

Good steps on a steep slope come down to four things: a consistent rise and run, a solid footing under every step, landings that break up long climbs, and a plan for water. Get those right and the stairs feel natural to climb and shrug off years of Arkansas rain. Get them wrong and the steps tilt, wash out or become a tripping hazard within a few seasons.
This guide walks through how we think about steps on a hillside: how to measure the slope, which dimensions work, how to build stable stone steps, where code applies, and how to fix steps that are already too steep.
TL;DR
- Aim for a rise of about 7 inches and a run of about 11 inches. Keep every step in a flight identical.
- Build from the bottom up, on an excavated, compacted footing, never on loose fill.
- Add a landing where the slope changes or the run gets long, and slope each tread slightly so water leaves it.
- Check your local building department before you build. Rules on stair dimensions, guards and grading vary by city and county.
- Steep, wet or tall slopes are where professional layout pays for itself.
Table of Contents
- Start by measuring the slope
- Rise, run and the 7-11 rule
- Choose the layout that fits the slope
- How to build stable stone steps on a slope
- Keep water from undermining the steps
- Handrails, guards and lighting
- Check grading and permit rules first
- How to fix steps that are too steep
- Our perspective: build the base once
- When to bring in a professional
- FAQ
- Sources
Start by measuring the slope
Every decision downstream depends on two numbers: the total vertical drop (rise) from the top of the slope to the bottom, and the horizontal distance the stairs can cover (run).
Here is a simple way to get them without special equipment:
- Drive a stake at the top of the slope and another at the bottom, where you want the stairs to land.
- Stretch a string between them and level it with a line level.
- Measure from the string down to the ground at the lower stake. That is your total rise.
- Measure the string’s length. That is your total run.
Divide the total rise by your target step height (about 7 inches) and round to a whole number. That gives you the number of steps. Then divide the total rise by that number to get the exact height of each one. Doing it this way keeps every riser equal, which matters more than hitting any particular dimension.
If the total run is shorter than the number of steps multiplied by the tread depth, the slope is too steep for a single straight flight. You have three options: add switchbacks, add landings, or cut into the hillside to gain depth. We cover each below.
Rise, run and the 7-11 rule
People often ask whether a 45-degree staircase is too steep. At 45 degrees the rise equals the run, so a 7-inch riser would come with only a 7-inch tread. That is shorter than most shoes, and it is a poor fit for an outdoor stair that is wet, leafy or icy part of the year. It is steeper than the proportions below, so we would not build it for regular use.
The proportion that most builders point to is the 7-11 stair: roughly a 7-inch riser and an 11-inch run, measured nosing to nosing. Fine Homebuilding describes it as a particularly comfortable configuration, and it satisfies two common comfort formulas at once: rise plus run equals 18 inches, and twice the rise plus the run equals 25 inches.
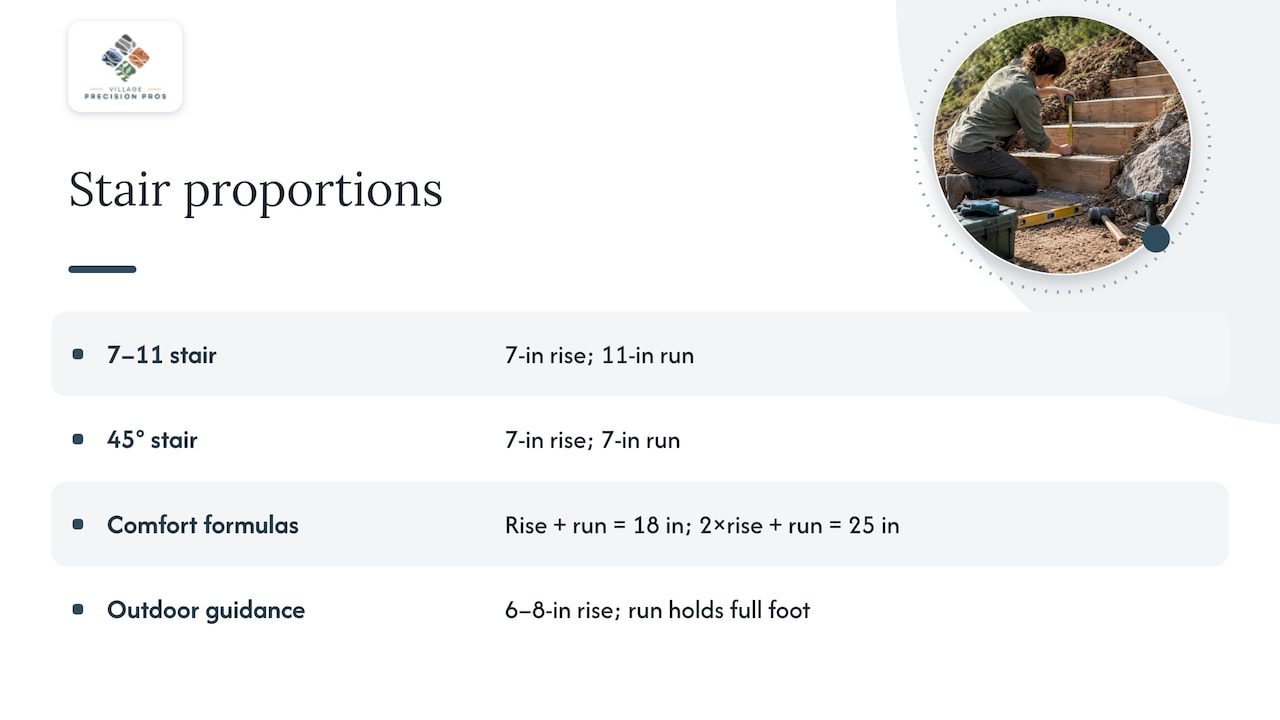
Outdoors, the guidance is similar. The U.S. Forest Service’s trail manual recommends a rise of 6 to 8 inches and a run long enough to hold the walker’s entire foot. Our rule of thumb for a yard where guests, kids and groceries are involved: shallower risers and deeper treads are always safer than the reverse.
What the residential code says
The 2018 International Residential Code sets a maximum riser of 7.75 inches, a minimum tread depth of 10 inches and a minimum clear stairway width of 36 inches. A county handout summarizing the same provisions recommends an 11-inch tread to avoid a nosing requirement, which is one more reason the 7-11 proportion is a sensible target.
Steps that serve a house entry or an exit path are more likely to be reviewed than a garden path. Local jurisdictions adopt their own editions and amendments, so call your city or county building department before you finalize dimensions.
Choose the layout that fits the slope
The layout is where steep slopes differ from gentle ones. A few common patterns:
| Layout | Best when | Trade-off |
|---|---|---|
| Straight flight | The slope is moderate and there is room for the full run | Simple, but long flights get tiring and carry water straight downhill |
| Straight flight with landings | The slope is steep but the route is direct | Landings add footprint but make the climb easier and safer |
| Switchback or L-shaped | The run is short for the drop | Uses more ground but cuts the effective steepness of each leg |
| Curved or angled path | The yard is informal and the hillside is wide | Looks natural, but needs careful layout to keep treads consistent |
Why landings matter
A landing gives you space to turn, handle a change in slope and use up surplus run. It also gives you a place to set down a load, and walkers recalibrate their gait on them. On a steep yard, we usually add one every several steps and always where the slope breaks or the stairs change direction. A landing should be at least as wide as the stairs and deep enough to stand on comfortably.
Width
Thirty-six inches clear is the code minimum for residential stairs, and it is also a practical minimum for two people passing or someone carrying a planter. If you want a more generous, welcoming approach, wider is better. A wider flight also reads as more intentional in the landscape. If the steps are part of an accessible route, see our guide to accessible backyard design.
How to build stable stone steps on a slope
Stone is the classic material for hillsides because it is heavy, durable and looks like it grew out of the landscape. The hard part is not the stone. It is what is under it. For design ideas, our roundup of stone steps ideas homeowners can build safely shows the range of styles, and our piece on materials for outdoor steps that last compares what holds up best.
The build sequence
- Lay out and mark. Set stakes and string at the step positions you calculated. Mark the width plus extra for the base on each side.
- Start at the bottom. The Forest Service advises building stairways from the bottom up at a break in the grade, with the bottom stair set on a solid excavated footing and each successive stair placed atop the previous one.
- Excavate to firm ground. Strip topsoil and organic material. Topsoil compresses and washes out, which is the most common reason steps settle crooked.
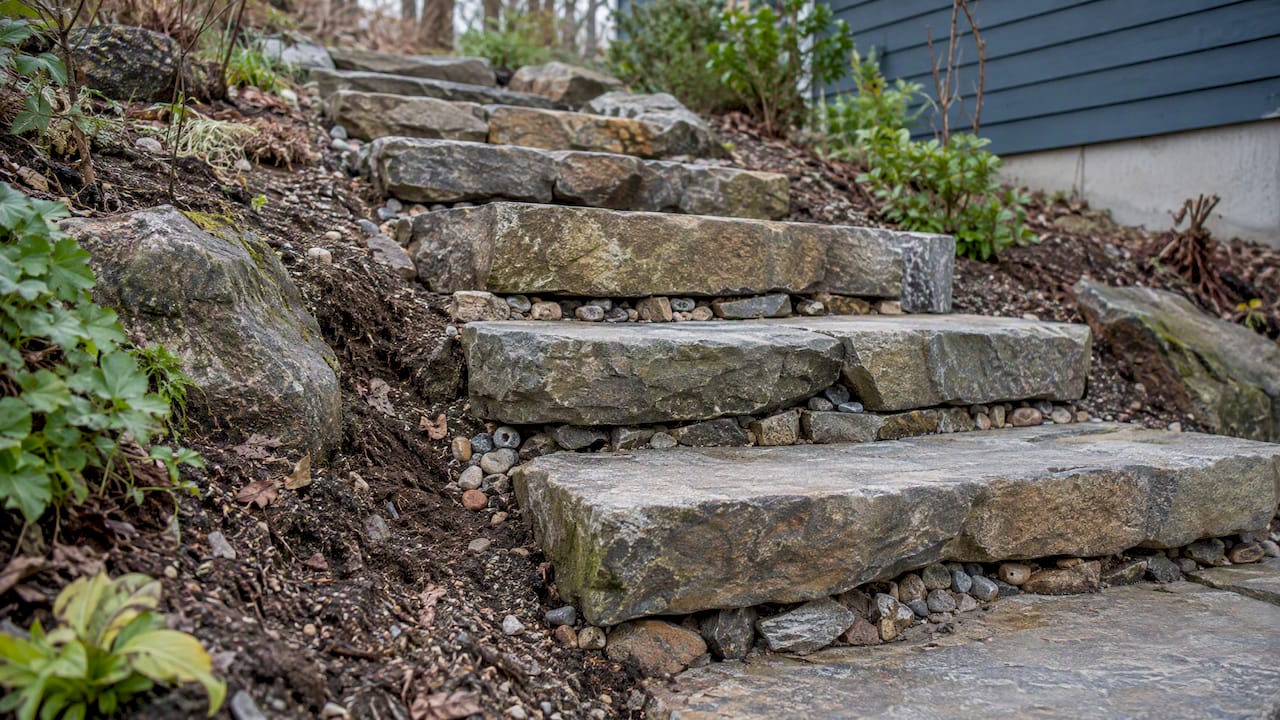
- Build a compacted aggregate base. For retaining-wall style steps, a compacted gravel base at least 6 inches deep is recommended, with 6 inches of base material behind each step. Compact in thin lifts, not one deep pour.
- Set the largest stones you can handle. The same Forest Service guidance calls for the largest possible massive, rectangular rocks, seated deeply. Big, blocky pieces with flat tops and good contact between them do not shift the way thin slabs do.
- Check level and slope on every tread. Each tread should be level side to side, or carry a very slight slope for drainage. Check the height of every riser against your calculation as you go.
- Backfill and compact behind each step. Use clean, free-draining stone, not the dirt you dug out.
- Finish the edges. Tuck soil, mulch or plantings against the sides so water has no easy path under the stones.
We use the same logic whether the steps are dry-laid stone, mortared masonry, pavers or timber. The stack is always the same: undisturbed soil, compacted aggregate, stable surface.
Dry-laid or mortared?
Dry-laid steps flex a little with freeze and thaw, drain through their joints and are easier to repair. Mortared steps look more formal and hold tight joints, but they need a stiffer base and good drainage behind them, or water pressure and frost cracks them. On a steep clay site, base preparation matters more than the finish you choose.
Keep water from undermining the steps
Water is what ruins hillside stairs. It runs down the steps, scours the soil beside them and undermines the footing. Plan for it from the start.
- Slope the treads. On straight stairways, the Forest Service advises crowning steps or sloping them to one side. On traversing steps, out-slope the steps and landings so water sheds off the edge instead of pooling.
- Break up long runs. Water should not run down the whole stairway. Where the stairs approach the top, consider a drain dip or a swale that turns runoff away before it reaches the first step.
- Handle roof and surface water upstream. A downspout that discharges above the stairs will undo good work. Our guide to downspout drainage ideas covers ways to move that water elsewhere.
- Stabilize bare soil. Planting and groundcover along the sides slow erosion. See our hillside erosion solutions for options.
- Control loose aggregate. If the steps are gravel-filled, gravel migrating downhill is a common complaint. This explanation of how to stop gravel running on a slope covers the slope ranges where it happens and what helps.
For landings and patios that connect to the stairs, a gentle slope away from structures helps. We explain the reasoning in patio drainage design.
Handrails, guards and lighting
The taller the drop, the more these matter. Under the 2018 IRC, guards are required where a walking surface is more than 30 inches above the ground within 36 inches horizontally. They must be at least 36 inches high, or 34 inches at stairs, and openings may not allow a 4-inch sphere to pass (4⅜ inches along stairs).
If your steps are part of an accessible route or a commercial property, different rules apply. The U.S. Access Board notes that federal standards apply to exterior stairs when they are part of a required means of egress. The older 1991 ADA Standards, which set the pattern for later rules, called for uniform risers and treads, treads at least 11 inches wide, closed risers, handrails on both sides, and outdoor stairs that prevent water accumulation. Those provisions exist because wet outdoor conditions add slipping and navigation hazards.
Even where no rule applies, we recommend a handrail on any flight steeper or longer than a few steps, and low-voltage lighting on the risers or beside the path. Most falls on outdoor steps happen at night or in wet weather, and a light at each landing is inexpensive insurance.
Check grading and permit rules first
Steep sites are where local rules bite hardest. Grading, retaining walls and drainage are often reviewed with a building permit. One Michigan township guide, for instance, notes that slopes steeper than 1:3 require retaining walls with construction details. An Orange County, North Carolina, grading manual says cuts steeper than 2:1 need special approval, and stability analysis when the slope exceeds 5 feet, and that drainage has to reach an approved safe discharge point with erosion protection.
Those are examples from other places, not Arkansas rules. What they show is the pattern: the steeper and taller the slope, the more likely an engineer or inspector will be involved. Before you dig, call your city or county building department and ask three things:
- Is a permit required for steps or retaining walls at this height?
- Which stair and guard dimensions do you enforce?
- Are there rules about changing drainage near a property line?
A licensed contractor should handle that conversation for you, and should know which questions to ask for your specific lot.
How to fix steps that are too steep
If your existing steps feel like a ladder, you usually have three ways to improve them:
- Rebuild with a gentler incline. Steps can be made less steep by rebuilding them with a more gradual incline, adding a landing or extending the treads. If space allows, add a switchback to gain run.
- Deepen the treads. Cutting back into the hill or extending the tread outward gives you the foot room you are missing.
- Even out the risers. Sometimes steps are not steep so much as inconsistent. One tall riser in a flight is more likely to cause a fall than a uniformly steep flight.
While you are at it, add a handrail, improve slip resistance and fix drainage. A step that is steep and wet is a double hazard. For terraced yards where steps meet a flat space, our sloped backyard patio designs show how landings and patios can work together.
Our perspective: build the base once
We have completed more than 2,000 projects across Central Arkansas, and the hillside jobs teach the same lesson every time: the finished surface is the smaller part of the work. What the homeowner sees is stone. What keeps it in place is a compacted aggregate base, a footing in firm ground, and a drainage plan that sends water around the stairs rather than through them.
We also think steps should look like they belong. A hillside stair that follows the land, with stone that matches the site and plantings that soften the edges, ends up feeling like part of the property rather than an add-on. That is the approach we take with our hardscape and masonry work, and it is the same whether the project is a short garden stair or a long flight down to a lake.
One more point from experience: do not rush the layout. An afternoon spent measuring and staking saves days of rework. If a flight does not fit cleanly, change the plan, not the riser height.
Ty
When to bring in a professional
Plenty of short, gentle flights are reasonable for a careful homeowner. Call a pro when:
- The total drop is tall enough to need guards or a retaining wall.
- The slope is wet, unstable or has visible erosion.
- The steps connect to a house entry, a deck or a commercial property.
- You need heavy stone placed with equipment.
- You are not sure what the local code requires.
Our crews design and build hardscape and stone masonry projects across Central Arkansas, including hillside stairs, retaining walls, and the drainage that keeps them stable. We do not publish prices, because the total depends on the slope, access for equipment, the stone you choose, how much excavation and base work the site needs, whether a retaining wall or handrail is involved, and what the permit process requires. Tell us about your slope and we will walk it with you. You can start from our services page or contact us through the main site, and if you want help keeping the finished landscape in shape, ask about our annual maintenance plans.
FAQ
How do you make steps on a steep slope?
Measure the total rise and run, divide the rise into equal steps of about 7 inches, and build from the bottom up on an excavated, compacted base. Add landings where the slope breaks or the run is long. Slope each tread slightly so water drains off.
Is a 45-degree staircase too steep outdoors?
For regular use, yes. At 45 degrees the tread is no deeper than the riser is tall, which is shorter than most feet. A rise near 7 inches with a run near 11 inches is much more comfortable, and it is easier to use when wet.
What is the 7-11 rule for stairs?
It describes a stair with about a 7-inch riser and an 11-inch run, measured nosing to nosing. It is considered comfortable because it meets common formulas for rise and run. It is a good target outdoors as well, though local code sets the actual limits.
Do I need a permit to build steps on a slope?
It depends on your city or county, the height of the drop and whether you are adding a retaining wall or changing drainage. Call your local building department before you start. A licensed contractor can usually handle that check and the paperwork for you.
Sources
- Trail Construction and Maintenance Notebook, U.S. Forest Service
- 2 Rules for Building Comfortable Stairs Like a Pro, Fine Homebuilding
- 2018 IRC Essentials, International Code Council
- Residential Stairs handout, Humboldt County Building Department
- Building Steps Into a Garden Slope, Craft Quantities
- How to Build Retaining Wall Steps, The Spruce
- Chapter 5: Stairways, U.S. Access Board
- 1991 ADA Standards excerpt, 28 CFR Part 36
- New Home Guide, London Township
- Orange County Grading Manual
- How to Make Outdoor Steps Less Steep
- Gravel on slopes: homeowner fixes