The best stone steps ideas combine a slip-resistant finish, like flamed granite or natural cleft bluestone, with a properly drained aggregate base underneath. We’ve built enough hardscapes to know a design only earns its keep once it survives its first freeze-thaw cycle. This guide covers the styles worth copying, the code minimums from the IRC and IBC, and the installation details that separate a stairway that lasts decades from one that heaves apart in three winters.
TL;DR:
- Using a properly compacted aggregate base of at least 4 to 6 inches is critical, especially in freezing climates, to prevent shifting and heaving.
- Flamed granite offers the best freeze-thaw resistance and slip resistance, while natural cleft bluestone provides a traditional and budget-friendly alternative.
- Consistent riser heights, ideally between 6 to 7 inches, and adequate nosing improve safety and comfort, with code requirements often requiring handrails for four or more risers.
- Heavy, custom-cut granite or bluestone steps on steep slopes or requiring retaining structures should be installed by professionals to ensure stability and longevity.
- Incorporating landscape with low-growing plants, groundcovers, or lighting enhances aesthetics and helps integrate steps naturally into the yard.
Table of Contents
- Stone Steps Ideas Worth Shortlisting for Your Yard
- Which Stone Types and Finishes Actually Hold Up Outdoors
- Getting the Rise, Run, and Grip Right
- Building It So It Lasts: Base, Drainage, and Setting Methods
- 12 Stone Steps Ideas With Build Notes You Can Actually Use
- Keeping Stone Steps Safe Through Every Season
- When Hiring a Pro Actually Pays Off
- How to Make Stone Steps Accessible for Every Visitor
- What Stone Steps Actually Cost, and Where the Money Goes
- Landscaping That Makes Stone Steps Look Intentional
- Where the Stone Comes From Matters More Than You’d Think
- Our Take: Stop Choosing Steps by Photo Alone
- Ready to Turn These Stone Steps Ideas Into Something Built to Last
- Sources
- FAQ
Stone Steps Ideas Worth Shortlisting for Your Yard
Before falling for a Pinterest photo, match the style to your site. Slope, drainage, and foot traffic decide what actually survives.
- Woodland stepping stones — irregular slabs set into a slope, best for informal side yards; watch for erosion around edges without a gravel border.
- Tiered or terraced steps — wide landings broken across a steep grade; needs solid retaining structure behind each tier.
- Floating slab steps — thick treads that appear to hover, cantilevered from a wall; requires engineered support, not a DIY project.
- Grand front entrance steps — symmetrical, wide risers framing an entry; best in granite or bluestone for long-term wear.
- Boulder and oversize slab combos — massive individual stones as risers; heavy equipment access is a real constraint.
- Integrated planter steps — steps with built-in pockets for groundcover; watch for soil moisture wicking into mortar joints.
- Lakeside or shoreline steps — transitions to docks or water access; demands frost-resistant stone and reinforced footing.
- Oversize landing with low walls — a generous pause point with seat-height walls; ideal where steps meet a patio.
- Modern blade steps — thin, sharp-edged cantilevered treads; striking but unforgiving if base settling isn’t perfect.
- Modular precut stone steps — factory-cut uniform units; fastest install, most budget-friendly, least custom look.
Which Stone Types and Finishes Actually Hold Up Outdoors
Flamed or thermal-finish granite is the professional standard for exterior steps because its density resists freeze-thaw cycling and the textured surface stays grippy in rain. Bluestone with a natural cleft face is the traditional alternative across much of the country, prized for the same slip resistance without granite’s price tag. Quartzite splits the difference: nearly as hard as granite, with more color variation.
Sandstone, limestone, and travertine look warm and inviting, but they’re porous and better suited to mild, dry climates than places with hard winters.
- Granite (flamed): densest option, best freeze-thaw performance, higher cost
- Bluestone (natural cleft): strong traction, regionally common, mid-range cost
- Quartzite: hard and varied in tone, moderate to high cost
- Sandstone/limestone/travertine: attractive but porous; fine in mild climates, risky where freezing is frequent
Pro Tip: Never specify polished stone for an exterior tread. A polished surface becomes dangerous the moment it’s wet, and no amount of sealer fully fixes that.
Exterior treads typically have sufficient thickness to resist cracking under seasonal movement without adding unnecessary weight to the substructure below.
Getting the Rise, Run, and Grip Right
Comfortable exterior steps generally use a 6 to 7 inch riser with an 11 to 14 inch tread depth, though your local building department has the final say. Building codes set firm boundaries here.
- Riser and tread dimensions must stay within IRC/IBC ranges, and any flight with four or more risers typically triggers a handrail requirement.
- Every riser in a run needs to match within a fraction of an inch to ensure safe and stylish stairway construction, as explained in our guide on installing LVP on stairs: safe, stylish steps for Alabama homes. Inconsistent height is one of the most common causes of trips on stairs, since your foot learns the pattern after the first two steps and stops paying attention.
- Nosing (the tread overhang past the riser) should be visible enough to catch the eye but not so deep it becomes a catch point for a shoe.
- For grip, choose flamed or thermal granite, natural cleft bluestone, or a broom-finished concrete edge; skip anything glossy.
Building It So It Lasts: Base, Drainage, and Setting Methods
Almost every step failure we see traces back to what’s underneath, not the stone on top. A compacted aggregate base of 4 to 6 inches, deeper in frost-prone regions, keeps the whole structure from shifting as the ground freezes and thaws.
- Compact the base in lifts, not all at once, so each layer actually settles.
- Pitch the base and any landing slightly away from the house for drainage.
- Use polymer-modified mortar with 95% coverage under the tread for bedded, high-traffic steps.
- Dry-lay or sand-set for informal garden paths where some settling is acceptable.
- Add expansion joints and silicone caulk where steps meet a wall or run more than a few risers long.
The two most common DIY mistakes we see are using the wrong mortar type and sealing before the mortar has fully cured, which traps moisture and eventually cracks the bond.
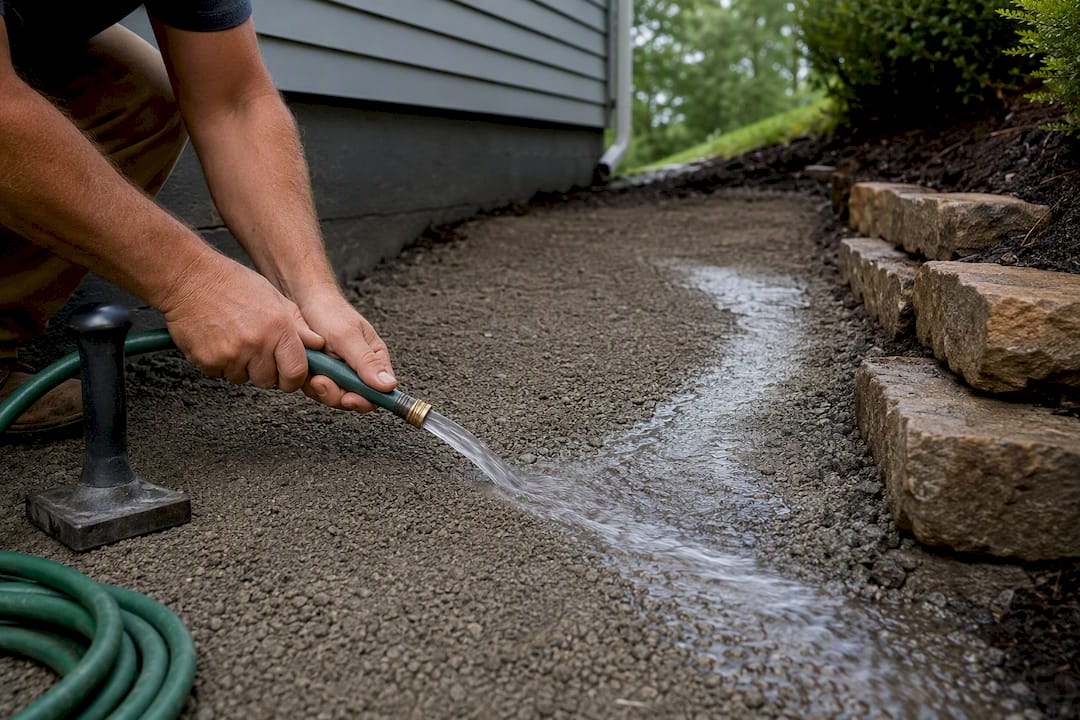
Pro Tip: Before you set a single stone, run a hose test on your compacted base. Water should sheet away within a minute or two. If it pools, fix the pitch now, because you won’t get a second chance once the mortar goes down.
12 Stone Steps Ideas With Build Notes You Can Actually Use
Each of these works differently depending on your site, so we’ve flagged the stone, the risk, and whether it’s realistic to tackle yourself.
- Rustic woodland path steps. Irregular fieldstone set directly into a wooded slope. Best stone: local fieldstone or quartzite. Watch for root interference undermining the base. DIY-friendly for short runs.
- Formal front stoop. Symmetrical granite risers flanking an entry door. Best stone: flamed granite. Watch for level landing at the top matching the threshold height exactly. Hire a pro.
- Floating cantilevered treads. Thick slabs anchored into a retaining wall with no visible support. Best stone: dense granite or quartzite. Watch for structural engineering on the anchor points. Pro only.
- Bluestone terrace steps. Wide, shallow risers breaking a steep backyard grade into usable tiers. Best stone: natural cleft bluestone. Watch for retaining structure behind each tier. Pro recommended for anything over 3 tiers.
- Boulder stepping combination. Oversize natural boulders set as risers with gravel infill. Best stone: local granite boulders. Watch for equipment access to place heavy stones. Pro required.
- Planter-integrated steps. Risers with built-in soil pockets for creeping thyme or sedum. Best stone: bluestone or limestone in mild climates. Watch for moisture wicking into joints. DIY-friendly with sealed pockets.
- Modular precut steps. Factory-cut uniform units set on a gravel base. Best stone: precast granite or concrete pavers. Watch for consistent base compaction across each unit. DIY-friendly.
- Lakeside access steps. Steps transitioning from yard to dock or shoreline. Best stone: dense, frost-resistant granite. Watch for reinforced footing against water erosion. Pro required.
- Grand landing with seat walls. A generous paused landing bordered by low walls at seat height. Best stone: granite or bluestone matched to the patio. Watch for drainage across the wide flat surface. Pro recommended.
- Modern blade-edge steps. Thin, sharp-profile treads with minimal visible support. Best stone: honed but non-polished granite. Watch for precise base leveling since thin stone shows every imperfection. Pro only.
- Curved garden approach steps. Gently arcing steps following a path’s natural bend. Best stone: bluestone or fieldstone. Watch for consistent riser height through the curve. DIY for experienced homeowners.
- Side-yard utility steps. Simple, budget-conscious steps connecting a driveway to a side door. Best stone: modular concrete or limestone. Watch for adequate drainage away from the foundation. DIY-friendly.
Keeping Stone Steps Safe Through Every Season
A little seasonal attention keeps steps performing the way they did on installation day.
- Reseal with a penetrating sealer every 2 to 3 years, or sooner in freeze-thaw climates.
- Test it yourself: pour water on the surface. If it beads up, the seal is still working; if it soaks in, it’s time to reapply.
- Skip rock salt entirely. Sodium chloride damages calcite-based stones like limestone and travertine over time. Use calcium magnesium acetate or plain sand for traction instead.
- Walk the full flight every spring and fall, checking for loose treads, cracked mortar joints, or gaps at wall interfaces.
When Hiring a Pro Actually Pays Off
Some projects are forgiving of amateur mistakes. Steps on a steep slope, oversize slabs that need machine placement, or drainage repairs after a failed DIY attempt are not among them.
- Steep grades where retaining structure is load-bearing, not decorative
- Slabs heavy enough to require equipment for safe placement
- Projects that require a permit or code review for handrails and riser counts
- Existing steps with drainage problems already causing settling or cracking
Village Precision Pros has built stone pathways and walkways across Central Arkansas, with over 1,750 completed projects informing how we approach base prep, drainage, and material selection on every job.
How to Make Stone Steps Accessible for Every Visitor
Traditional stone steps assume steady footing, but plenty of visitors, guests using canes, older parents, kids on bikes, don’t have that luxury. A few adaptations make a real difference without sacrificing the natural look.
Widening the tread depth beyond the standard 11 to 14 inches gives unsteady walkers more margin for a full foot placement rather than a toe-catch. Lower riser heights, closer to 6 inches than 7, reduce the leg lift required at each step, which matters more than most homeowners realize until a grandparent visits.
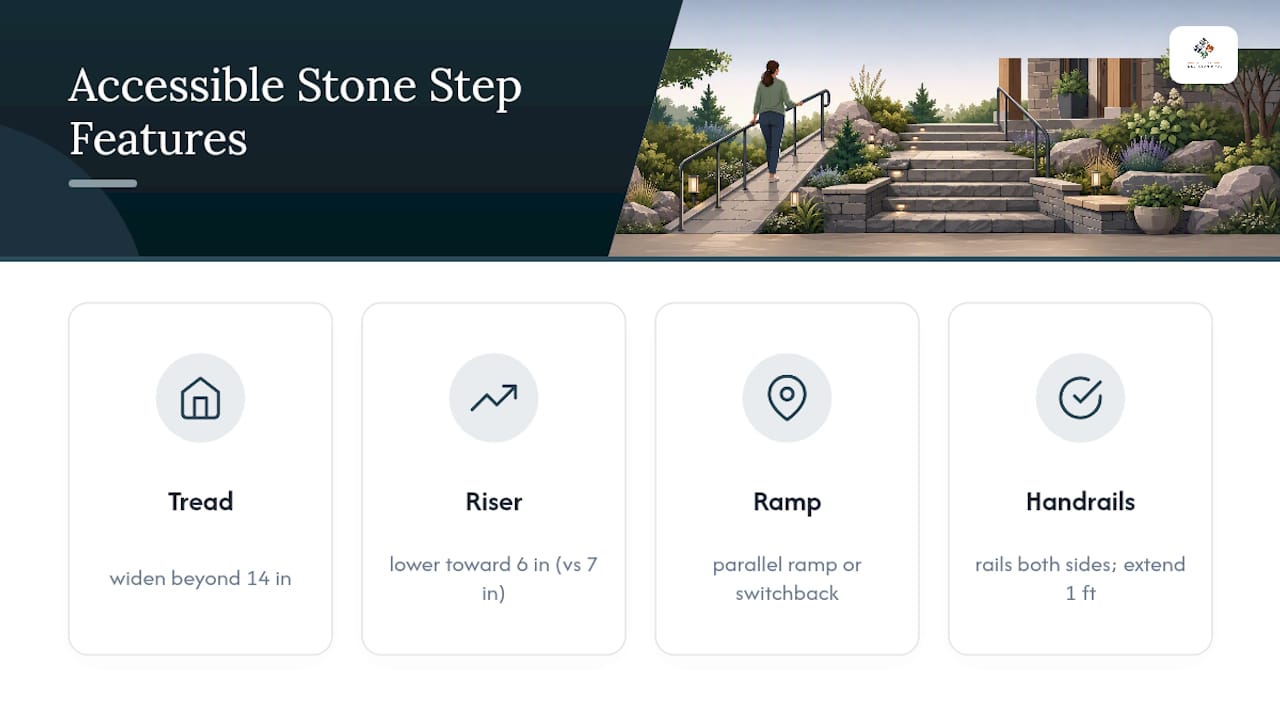
A parallel ramp alongside a short flight solves the wheelchair and stroller problem without demolishing the stairway itself. Where a full ramp isn’t practical, a gentle switchback path graded at a gradual slope can bypass steps entirely for anyone who needs it.
Handrails deserve more thought than a code checkbox. A rail on both sides, not just one, helps anyone favoring a weaker side, and extending the rail past the top and bottom step by a foot gives users something to grab before their foot even leaves solid ground.
Contrast strips along the leading edge of each tread, often a lighter stone inlay or a painted safety strip, help people with low vision judge where one step ends and the next begins. Combined with the lighting solutions many homeowners add along a flight, accessibility and nighttime safety end up solving the same problem twice.
What Stone Steps Actually Cost, and Where the Money Goes
Budget swings widely based on stone choice, site complexity, and how much excavation the grade requires. Modular precut steps sit at the affordable end since the units come cut to uniform dimensions and install faster. Custom-cut granite or bluestone treads, especially on a steep slope requiring retaining structure, land at the higher end because of material cost, cutting labor, and the equipment needed to place heavy slabs safely.
Base preparation is where a surprising share of the budget goes, and it’s the part homeowners are most tempted to cut corners on. A compacted aggregate base, proper drainage pitch, and (in frost regions) a deeper excavation all cost money before a single visible stone gets set. Skipping this step to save on the front end is the single most common reason stone steps fail within a few years.
Other cost drivers include site access (can equipment reach the work area, or does everything move by hand), the number of risers in the flight, and whether the project includes extras like integrated lighting, seat walls, or planter pockets. A short, straightforward run of modular steps on flat ground costs a fraction of what a tiered granite stairway on a steep slope with a retaining wall behind it will run.
The smartest way to budget is to separate “must-have” (base prep, drainage, code-compliant dimensions) from “nice-to-have” (premium stone finish, integrated lighting, decorative planters) and make sure the must-haves are fully funded before adding the extras. A professional consultation can price out your specific slope and stone preference far more accurately than any general estimate.
Landscaping That Makes Stone Steps Look Intentional
Steps that just appear in the middle of a lawn look like an afterthought. Steps flanked by the right plants look like they grew out of the landscape.
Low, spreading groundcovers, creeping thyme, sedum, or Irish moss depending on your climate, soften the hard edges of stone risers and fill gaps between irregular treads without becoming a tripping hazard themselves, since they stay under an inch or two tall. Taller ornamental grasses or perennials work well along the sides of a flight rather than directly on the tread line, framing the stairway without obstructing sightlines.
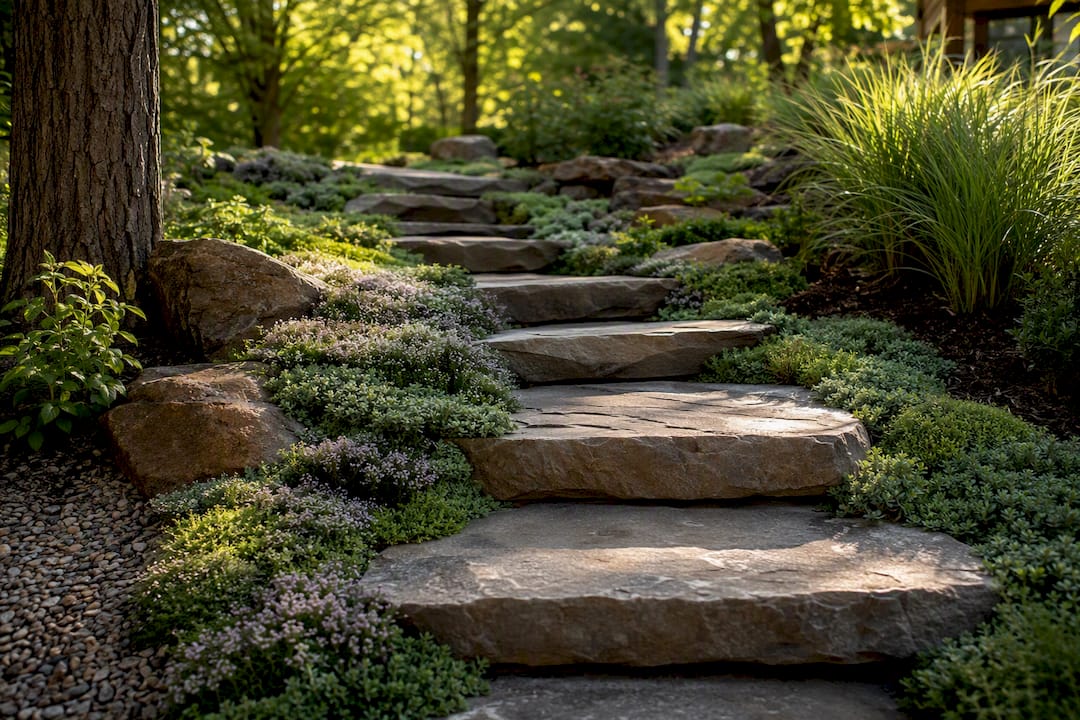
For shaded woodland-style steps, ferns and hostas planted along the margins pick up the informal fieldstone look without competing with it. Sunnier front-entrance steps do better with structured plantings, boxwood, dwarf hollies, or seasonal color in defined beds, that reinforce the symmetry of a formal granite stoop.
One detail homeowners miss: plant roots near mortar joints can eventually work their way into small cracks and widen them. Keep aggressive spreaders, English ivy, running bamboo, at least a foot back from any mortared step, and reserve them for dry-laid or gravel-set stairways where root intrusion matters less.
Lighting fits into this integration too. Low-voltage path lights tucked behind plantings at the edge of each tread illuminate the walking surface without glare, solving both the aesthetic and safety sides of the same design problem.
Where the Stone Comes From Matters More Than You’d Think
Natural stone is quarried, not manufactured, which means its environmental footprint depends heavily on how far it traveled and how it was extracted. Regional stone, bluestone quarried in the northeastern United States, granite from domestic quarries, cuts down dramatically on the transportation emissions that come with importing slabs from overseas.
Quarrying itself disturbs land, but stone is also one of the most durable building materials available. A correctly installed granite or bluestone step can outlast the house it’s attached to, which means the environmental cost gets spread across decades rather than replaced every few years like a composite or treated-wood alternative. That longevity is the strongest sustainability argument stone has going for it.
Reclaimed and salvaged stone, pulled from demolished walkways, old foundations, or retired quarries, is worth asking about if you want the lowest-impact option available. It carries character that new-cut stone can’t replicate, though supply is inconsistent and matching thickness across a full flight takes patience.
When sourcing new material, ask your supplier where the stone was quarried and how it’s finished. A domestically quarried, flamed granite typically beats an imported, heavily processed alternative on both footprint and long-term performance.
Our Take: Stop Choosing Steps by Photo Alone
Most stone step advice online is a photo gallery with no engineering behind it. That’s backwards. The style should be the last decision you make, not the first, because a floating blade-edge design that looks stunning on a flat lot can become a liability on a steep, poorly drained slope.
The conventional wisdom oversells stone type and undersells the base. We’ve watched premium granite steps fail within a couple of winters because nobody compacted the aggregate properly, and we’ve watched modest, precut modular steps outlast expensive custom work simply because the drainage was right. If you take one thing from this guide, prioritize the invisible 6 inches under the stone before you fall in love with the visible surface on top.
Consistent riser height matters almost as much and gets ignored constantly, usually because a homeowner or crew eyeballs it instead of measuring every single riser against the others. That’s the detail a good contractor never skips and a rushed DIY job almost always does.
— Ty
Ready to Turn These Stone Steps Ideas Into Something Built to Last
Village Precision Pros handles the part most guides gloss over: matching your slope, drainage, and stone choice to a build that won’t need redoing in five years. We pair design work with the hardscape and drainage expertise to fix uneven ground before it becomes a step problem, not after.

Whether you’re picturing a formal granite entrance or a rustic bluestone path through the backyard, our design and installation process starts with a site assessment, not a sales pitch. If you’re ready to move past inspiration boards, schedule a landscaping consultation and we’ll walk your property, talk through stone options, and give you a realistic plan for the steps you’ve been picturing.
Sources
FAQ
What is the best stone for outdoor steps?
Flamed or thermal-finish granite is generally the top choice for durability and slip resistance, with natural cleft bluestone as a strong traditional alternative in many regions.
What are some creative ideas for stone steps in my backyard?
Tiered terraced steps for a sloped yard, planter-integrated steps with groundcover pockets, and boulder-and-slab combinations for a natural look are all popular backyard approaches.
How do I make my own stone steps?
Start with a compacted aggregate base 4 to 6 inches deep, pitch it for drainage, then dry-lay or mortar-set your stone depending on the traffic and formality of the path. Simple modular or dry-laid designs are realistic DIY projects; anything involving heavy slabs, steep slopes, or retaining walls is safer left to a professional.
What should go under stone steps?
A compacted gravel or aggregate base, typically 4 to 6 inches and deeper in frost-prone climates, goes under stone steps to prevent shifting and freeze-thaw damage. Proper pitch and drainage beneath that base determine whether the steps stay level for decades or start heaving within a few winters.