Epoxy patio coating works well on covered or shaded concrete, where it resists foot traffic and staining without breaking your budget. On a patio that sits in full sun most of the day, though, we generally steer homeowners toward polyaspartic instead, since epoxy is prone to yellowing and going brittle outdoors. Epoxy is cheaper and more DIY-friendly, but that savings comes with a UV trade-off. For a professional install, either system is worth discussing with a crew like Village Precision Pros before you commit.
TL;DR:
- Epoxy coating in outdoor sun-exposed areas tends to yellow, chalk, and degrade within three to seven years, increasing the need for frequent re-coats.
- Moisture testing before application, such as the plastic sheeting test, is crucial to prevent bubbling and delamination caused by moisture migrating through the concrete.
- A hybrid approach of epoxy base with a UV-stable polyaspartic topcoat offers longer-lasting outdoor durability in harsh sunlight and temperature fluctuations.
- Proper surface profiling, crack repair, and correct mixing techniques are vital for adhesion and longevity of the epoxy coating.
- Larger or more complex patios, especially those with drainage issues or exposed to full sun, benefit from professional installation over DIY efforts.
Table of Contents
- Epoxy Patio Coating Pros and Cons Outdoors
- How Does Epoxy Compare to Polyaspartic for Patios?
- Do You Need to Test the Concrete Before Coating?
- What Does a Typical Epoxy Patio Application Look Like?
- How Do You Maintain and Repair an Epoxy Patio?
- Why Village Precision Pros Trusts This Approach
- The Contractor’s Honest Take on Epoxy Patios
- Get Professional Help With Your Patio Project
- Sources
- FAQ
Epoxy Patio Coating Pros and Cons Outdoors
Epoxy earns its popularity for good reason. It bonds tightly to properly prepared concrete, builds a thick, glossy film that hides minor surface flaws, and gives DIYers a forgiving amount of working time before it sets up. That last point matters more than people expect: a novice mixing a batch on a warm Saturday afternoon has room to correct mistakes before the material firms up.
Outdoors, though, epoxy runs into three recurring problems.
- UV sensitivity. Direct sun breaks down the resin’s chemical structure, causing yellowing, chalking, and a dull, hazy finish within a season or two of heavy exposure.
- Rigidity. Epoxy doesn’t flex much, so freeze-thaw cycles can crack the coating even when the slab underneath stays sound.
- Vapor drive. Moisture pushing up through the concrete has nowhere to go once it hits the film, and that pressure shows up as bubbling or delamination.
Slip resistance is another practical concern. Most installers broadcast aluminum oxide or polypropylene grit into the topcoat, since a glossy epoxy surface gets dangerously slick when wet.
Pro Tip: Skip metallic epoxy finishes on any patio that sees real sun. They look striking indoors, but the pigments used for that swirled, three-dimensional effect fade fast under UV exposure.
Lifespan is where the trade-off becomes concrete. Epoxy exposed to direct sunlight typically holds up for 3 to 7 years before it needs stripping and recoating, while polyaspartic systems in the same conditions often run 15 years or more.
How Does Epoxy Compare to Polyaspartic for Patios?
Sunlight exposure is the deciding factor, but it isn’t the only one. Cure time, flexibility, and upfront cost all shift the math depending on your project.
| Factor | Epoxy | Polyaspartic/Polyurea |
|---|---|---|
| UV resistance / color stability | Weak; yellows and chalks in sun | Strong; holds color for years |
| Flexibility / freeze-thaw performance | Rigid, prone to cracking | Flexible, handles temperature swings |
| Cure time / downtime | Slow, often 24 to 72 hours | Fast, foot traffic possible within hours |
| Typical lifespan / long-term cost | Shorter lifespan, more frequent recoats | Longer lifespan, fewer redo costs |
| Cost per square foot | Lower upfront | Higher upfront |
Polyaspartic and polyurea coatings resist UV breakdown and hold their flexibility far better than standard epoxy, which is why we recommend them for pool decks, uncovered patios, and any climate with real freeze-thaw cycles.
A hybrid approach often makes the most sense: an epoxy base for its adhesion and film build, topped with a UV-stable polyaspartic topcoat for outdoor durability. For a shaded or covered patio, straight epoxy still holds up fine and costs less. If you want the full picture on where epoxy fits outdoors before you buy material, our guide on using epoxy flooring outside walks through more scenarios.
Do You Need to Test the Concrete Before Coating?
Yes, and skipping this step is the single most common reason outdoor coatings fail within their first year. Concrete looks solid, but what’s happening underneath and inside the slab determines whether any coating will actually bond.
- Run the plastic moisture test. Tape an 18-inch square of plastic sheeting to the slab and leave it overnight. Condensation underneath the next morning means moisture is migrating up through the concrete, and coating over it invites bubbling and adhesion failure.
- Profile the surface. Diamond grinding opens the concrete’s pores for a mechanical bond and is the standard for outdoor jobs. Acid etching works in a pinch on smaller, lower-traffic areas, but it doesn’t remove sealers or heavy contamination as reliably.
- Repair cracks and spalls first. Hairline cracks need routing and filling; anything wider or accompanied by spalling concrete needs structural patching before any coating goes down. A coating can’t fix a substrate problem.
- Check the drainage. Standing water after rain, or a high water table pushing moisture upward, will defeat almost any coating system. That has to be resolved before material selection even matters.
Pro Tip: Mix your epoxy using the double-bucket method. Combine resin and hardener in one bucket, then pour the mixed batch into a second clean bucket and give it another quick stir before applying. This catches the unmixed material clinging to the sides of the first bucket, which is a leading cause of soft, tacky patches that never fully cure.
What Does a Typical Epoxy Patio Application Look Like?
Once the slab passes its moisture test and gets properly profiled, the application follows a fairly predictable sequence: clean the surface, repair any cracks, lay down an epoxy primer or base coat, broadcast a decorative flake or quartz layer if you want one, and finish with a UV-stable topcoat.
Timing is where climate and chemistry both matter. Epoxy typically needs 24 to 72 hours before it can handle traffic, and it’s picky about temperature and humidity during application. Polyaspartic cures in hours rather than days, but that speed cuts your working window down, which raises the stakes for a first-time installer.
A basic DIY kit calls for a low-nap roller, a notched squeegee for spreading, chemical-resistant gloves, and a respirator rated for solvent fumes. The most common mistakes we see are applying epoxy when the slab is too cold, working in humidity that’s too high, and rushing the mix ratio under time pressure.
Before you decide DIY versus hiring out, run through this checklist:
- Is the patio larger than a two-car garage footprint? Bigger areas raise the cost of a mixing mistake.
- Did the moisture test come back clean, or does the site need drainage work first?
- Do you want a workmanship warranty behind the job?
- Can your schedule tolerate a multi-day cure window, or do you need the space back fast?
If two or more of those point toward complexity, it’s worth a call to a crew that installs coatings for a living.
How Do You Maintain and Repair an Epoxy Patio?
Routine care is simple: sweep regularly and clean with mild soap and water. Skip harsh solvents and acidic cleaners, since both attack the coating’s surface chemistry and speed up wear.
Not every problem calls for a full teardown.
- Yellowing or chalking signals UV degradation. If it’s isolated to one sun-exposed section, a spot recoat with a UV-stable topcoat usually fixes it.
- Bubbles or pops point to adhesion failure, often from moisture. This typically means grinding out the affected area and starting over there, since patching over trapped moisture just delays the same failure.
- Worn anti-slip texture in high-traffic zones needs fresh grit broadcast into a recoat before the surface gets dangerously smooth.
Given epoxy’s 3 to 7 year outdoor lifespan under direct sun, budget for a recoat on that timeline rather than treating any fix as permanent.
Why Village Precision Pros Trusts This Approach
Village Precision Pros has completed more than 1,750 landscaping projects across Central Arkansas since 2020, and epoxy flooring work, including outdoor applications, flake finishes, and metallic decorative coatings, has been part of that portfolio from early on. Slip safety gets particular attention on our jobs; one project achieved a 0.42 Wet DCOF rating, well past the threshold most safety standards call for on wet-prone surfaces, detailed on our slippery epoxy floor fix page.
The Contractor’s Honest Take on Epoxy Patios
Most articles on this topic bury the sun-exposure warning three paragraphs deep, after they’ve already sold you on epoxy’s low price and easy application. That ordering is backwards. Sunlight exposure should be the first question you answer, not an afterthought, because it determines whether you’re even looking at the right material.
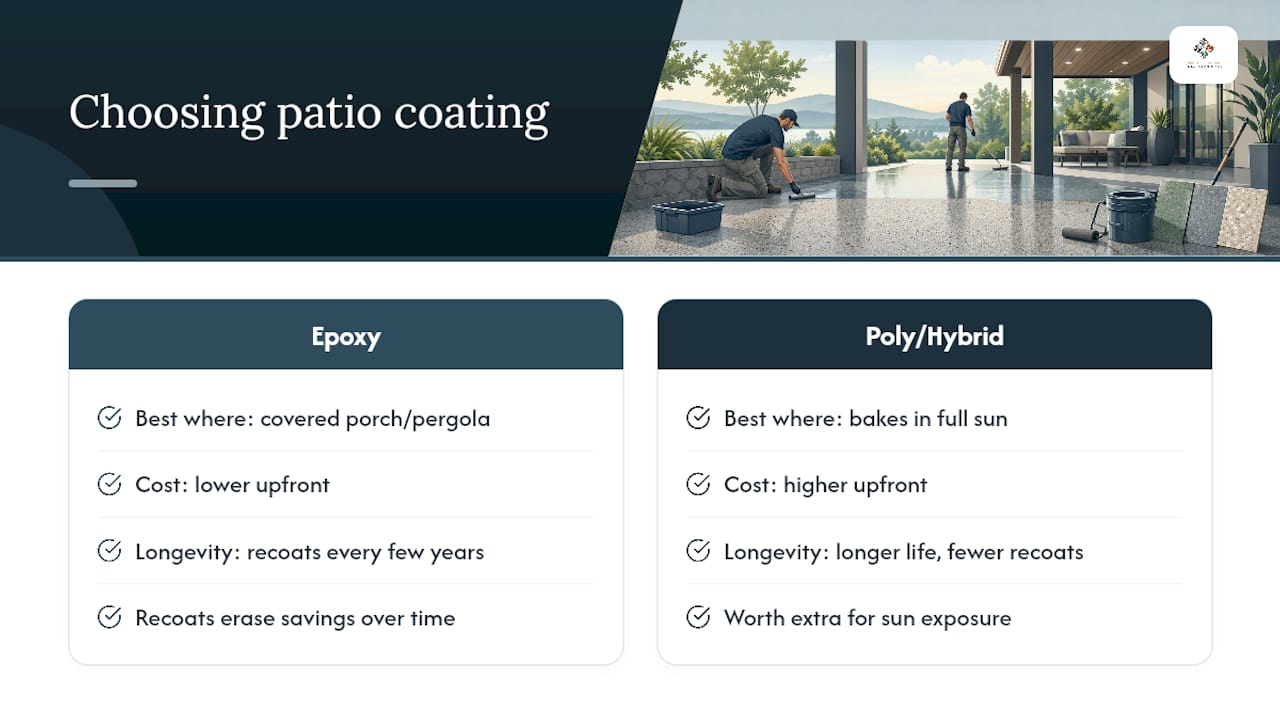
Here’s what I think gets overrated: the price gap. Yes, epoxy costs less per square foot upfront, but recoating a failed patio every few years erases that savings fast, especially once you factor in grinding out old material before a redo. Here’s what gets underrated: the plastic moisture test. It takes one sheet of plastic and one night, and it will save you from the single most expensive mistake in this entire process.
If your patio sits under a covered porch or pergola, epoxy is a legitimate, budget-smart choice. If it bakes in the sun most of the day, spend the extra money on polyaspartic or a hybrid system. Do the moisture test either way, and don’t skip the double-bucket mix. Those two habits prevent more failures than any product choice ever will.
— Ty
Get Professional Help With Your Patio Project
Village Precision Pros gives homeowners a faster path to a durable patio than piecing together a DIY coating project on your own weekends, especially when your slab fails the moisture test or your patio sits in full sun and needs a hybrid coating system done right. Our crews handle everything from surface grinding and crack repair to full epoxy and polyaspartic application, backed by workmanship you can hold us to.

If your patio is large, shows signs of standing water, or you simply want a warranty behind the work, that’s the moment to bring in a professional rather than gamble a weekend on it. Our patio design and installation services cover both new hardscape builds and coating work on existing concrete, and if shade is part of your long-term plan for protecting the coating, pairing it with a cover is worth exploring through resources like this guide to improving patio comfort. Ready to find out what your patio actually needs? Schedule a landscaping consultation and we’ll assess your slab, run the moisture test ourselves, and recommend the right coating system for your exposure and budget.
Sources
- Protecting Outdoor Concrete: Polyurea and Polyaspartic vs Epoxy
- Polyaspartic vs epoxy for outdoor concrete patio
- Patio Epoxy Flooring: Pros, Cons, and Buying Guide – D and G Flooring
- Why epoxy floors fail — troubleshooting and best practices
FAQ
Is Epoxy Good for an Outdoor Patio?
Epoxy works well on covered or shaded outdoor patios, but it isn’t the best choice for a patio in direct sun, where UV exposure causes yellowing and brittleness over time.
Can You Put Epoxy on an Outdoor Concrete Patio?
Yes, as long as the slab passes a moisture test and gets properly profiled through diamond grinding, epoxy can be applied to outdoor concrete, though sun-exposed areas benefit from a polyaspartic topcoat.
What Are the Downsides of Epoxy Floor Coating?
The main downsides outdoors are UV sensitivity that causes yellowing and chalking, rigidity that can crack under freeze-thaw stress, and a shorter lifespan of roughly 3 to 7 years compared to 15 or more for polyaspartic.
What Are the Drawbacks of Using Concrete Epoxy?
Beyond UV and flexibility issues, epoxy is vulnerable to moisture pushing up through the slab, which causes bubbling and delamination if a moisture test isn’t done before installation.
Should I Hire a Professional or Do It Myself?
Small, shaded patios with clean moisture-test results are reasonable DIY projects, but larger areas, drainage problems, or a desire for a workmanship warranty are all good reasons to bring in a crew like Village Precision Pros.