A gravel patio is a solid choice for homeowners who prioritize drainage and flexible layout, but it requires proper base work and containment to avoid shifting and furniture instability. Before committing, check your soil’s infiltration rate against EPA guidance, and plan for a compacted base and edging from day one. We’ve seen both outcomes up close at Village Precision Pros, and the difference almost always comes down to prep work.
TL;DR:
- Test soil before ordering stone: permeable systems need at least 0.27 inches per hour, while slower sites may require an underdrain or deeper aggregate storage.
- Compact the subgrade, add at least four inches of crushed stone, then place fabric and edging beneath two to three inches of gravel.
- Keep gravel two to three inches deep; deeper layers improve drainage storage but make furniture harder to move, while loose stone complicates snow shoveling.
- USGS testing found maintenance increased infiltration rates for permeable interlocking concrete pavers by 94% to 1,703%; results varied by surface and clogging.
- Choose permeable pavers or pervious concrete if you need stormwater infiltration but want a stable surface for chairs, walking, and snow removal.
Table of Contents
- Pros of Gravel Patios Homeowners Benefit From
- Cons of Gravel Patios Homeowners Should Weigh
- How Drainage and Permeability Work With Gravel Patios
- Installation Details That Determine Whether a Gravel Patio Stays Stable and Weed Free
- Routine and Restorative Maintenance to Keep Permeability and Appearance
- How a Gravel Patio Stacks Up Against Pavers and Poured Surfaces
- Our Take on Gravel Patios After Years in Central Arkansas Soil
- Let Village Precision Pros Handle Your Gravel Patio Project
- FAQ
- Sources
Pros of Gravel Patios Homeowners Benefit From
Gravel earns its popularity honestly. As a permeable surface, it lets rainwater soak into the ground instead of running off, which helps replenish groundwater and eases pressure on storm drains, a benefit extension research ties to sandy soils and flatter sites. It also shrugs off the geometry problems that plague hard materials: no custom cutting required for curved beds or odd corners.
- Drainage performance: permeable hardscapes can cut annual runoff volume by about 60 percent on monitored sites.
- Design flexibility: gravel flows around trees, curves, and irregular lot lines without special tools.
- Simple repairs: a low spot or thin patch just needs a shovel and a bag of matching stone, not a torn-out slab.
That last point matters for long-term upkeep. Poured concrete and dry-laid pavers both demand real labor to fix a crack or a settled joint. Gravel just needs a little more material in the right spot.
Cons of Gravel Patios Homeowners Should Weigh
The tradeoffs are real, and they tend to surprise homeowners who only picture the finished look. Loose stone migrates. Without a firm edge, gravel walks onto the lawn, into flower beds, and eventually into your shoes.
- Stone migration: foot traffic and rain push gravel outward, and uncontained patios spread mess beyond the planned footprint.
- Furniture instability: chair and table legs sink or wobble once depth passes a few inches.
- Seasonal headaches: snow shoveling lifts stone along with the snow, and poor base prep invites weeds through thin fabric.
- Ongoing topping up: even a well-built patio loses material over time and needs periodic replenishing.
None of these issues are dealbreakers on their own. They’re the reason gravel patios succeed or fail based on what goes in before the stone ever gets delivered.
How Drainage and Permeability Work With Gravel Patios
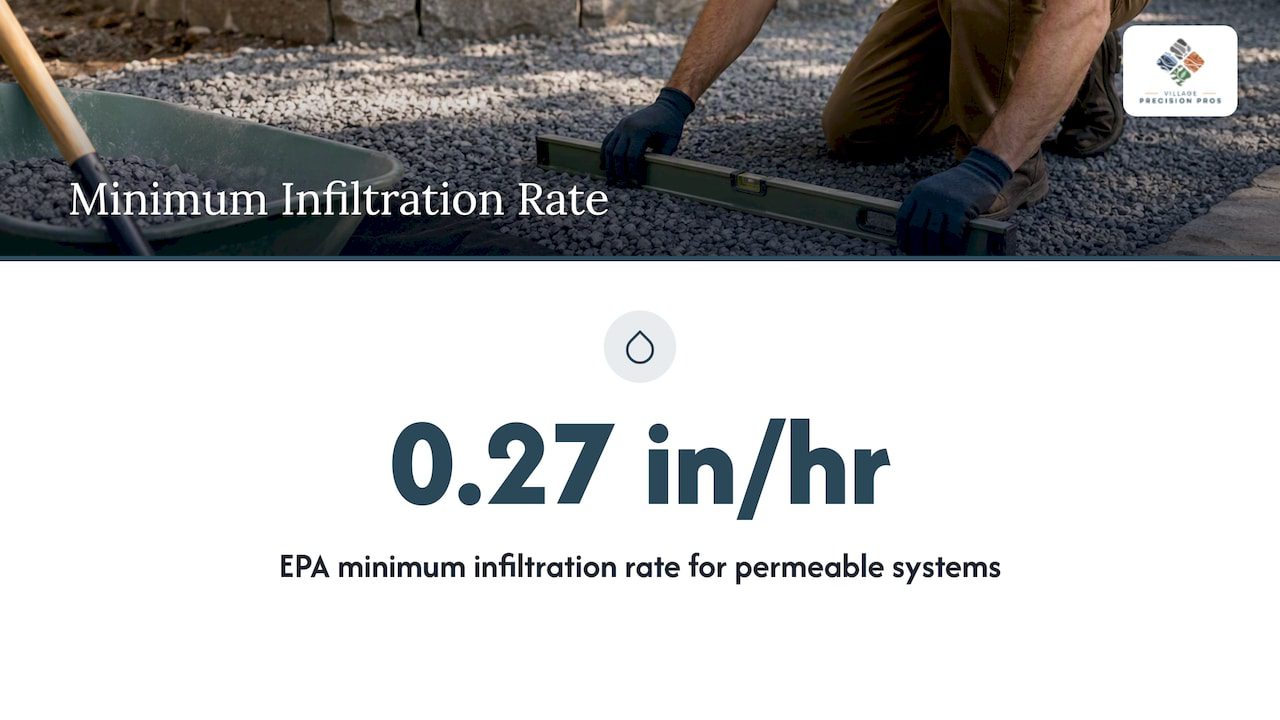
Gravel’s biggest selling point, its permeability, only works when the ground underneath can actually absorb water. The EPA sets 0.27 inches per hour as the minimum acceptable infiltration rate for permeable systems, and that number is worth testing before you commit to a design.
One figure to remember: 0.27 inches per hour is the floor for acceptable infiltration, and soils that fall short usually need engineered help to keep water from pooling on the surface.
Clay-heavy soils, steep slopes, and sites close to a foundation all limit how much water the ground can take. When field-testing shows a slow infiltration rate, an underdrain or a deeper layer of aggregate storage beneath the gravel gives water somewhere to go instead of sitting on top. Over time, even a well-built patio loses some infiltration capacity as fine sediment works its way into the gaps between stones. That’s a maintenance issue, not a design flaw, and it’s recoverable with the right restorative steps, which we cover in the maintenance section below.
Installation Details That Determine Whether a Gravel Patio Stays Stable and Weed Free
Gravel dumped straight onto dirt is a patch, not a patio. A durable installation follows a sequence, and skipping a step is usually where the regret starts.
- Excavate and compact the subgrade. Dig down four to five inches, per practitioner guidance, and compact the soil before adding anything else.
- Add a crushed stone base. A minimum four-inch layer of clean, washed crushed stone over the compacted subgrade, as outlined in drainage specifications, gives the surface layer the support loose soil can’t provide.
- Install edging that holds its line. Steel, plastic, or timber edging works, and a properly set edge sits about half an inch above the gravel surface to keep stones from migrating.
- Lay fabric, then the finish gravel. Professional-grade landscape fabric between the base and the decorative layer blocks weeds while still letting water through.
- Choose the right depth for your use. Two to three inches is the functional sweet spot for furniture and foot traffic; deeper layers help with drainage storage but make chairs harder to move.
Pro Tip: Test your soil’s drainage with a simple fill-and-time test before ordering stone, since a slow-draining site changes your base design.
If a test hole holds water for hours instead of draining, that’s a sign to call in patio drainage design help before the gravel arrives.
Routine and Restorative Maintenance to Keep Permeability and Appearance
Gravel patios aren’t maintenance-free, but the work is manageable when it’s done on schedule instead of after problems pile up.
- Sweep regularly to clear leaf litter and organic debris before it breaks down and clogs the gaps between stones.
- Rake displaced gravel back into place after heavy rain or a season of foot traffic.
- Top up thin spots with matching stone as needed rather than waiting for bare patches to spread.
Surface clogging from fine sediment is the main driver of reduced infiltration over the years, especially on patios near unprotected soil or a downspout outlet. Restorative work can recover lost performance: USGS-documented testing found that maintenance increased infiltration rates for permeable interlocking concrete pavers by 94 percent to 1,703 percent, with gains also reported for other permeable surfaces. That’s a wide range, and the right method depends on how clogged the surface has become.
Pro Tip: Route downspouts away from the patio edge, since redirected runoff is one of the simplest ways to slow sediment buildup. Our downspout drainage guidance covers the basics.
How a Gravel Patio Stacks Up Against Pavers and Poured Surfaces
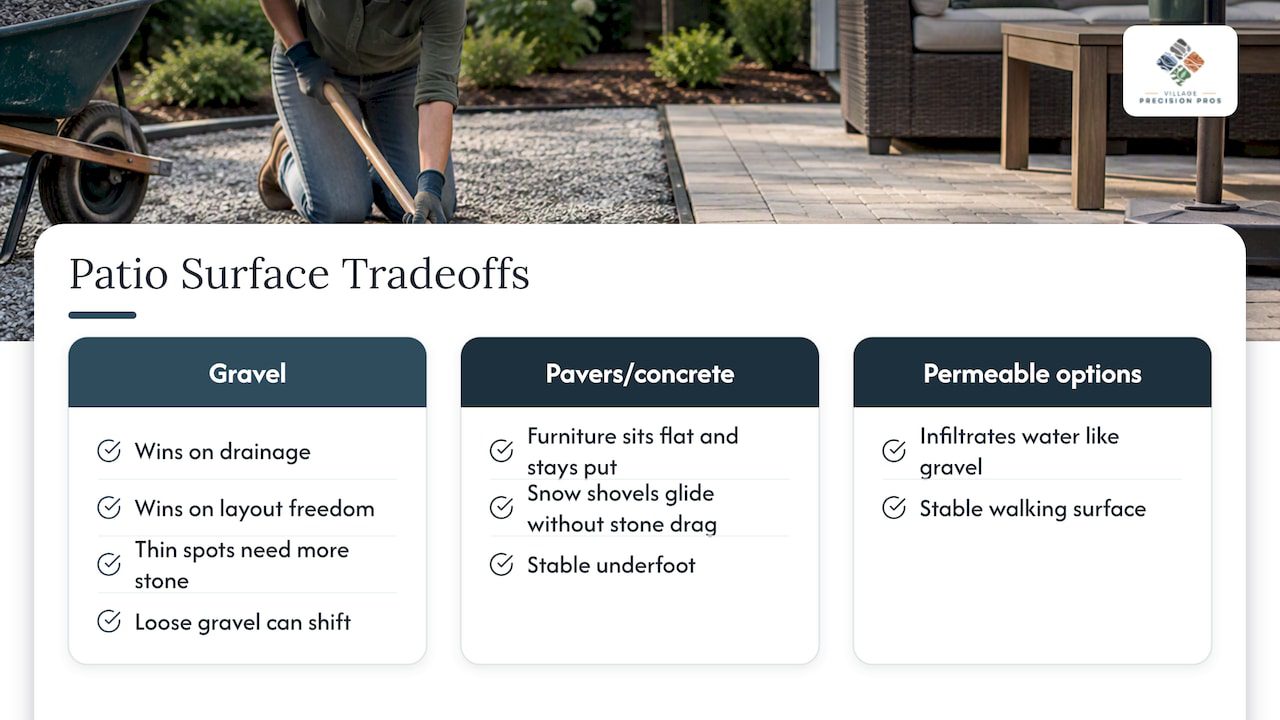
Gravel wins on drainage and layout freedom, full stop. It wins on repair simplicity too, since a thin spot just needs more stone.
Pavers and poured concrete win where gravel struggles: furniture sits flat and stays put, snow shovels glide across the surface without dragging stone along, and neither material shifts underfoot the way loose gravel can. If stormwater performance matters but you want a firmer, more furniture-friendly surface, permeable pavers or pervious concrete split the difference: they infiltrate water like gravel but give you a stable walking surface. For homeowners comparing a poured option specifically, our breakdown of stamped concrete patio pros and cons covers the tradeoffs on maintenance and upfront labor.
Our Take on Gravel Patios After Years in Central Arkansas Soil
Drainage and uneven ground can cause gravel patio problems, and both are fixable with the right base work before a single stone goes down. A small gravel accent bed or a stepping path is a reasonable DIY weekend project. A full patio that needs to handle furniture, foot traffic, and seasonal rain is a different scope, and getting the base wrong is expensive to fix later. Before you commit to gravel, test your drainage and check your soil. That step can help avoid problems.
Ty
Let Village Precision Pros Handle Your Gravel Patio Project
A properly built gravel patio comes down to getting the base, edging, and drainage right the first time, and that’s where professional installation pays for itself. We bring that groundwork together through a few connected services:
- Decks & Patios: full design and installation, including gravel, paver, and poured options.
- Hardscape & Stone Masonry: edging, containment, and the structural base work that keeps gravel in place.
- Landscape Water Drainage Solutions: site evaluation and underdrain installation for soils that need extra help.
- Annual maintenance plans: scheduled upkeep that keeps a permeable surface draining the way it should.

We start every patio project with a site evaluation, checking soil, slope, and drainage before we recommend a material. That means you get a patio built for your actual yard, not a generic layout. Reach out through our Decks & Patios page to schedule a site visit.
FAQ
What Are the Downsides of Pea Gravel?
Pea gravel migrates without proper edging, tracks into the house on shoes, and makes a poor surface for furniture once depth exceeds a few inches. It also needs periodic topping up as stones work their way out of the contained area over time.
What’s Better for Pavers, Sand or Gravel?
Pavers typically rest on a compacted crushed stone base topped with a thin leveling layer of coarse sand, with the stone layer providing drainage and structural support. Sand alone compacts and shifts too easily to serve as a long-term base under foot traffic.
Is It Better to Run on Gravel or Concrete?
Concrete offers a firmer, more even surface that’s generally easier on joints for running, while gravel can shift underfoot and create uneven footing. For a patio meant for furniture and foot traffic rather than exercise, that distinction matters less than drainage and base quality.
Do I Need to Put Anything Under Pea Gravel?
Yes. A compacted crushed stone base of at least four inches, topped with landscape fabric, is standard practice for keeping pea gravel stable and limiting weed growth, according to drainage specifications and installation guidance. Skipping the base can contribute to uneven settling and weed growth.
Sources
- AEN-108: Permeable Pavement for Stormwater Management
- Assessment of restorative maintenance practices on the infiltration capacity of permeable pavement
- Gravel Drainage Specifications, Research, Department of Plant Science
- Create a DIY Pea Gravel Patio: This Old House
- Permeable Hardscapes