The most common polymeric sand problems are washout, surface haze, joint sand loss, and biological staining. If you’re seeing any of these, check that your pavers and joints are fully dry, remove loose surface residue, and hold off on reapplying polymeric sand until you know what caused the failure. Some of these signs point to a base or drainage issue that needs professional repair, not another bag of sand.
TL;DR:
- Damp joints during installation or inadequate drainage can cause haze, sand loss, and bond failure, often requiring correction of base or drainage issues.
- Repeated pumping or puddling indicates underlying base or drainage problems that typically need regrading or base recompaction, not just joint refilling.
- Surface haze can often be removed with dry brushing or mild cleaners, but persistent issues suggest underlying drainage or base failures.
- Polymeric sand should be avoided in permeable pavements, steep slopes, or permanently wet areas, where aggregate-filled joints or dry sand are better options.
- Proper installation requires dry conditions, thorough surface cleaning, and built-in drainage to prevent most failures, with inspections recommended after winter and heavy rain.
Table of Contents
- Common causes and how they lead to failure
- How to inspect and diagnose the problem on your patio
- Repairs and step-by-step fixes for each failure type
- Prevention and best practices for installation and maintenance
- When not to use polymeric sand and recommended alternatives
- Expected lifespan and maintenance timeline
- Field-tested perspective from Village Precision Pros
- Author recommendation: DIY limits and when to call a pro
- Fixing patios the right way with Village Precision Pros
- FAQ
- Sources
Common causes and how they lead to failure
Most polymeric sand failures trace back to a handful of installation and environmental factors, and they often overlap. Once you understand which ones apply to your patio, diagnosing the problem gets much simpler.
- Damp pavers or joints during installation: moisture on the surface triggers premature curing, which bonds a haze directly onto the paver face instead of just inside the joint.
- Incorrect watering during cure: too little water leaves the polymer under-activated and crumbly, while too much floods the joint and washes the binder out before it sets.
- Poor drainage and saturated bedding: when water has nowhere to go, hydrostatic pressure builds under the pavers and forces sand up and out of the joints, a process known as pumping.
- Excess residue left on the surface: sand that isn’t fully swept and blown off before activation hardens into a visible film across the paver tops.
- Joint geometry and edge restraint problems: joints that are too wide, too narrow, or unsupported at the edges shed sand faster under traffic and weather.
- Freeze-thaw cycles and deicing salts: repeated freezing and salt exposure break down joint material over time, and a technical report on joint deterioration found that saturation, microcracking, and salt solutions combine with design and material choices to accelerate the damage rather than acting alone.
How to inspect and diagnose the problem on your patio
Before you buy more sand or reach for a pressure washer, walk the patio and build a clear picture of what’s actually happening.
- Scan the surface for visual cues: look for a dull gray or white film (haze), visible gaps between pavers, soft or missing sand, slimy or dark joints, and any spots where water puddles after rain.
- Probe joint depth: slide a flathead screwdriver into a few joints and compare the sand level to the paver’s chamfer edge. A noticeable drop below that edge means real sand loss, not just surface wear.
- Run a sweep and light-rinse test: brush a joint lightly, then rinse with a garden hose. If sand lifts out easily, the polymer bond has failed in that area.
- Check for dampness history: think back to installation conditions or recent heavy rain. Damp joints during application or during the first cure window are a leading cause of haze and weak bonding.
- Watch for decision triggers: repeated pumping after every rain, consistent puddling in one spot, or sand loss concentrated along one edge usually signals a drainage or base problem rather than a simple joint refill.
Pro Tip: Do the screwdriver test in at least three spots, center, edge, and a low point, since sand loss is rarely even across the whole patio.
Repairs and step-by-step fixes for each failure type
Not every failure needs the same fix, and matching the repair to the actual problem saves you from redoing the work twice.
Haze removal usually responds to dry brushing with a stiff broom first, followed by a specialized paver cleaner or mineral spirits product made for polymeric sand residue if dry brushing alone doesn’t clear it. Avoid aggressive pressure washing on fresh haze, since high pressure can etch the paver surface or blow out joint sand that hasn’t fully cured. For additional guidance, refer to common mistakes to avoid when pressure washing.
Refilling joints that have dropped but aren’t actively failing should generally use dry masonry sand rather than more polymeric sand. CMHA’s operation and maintenance guidance notes that once joint sand has dropped beyond a modest depth threshold, the joint should be topped up right away with dry masonry sand, since polymeric sand is formulated for initial installation rather than routine topping up. Reapplying polymeric sand only makes sense after you’ve fixed whatever caused the original loss.
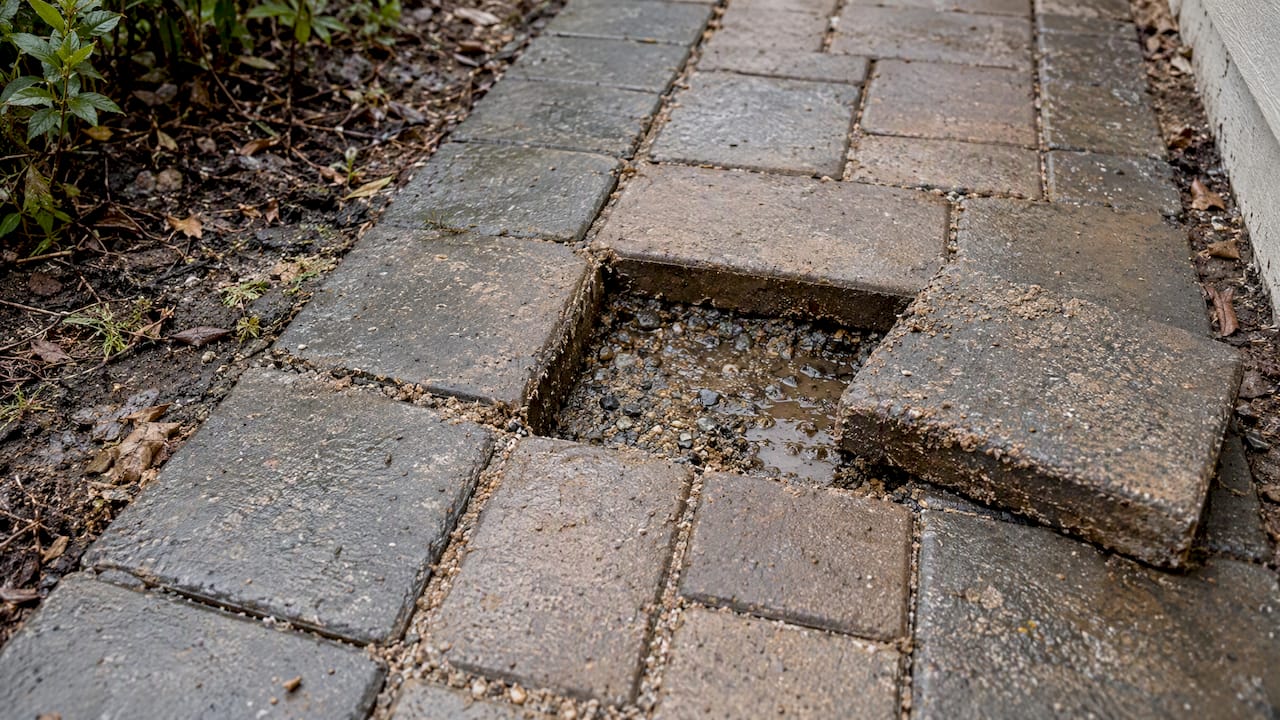
Sand washout and pumping point to a drainage or bedding issue underneath. Drainage problems on solid bases can force water through the joints, pushing sand out and destabilizing the whole surface, so the fix usually means regrading, recompacting the base layer, or in worse cases pulling and resetting the affected pavers.
Mold and staining respond to cleaning with a mild detergent, thorough drying, and improving airflow or drainage to the damp spot that’s feeding the growth. Use sealers cautiously, since sealing over a moisture problem traps it rather than solving it.
Before any repair, gather a stiff broom, a shop vac, dry masonry sand, and a paver-safe cleaner, and always test any chemical cleaner on a small hidden area first.
Prevention and best practices for installation and maintenance
Most of the failures above are preventable with a few disciplined steps during installation and routine upkeep afterward.
- Confirm dry conditions and correct joint width before any polymeric sand goes down. Pavers, joints, and the surrounding base should be fully dry, with no rain forecast for at least 24 hours.
- Sweep thoroughly before activation. Every grain of loose sand left on the paver face will cure into haze, so blow and brush the surface clean before wetting.
- Follow controlled watering steps. Mist the joints in stages rather than soaking them, and stop once the sand looks uniformly damp rather than pooled.
- Build in drainage from the start. A proper 2% slope away from structures, solid edge restraints, and a well-compacted base layer prevent the standing water that leads to pumping.
- Do seasonal maintenance checks. Clear excess sand off the surface each spring, since industry guidance warns that sand left sitting on pavers accelerates surface abrasion, and inspect joints after winter for salt-related saturation.
When not to use polymeric sand and recommended alternatives
Polymeric sand isn’t the right choice for every paver system, and using it in the wrong setting creates problems that no amount of careful installation can fix.
- Permeable interlocking concrete pavement (PICP) relies on open joints to let water drain through, and CMHA’s maintenance guidance for permeable systems specifically advises against sand joints because they reduce infiltration and clog over time.
- Steep slopes with concentrated runoff or spots that stay permanently wet put constant stress on the polymer bond and invite repeat washout.
- Aggregate-filled joints are the recommended alternative for permeable systems, since they preserve drainage capacity instead of sealing it off.
- Dry masonry sand remains the better choice for topping up established joints rather than reapplying polymeric sand.
Choosing between polymeric sand and regular sand really comes down to whether your pavement needs to stay permeable or not.
Expected lifespan and maintenance timeline
Properly installed polymeric sand can last several years before it needs significant attention, though drainage quality, traffic, and climate exposure all shorten that window. Plan on a spring check to clear surface residue and a post-winter inspection for salt damage or joint gaps. Recurring pumping, widening gaps, or dark staining that returns after cleaning are warning signs that point to a base issue rather than a simple sand refill.
Field-tested perspective from Village Precision Pros
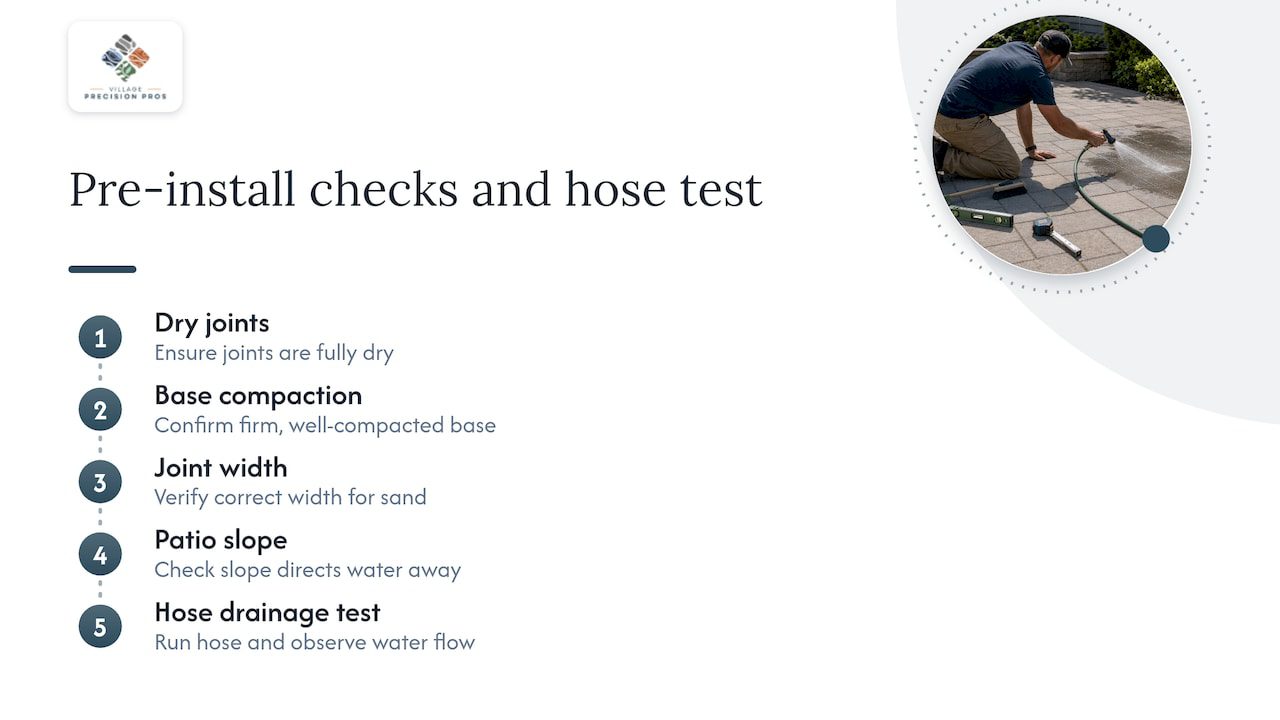
A common root cause of polymeric sand problems is damp joints at installation and drainage that wasn’t graded correctly from the start. It is important to check base compaction, joint width, and slope before any sand goes down, and to test drainage with a hose before calling a patio finished. These same checks, dryness, slope, and joint depth, are ones you can run yourself before deciding whether a repair is a weekend project or a call to a contractor.
Author recommendation: DIY limits and when to call a pro
Diagnose moisture and drainage first, every time, before you touch the joints themselves. Haze removal and minor sand refills are reasonable DIY jobs. If the problem keeps coming back or points to the base, bring in a contractor for an inspection rather than repeating the same fix.
Ty
Fixing patios the right way with Village Precision Pros

We handle the diagnostics and repair work that keep a patio from cycling through the same polymeric sand problems year after year. Our hardscape and stone masonry crews address drainage and base issues at the source, whether that means regrading, recompacting, or resetting pavers, and our annual maintenance plans catch joint wear before it turns into a bigger repair.
| Problem | Likely cause | Our fix |
|---|---|---|
| Haze | Residue left on surface | Cleaning and resealing as needed |
| Pumping | Drainage or base failure | Regrade and recompact base |
| Joint sand loss | Weather or traffic wear | Refill or reinstall joints |
Pro Tip: If you’ve already tried cleaning and refilling without lasting results, that’s usually a sign the base needs a closer look.
Pavers that keep failing in the same spot almost always have a drainage story underneath them.
Request an inspection through our patios and pavers page and we’ll tell you straight whether you’re looking at a simple refill or a base repair.
FAQ
What are the downsides of polymeric sand?
Polymeric sand can haze over if residue isn’t fully swept before activation, and it’s prone to washing out under heavy rain or improper watering during cure. It also performs poorly in permanently wet areas, since trapped moisture prevents proper curing.
What is better than polymeric sand?
For permeable paver systems, aggregate-filled joints perform better since they preserve drainage instead of blocking it. For routine topping up of existing joints, dry masonry sand is the preferred choice over reapplying polymeric sand.
When not to use polymeric sand for pavers?
Avoid polymeric sand on permeable interlocking concrete pavement, since sand joints reduce infiltration and clog over time. It’s also a poor fit for spots with steep runoff or standing water that never fully dries out.
How many years does polymeric sand last?
Properly installed polymeric sand can last several years before it needs attention, though drainage quality, climate, and traffic all affect that timeline. Regular spring cleanup and post-winter checks help it last closer to the upper end of that range.
Sources
The guidance above draws on published maintenance standards and technical research rather than general advice alone. CMHA’s operation and maintenance guide covers topping up joint sand correctly, while its maintenance guide for permeable pavements explains why sand joints don’t belong in permeable systems. A technical report from Iowa State’s InTrans program examines how moisture and deicing salts contribute to joint deterioration over time. Practical drainage guidance from Angi’s paver patio articles rounds out the picture with real-world drainage fixes homeowners can recognize in their own yards.
- PAV TEC 007: Operation and maintenance guide (CMHA)
- Deterioration of joints in concrete pavements, InTrans Iowa State
- Paver patio drainage problems and fixes, Angi