The simplest effective landscape lighting design uses layered lighting, ambient, accent, and task, and starts with a nighttime walk to define zones. Pick one or two focal features, size your transformer with room to grow and stick with warm 2700 to 3000K LEDs. Everything else, spacing, fixture choice, wiring, is built on that foundation.
TL;DR:
- Use a nighttime walk with a flashlight to identify safety zones and focal features, then group the landscape into entry, path, entertainment, accent, and security zones.
- Maintain 15 to 20 feet spacing for ambient lights along borders, and 6 to 12 feet for path lights, adjusting based on beam spread and curves.
- Size transformers at about 80% of total fixture wattage and account for voltage drop to prevent dimming or uneven lighting across long wire runs.
- Choose warm white LEDs between 2700K and 3000K with a CRI of 80 or higher, and ensure fixtures have IP65/IP67 ratings for durability near water or soil.
- Start small with a path of lights and one or two focal features, then expand after testing at night to avoid over-lighting and achieve a natural look.
Table of Contents
- How Do You Plan a Landscape Lighting Layout?
- What Are the Best Lighting Techniques and Fixtures for Each Job?
- How Far Apart Should Landscape Lights Be Placed?
- How Do You Size a Transformer and Avoid Voltage Drop?
- What Controls and Energy Settings Work Best for Outdoor Lighting?
- What Fixture Specs Actually Matter for Light Quality?
- How Do You Install and Test a Landscape Lighting System?
- What Has Village Precision Pros Learned From Real Landscape Lighting Projects?
- What I’d Tell a Friend Before They Start Drilling Holes for Fixtures
- How Village Precision Pros Can Take Landscape Lighting Off Your Plate
- Sources
- FAQ
How Do You Plan a Landscape Lighting Layout?
A good landscape lighting plan starts outside, after dark, with a flashlight and a notepad. Walk your property at night before you touch a single fixture. Look at where you naturally slow down or feel unsure of your footing, that’s a safety zone. Look at what draws your eye during the day, a mature oak, a stone wall, a water feature, and note whether it deserves a spotlight at night too.
Once you’ve walked the site, break it into zones. Most homes need some combination of these:
- Entry zone — the front door, steps, and any transition points a visitor uses first.
- Path zone — walkways, driveways, and stairs where footing matters most.
- Entertaining zone — patios, decks, and outdoor kitchens where task light matters for function.
- Accent zone — trees, architectural details, or garden beds worth highlighting.
- Security zone — side yards, gates, and blind corners near entry points.
Prioritize paths and entries first. They carry the safety burden. After that, choose one or two focal features, not ten, to uplight or wash with light. Trying to light everything at once is the single most common overreach in a homeowner’s landscape lighting plan, and it usually ends in a yard that looks like a parking lot instead of a garden. A minimal starter system, one uplight, a run of path lights, and a single wash light, gives you a composed look you can expand once you’ve tested it at night.
Before you buy anything, put together a scaled sketch of the property, a fixture schedule listing what goes where, and a rough transformer wattage estimate. Those three documents turn a vague idea into a plan you can actually shop and wire.
What Are the Best Lighting Techniques and Fixtures for Each Job?
Landscape lighting techniques aren’t interchangeable. Each one solves a different visual problem, and matching the wrong fixture to the wrong technique is why so much DIY installations look flat or harsh.
- Uplighting aims a spotlight or well light upward into a tree canopy or against a wall, exaggerating texture and height. Well lights work best for in-ground placement near trees; adjustable spotlights suit shrubs and smaller features.
- Downlighting (moonlighting) mounts a fixture high in a tree and aims down, mimicking natural moonlight through branches. It reads more subtly than uplighting and suits large shade trees over patios or paths.
- Grazing places a narrow-beam fixture close to a textured surface, stone walls, tree bark, brick, so light rakes across it and exaggerates shadow and depth.
- Washing spreads a wider beam evenly across a flat surface like a fence or facade, useful for softening a blank wall without dramatic shadow.
- Silhouetting places a fixture behind an object and aims it at a flat backdrop, throwing the object’s outline forward. It works well on plants with strong architectural shapes, like yucca or ornamental grasses.
- Path and step lighting uses low bollard or hooded fixtures aimed downward to guide feet without glare.
For uplights, start 1 to 3 feet from the base of the object and adjust based on height, taller trees need the fixture set back farther so the beam reaches the canopy rather than just the trunk. Narrow beam angles (around 15 to 25 degrees) concentrate light on tall, slender features; wider beams (35 to 60 degrees) suit broad shrubs or wall washes. A homeowner lighting a single tree trunk to a full canopy will usually need a narrower beam than one washing a wide garden bed.
How Far Apart Should Landscape Lights Be Placed?
Spacing is where most DIY lighting plans fall apart, usually in one of two directions: fixtures crammed so close together the yard looks like a runway, or spread so thin the light pools never connect and the design reads as disjointed. There isn’t a single number that works everywhere, but there is a reliable starting point.
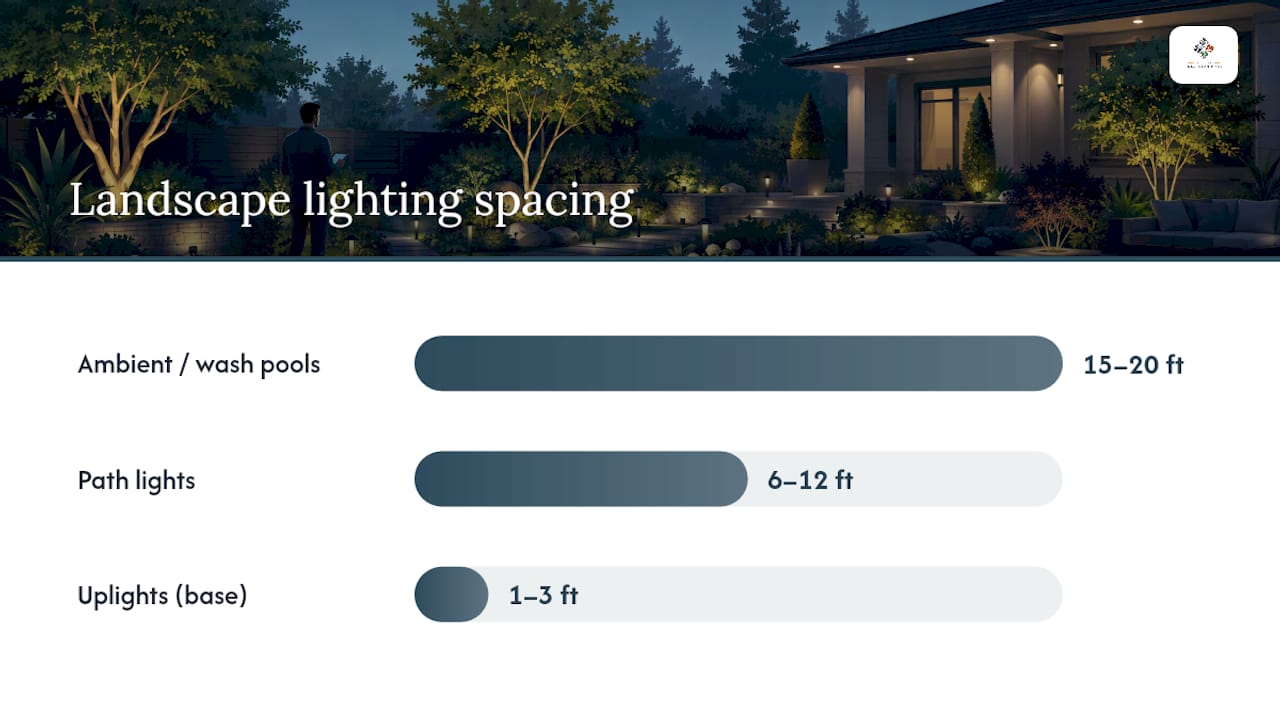
For general ambient pools of light, along a border bed or open lawn edge, designers typically start at 15 to 20 feet between fixtures, then adjust based on beam width and how much overlap looks natural. Path lights run tighter, 6 to 12 feet apart depending on the fixture’s beam spread and output, wider beams and higher-output fixtures can be spaced farther apart without leaving dark gaps.
| Fixture type | Typical spacing | Notes |
|---|---|---|
| Ambient/wash pools | 15 to 20 ft | Adjust for beam width and desired overlap |
| Path lights | 6 to 12 ft | Tighter on curves, wider on straight runs |
| Uplights (trees/shrubs) | 1 to 3 ft from base | Distance scales with plant height |
| Step/deck lights | One per step or landing | Placed for tread visibility, not decoration |
The best way to nail spacing is the stake-and-walk method. Push temporary stakes or use battery-powered fixtures at your planned spots, then walk the property after dark from the angles guests and family actually use, the street, the driveway, the back door. Stagger fixtures rather than lining them up perfectly straight; a slight offset avoids the runway effect and looks more natural along curved paths. Widen spacing slightly on straightaways and tighten it on curves, where sightlines shorten.
Pro Tip: Check your layout from the one viewpoint that matters most, your kitchen window or the spot where you sit on the patio most evenings, not just from the yard itself. A layout that looks great walking the path can look uneven from your favorite chair.
How Do You Size a Transformer and Avoid Voltage Drop?
Undersized transformers and voltage drop cause more disappointing lighting installations than bad fixture choices ever do. Get the electrical math right and the rest of the design holds up for years.
- Add up total fixture wattage. List every fixture’s wattage and sum them. If you’re using 3 watt LED path lights and 20 of them, that’s 60 watts before you even add uplights or wash lights.
- Size the transformer at about 80% of its rated capacity, then round up to the next standard size to leave headroom for adding fixtures later. A system drawing 240 watts should sit on a 300 watt transformer, not one rated exactly at 240. Professional landscape lighting plans build in this buffer specifically so a homeowner can expand the system without buying a second transformer.
- Calculate voltage drop on every run. Long wire runs and heavy loads bleed voltage before it reaches the far fixtures, and a drop past roughly 10% starts showing up as visibly dimmer, warmer-looking lights at the end of the line.
- Fix drop with wire gauge, not guesswork. Standard runs under about 100 feet typically do fine on 12 gauge wire; longer runs or heavier loads call for 10 gauge, splitting the run into two shorter “legs” from the transformer, or using a higher voltage tap if your transformer offers one. Hub or T-method wiring layouts also reduce drop compared to one long daisy-chain of fixtures.
- Mount the transformer near a GFCI-protected outdoor outlet, since low-voltage systems still plug into 120V household power and code requires that protection on the outlet feeding it.
If your plan involves multiple transformers, buried line-voltage runs, or anything touching your home’s main electrical panel, that’s the point to call a licensed electrician rather than push through it solo. NEC and NFPA rules govern outdoor wiring protection, and low-voltage burial depths differ from what many DIYers assume.
What Controls and Energy Settings Work Best for Outdoor Lighting?
Controls decide whether your lighting system feels effortless or becomes a chore you’re constantly adjusting by hand. Three tools cover almost every homeowner’s needs:
- Photocells turn lights on automatically at dusk, the simplest set-and-forget option for most systems.
- Timers add an off schedule so lights don’t burn all night, useful for reducing runtime and glare after everyone’s asleep.
- Smart scene controllers let you create different lighting moods, an everyday setting, a dimmer late-night setting, and a brighter event setting, without rewiring anything.
- Motion sensors suit security zones like side yards and gates, where you want light on demand rather than lighting that runs continuously.
LEDs make all of this practical. They run cooler, last dramatically longer than halogen bulbs, and use a fraction of the energy for equivalent brightness, which is why Energy for outdoor fixtures. Pair that efficiency with a warm color temperature, and Dark Sky guidance backs this specifically, recommending shielded fixtures and a color temperature at or below 3000K to limit glare and reduce disruption to nocturnal wildlife. Running accent lights on a timer that shuts them off at midnight, rather than letting them burn until sunrise, does both your energy bill and your local ecosystem a favor.
What Fixture Specs Actually Matter for Light Quality?
Not every spec sheet number matters equally. Three of them decide whether your lighting looks natural or washed out.
- Lumens should scale to the object. Shrubs and small plantings generally need only 50 to 150 lumens; medium trees call for roughly 150 to 300 lumens; large architectural features or big canopy trees may need 300 to 1,000 lumens to read properly at night.
- Color temperature should stay in the 2700 to 3000K range for nearly all residential settings. This warm tone flatters stone, wood, and foliage; anything bluer starts looking clinical against a home’s exterior.
- CRI (color rendering index) of 80 or higher matters wherever plant color or material tone needs to look accurate, a low-CRI fixture can make green foliage look dull or gray even at the right brightness.
- IP ratings determine durability. Fixtures near soil, mulch, or water features need at least IP65 or IP67 ratings and corrosion-resistant housings, brass and copper hold up far better than cheap coated aluminum over years of exposure.
- Mounting matters as much as the fixture itself. Bury well lights flush, tuck spotlights behind foliage, and angle housings so the visible hardware disappears during the day and only the light remains visible at night.
How Do You Install and Test a Landscape Lighting System?
Installation goes smoothly when you commission the system in stages instead of burying every wire and hoping for the best.
- Document before you dig. Have your scaled sketch, fixture schedule, and planned wire routes on hand so you’re following a plan, not improvising in the dirt.
- Stake-test everything first. Set fixtures loosely, run temporary connections, and walk the property from your key viewpoints, front curb, back patio, driveway, before locking anything down.
- Measure voltage at the farthest fixtures, not just at the transformer, to confirm your voltage drop calculations held up in the real installation.
- Commission the system. Set your timer or photocell schedule, lock down final aim angles, then photograph or sketch the as-built layout for future reference.
- Bury cable to code depth, then re-test every fixture once more before covering the last run.
Pro Tip: Wait for full darkness, not dusk, to do your final aiming pass. Fixtures that look perfectly aimed in twilight often throw glare or miss their target once the sky goes fully black.
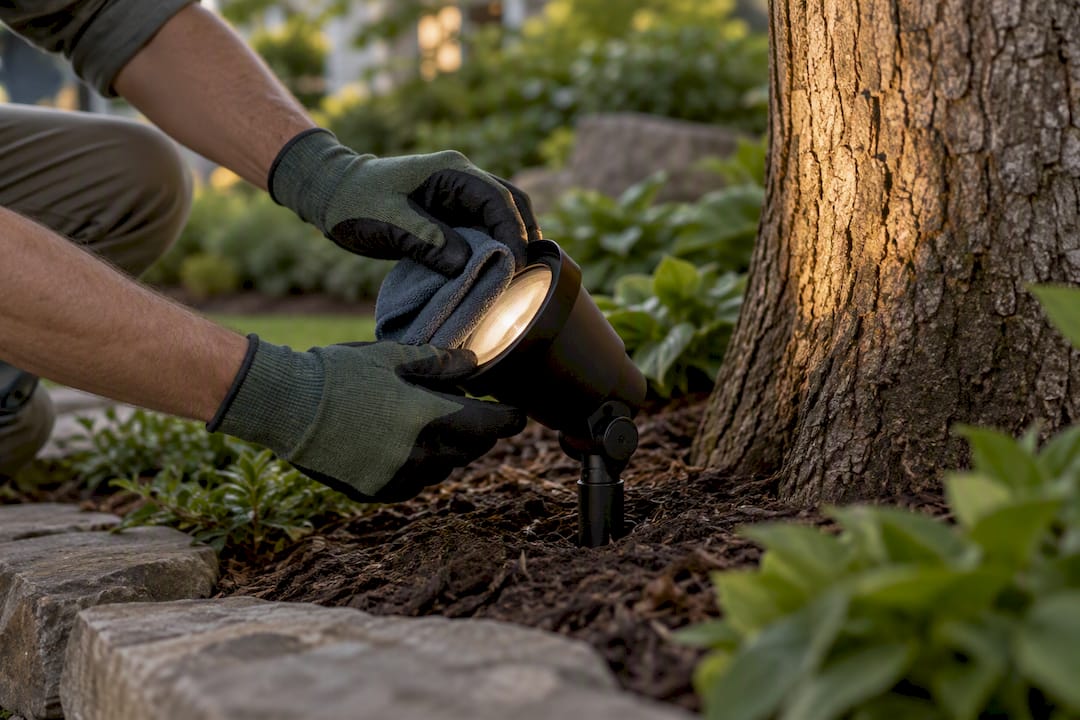
Maintenance afterward is light but not optional: clean fixture lenses a couple of times a year, check wire connections for corrosion, and re-aim uplights as trees and shrubs grow into or out of their beams.
What Has Village Precision Pros Learned From Real Landscape Lighting Projects?
We’ve seen how often lighting gets bolted onto a landscape as an afterthought instead of designed alongside it. The installs that age best are planned at the same time as the patio, wall, or walkway they’ll illuminate, not added after the hardscape is finished.
Plenty of scopes suit a confident DIYer: a handful of path lights along an existing walkway, one or two uplights on a favorite tree, a simple photocell timer setup. Where we typically see homeowners bring in a professional is whole-property systems tying into new hardscape, anything requiring trenching near a home’s electrical panel, or properties under HOA lighting restrictions that need documentation. Cost and timeline on professional installs vary with fixture count, wire runs, and site access, details worth reviewing before you budget a project.
What I’d Tell a Friend Before They Start Drilling Holes for Fixtures
If I had to name the three mistakes I see repeated most, they’d be over-lighting the whole yard at once, picking a cool-white LED because it looked brighter on the shelf, and undersizing the transformer to save $40 upfront. Every one of those is fixable before installation, and expensive to fix after.
Start small: a run of path lights and one or two uplights on your best feature. Walk it at night, adjust, then expand. The plan on paper never tells you as much as ten minutes standing in your own dark yard.
— Ty
How Village Precision Pros Can Take Landscape Lighting Off Your Plate
If the wiring math and beam-angle decisions above sound like more evening hours than you want to spend, that’s a service some homeowners choose to outsource, often supported by specialized Landscaping SEO Services to grow their landscaping business efficiently. Lighting can be integrated directly into hardscape and irrigation projects from the start, so wire routes, transformer placement, and fixture aim can be planned alongside a patio or walkway instead of retrofitted afterward.

A consultation is recommended when planning a whole-property system, dealing with electrical runs near the main panel, or working under HOA lighting rules that require documentation. Professionals can handle the fixture schedule, transformer sizing, and code-compliant wiring to avoid troubleshooting voltage drop. If you’re already planning a new patio or walkway, pairing it with a landscape and irrigation consultation lets us design the lighting and hardscape together from day one. Reach out through Hardscape & Stone Masonry to start that conversation, or ask about our annual maintenance plans to keep an installed system running clean for years.
Sources
- Layered lighting in landscape design — Lighting Warehouse
- Outdoor lighting best practices — International Dark-Sky Association
FAQ
How Do You Lay Out Landscape Lighting?
Start with a nighttime walk to identify safety zones and focal features, then group the property into entry, path, entertaining, accent, and security zones. Prioritize paths and entries first, add one or two accent features, and use the 15 to 20 foot spacing guideline for ambient areas and tighter 6 to 12 foot spacing for paths.
What Color Temperature Should Outdoor Lights Be?
Most residential landscape lighting looks best between 2700K and 3000K, a warm white that flatters stone, wood, and foliage without looking clinical. Dark Sky guidance also recommends staying at or below 3000K to limit glare and reduce impact on nocturnal wildlife.
What Are Some Creative Design Ideas for Landscape Lighting?
Silhouetting an ornamental grass or yucca against a wall creates dramatic shape without heavy brightness, while grazing light across a stacked stone wall exaggerates its natural texture. Moonlighting from a high branch over a patio mimics natural light filtering through leaves, a subtler alternative to direct uplighting.
What Landscape Lighting Trends Should Homeowners Watch in 2026?
Smart scene controllers that let homeowners switch between everyday, late-night, and entertaining lighting moods from a phone app continue gaining ground over simple on/off timers. Warm, shielded fixtures aligned with Dark Sky principles are also becoming a standard expectation rather than a niche preference, driven by both energy efficiency and neighbor-friendly lighting habits.
Does Village Precision Pros Install Landscape Lighting?
Yes, Villageprecisionpros offers woodworking and lighting services as part of its broader landscaping work in Central Arkansas, often integrated with hardscape and irrigation projects. Pricing depends on project scope, so current details are available directly through the site.