Flagstone is a durable, high-impact choice for walkways when it sits on a properly prepared base. Pick an irregular dry-laid layout for a garden path, a tight mortared surface for an accessible front entry, or a stepping-stone pattern for a casual side yard. The style you choose should follow how the path gets used, not just how it looks in a photo.
TL;DR:
- Proper base preparation, including sufficient depth and layered compaction, is essential for the walkway’s longevity in Arkansas’s climate.
- Installed flagstone comes in higher than stamped concrete but offers better aging qualities.
- Select flagstone types carefully: bluestone is dense and durable, while sandstone and limestone are softer and climate-dependent, influencing durability.
- Installation method matters: dry-set works best for drainage and easy repairs, whereas mortar-set offers flat, accessible surfaces for high-traffic and mobility needs.
- Widths of 3 to 4 feet suit main walkways, with matching transition materials and proper grading ensuring the path feels integrated and natural.
Table of Contents
- Flagstone Walkway Ideas Worth Copying for Your Yard
- Which Flagstone Type Should You Buy?
- Dry-Set or Mortar: Which Installation Method Fits Your Path?
- The Base Specs That Determine Whether Your Path Lasts
- How Wide Should a Flagstone Walkway Be?
- Choosing Between Polymeric Sand, Stone Dust, and Gravel Joints
- What Does a Flagstone Walkway Really Cost?
- Keeping a Flagstone Walkway Looking Right for Years
- What Our Crews Have Learned Installing Flagstone Walkways
- Plants and Edging That Actually Complement Flagstone
- Lighting Options That Make a Flagstone Path Work After Dark
- Making the Walkway Feel Like Part of the Landscape, Not an Add-On
- A Contractor’s Take on Aesthetics vs. Longevity
- Get a Flagstone Walkway Built Right the First Time
- Sources
- FAQ
Flagstone Walkway Ideas Worth Copying for Your Yard
Every flagstone walkway idea below solves a different problem: foot traffic, drainage, style, or budget. We’ve installed most of these patterns across Central Arkansas properties, and the right pick usually comes down to who’s walking on it and how often.
- Irregular dry-laid flagstone for winding garden paths. Random-shaped stones set with open joints look like they grew out of the landscape, and they’re the easiest style to repair stone by stone.
- Stepping-stone flagstone on compacted gravel for informal side paths. Individual stones spaced with grass or gravel between them work well for low-traffic routes and keep costs down since you’re covering less surface area.
- Geometric cut flagstone for formal or modern entries. Squared and rectangular pieces laid in a grid give a tailored look that suits contemporary homes better than irregular shapes do.
- Tight, mortared flagstone for smooth, accessible routes. This is the style to choose for front walkways, main entries, or anywhere someone using a walker or wheelchair needs level footing.
- Flagstone with contrasting gravel or pea-gravel joints for drainage and texture. Wider joints filled with crushed stone let water pass through instead of pooling on the surface.
- Flagstone-to-concrete or flagstone-to-paver transitions where a path meets a driveway or patio. These require a properly detailed seam, which we cover further down.
For more layout inspiration tailored to Arkansas properties, our flagstone patio ideas page walks through several full-yard examples.
Which Flagstone Type Should You Buy?
Flagstone types vary in look, hardness, and how they hold up to freeze-thaw cycles. Picking the wrong one for your climate is one of the most common (and expensive) mistakes DIYers make.
- Bluestone: blue-gray to charcoal tones, dense and durable, a common choice for both patios and walkways.
- Sandstone: warm tans and rust tones, softer than bluestone, works well in milder climates.
- Limestone: light gray to cream, smooth texture, but softer and more prone to erosion in wet regions.
- Slate: rich color variation, thin and sometimes slick when wet, better suited to accent paths than main routes.
For thickness, go with flagstone that’s at least 1½ to 2 inches thick for walkway use. Thinner slabs crack under foot traffic unless they’re set in mortar or concrete. When you’re at the stone yard, inspect each piece for warping or hairline cracks, and try to keep thickness consistent across the whole order. Skip anything smaller than about a foot across. It won’t stay put.
Pro Tip: Sort your stones by thickness before you start setting them. It sounds tedious, but it cuts your leveling time dramatically once you’re on your knees with a rubber mallet.
Dry-Set or Mortar: Which Installation Method Fits Your Path?
Dry-set flagstone sits on a compacted crushed-stone base with a sand or stone-dust bedding layer underneath. Mortar-set flagstone sits on a concrete slab or mortar bed, locking each piece in place.
- Dry-set drains well, costs less, and is easy to repair. Lift one stone, fix the base, reset it. It’s the right call for garden paths, sloped sites, and anywhere drainage is a concern.
- Mortar-set creates a flat, continuous surface with minimal joint gaps. Choose it for front entries, wheelchair or walker routes, and thin stone that can’t handle flexing.
- Accessibility matters here: a smooth mortared surface beats irregular dry-laid stone whenever the path needs to serve mobility devices.
- Hire vs. DIY checklist: rent a plate compactor either way; add a wet saw if you’re cutting stone for a mortar-set project; call a pro if the slope exceeds a gentle grade or if you’re pouring a structural slab.
The Base Specs That Determine Whether Your Path Lasts
Base construction is the part of this project that decides whether your walkway lasts fifteen years or needs redoing in three. Skimp here and no amount of pretty stone will save it.
- Excavate 6 to 12 inches, depending on soil type and installation method. Clay-heavy soil and mortar-set slabs need the deeper end of that range.
- Build the base in layers. Add crushed stone in 2 to 3 inch lifts, compacting each one with a plate compactor before adding the next. Skipping the layered compaction is the single most common reason walkways sink within a couple of seasons.
- Add a bedding layer of stone dust or coarse sand, roughly 1 inch thick, and screed it flat before setting stone.
- Slope the finished surface about a quarter inch per foot away from any structure, and use filter fabric between soil and base if you’re working in mixed or sandy ground.
- Call 811 before you dig. It’s free, and it’s the only way to know what’s running under your yard.
Base depth commonly ranges from 6 to 12 inches depending on soil conditions, which is why a quick soil check before you order materials saves you from buying too little crushed stone.
How Wide Should a Flagstone Walkway Be?
Width and rhythm decide whether a path feels natural to walk or awkward to navigate.
- 3 to 4 feet is the comfortable standard for main walkways, wide enough for two people or one person carrying groceries.
- 18 to 24 inches works fine for a secondary accent path where only single-file foot traffic matters.
- Space stepping stones to match a natural stride, roughly 24 to 30 inches center to center, and test the rhythm by walking it before you commit to final placement.
- Use a rigid edge restraint (steel or stone border) where flagstone meets a lawn or mulch bed to stop creeping and erosion.
- For anyone using a wheelchair or walker, choose mortar-set stone or pavers instead of irregular dry-laid joints.
Choosing Between Polymeric Sand, Stone Dust, and Gravel Joints
Joint fill affects both looks and upkeep. Polymeric sand locks joints tight and cuts down on weeds when it’s swept in dry and activated with a fine fog spray, but it needs a dry forecast to cure properly.
- Stone dust: easiest to refresh, ideal for dry-set installs, but it washes out faster in heavy rain.
- Pea gravel: improves drainage in wide joints and adds visual contrast against the stone.
- Moss or low groundcover: a soft, natural look, but it can get slick when wet, so keep it off high-traffic mortar routes.
What Does a Flagstone Walkway Really Cost?
Budget expectations matter before you fall in love with a design. Concrete wins on upfront cost every time, but flagstone tends to age better and needs less refinishing over the decades.
- Cost drivers include stone type, site access, base depth required, how much cutting the layout demands, and local labor rates.
- DIYers can cut costs by renting a plate compactor and a wet saw, though rental availability can affect your project timeline more than people expect.
- A well-built flagstone entry is one of the upgrades buyers notice and tend to factor into a home’s curb appeal.
Keeping a Flagstone Walkway Looking Right for Years
Flagstone is low-maintenance compared to a lot of hardscape, but it’s not zero-maintenance.
- Refresh joint fill annually. Sweep in more stone dust or polymeric sand where gaps have opened, and pull weeds before they root deep.
- Reset a sunken stone by lifting it with a flat bar, adding compacted base material underneath, and resetting it level with a rubber mallet.
- Seal sparingly. Sealing isn’t required for most stone types, and it can trap moisture in porous stone like some sandstones.
- Skip rock salt in winter. Use sand for traction instead, and shovel rather than chip at ice, which can chip stone edges.
- Call a pro if an entire section has settled unevenly or if standing water suggests a drainage problem below the surface.
What Our Crews Have Learned Installing Flagstone Walkways
We set stones iteratively, adjusting one at a time rather than trying to nail placement on the first try, and sorting by thickness ahead of time speeds that process considerably. We tend to overbuild the base on drainage-heavy lots, because a little extra crushed stone up front beats a callback in two years. After more than 2,000 completed projects, our advice to homeowners is simple: hire out the base work if you’re unsure, and DIY the parts you’re confident in. For repair-adjacent projects like brick walkways, this guide to brick walkway repair covers similar joint-stabilization principles.
Plants and Edging That Actually Complement Flagstone
The planting bed around your walkway does as much visual work as the stone itself, and it’s where a lot of otherwise good designs fall flat.
Low, mounding groundcovers like creeping thyme or Irish moss soften the edges of irregular flagstone without competing with the stone’s texture. Keep taller ornamental grasses and perennials set back a few inches from the path edge so they don’t flop over and create a tripping hazard after rain. For a more structured, geometric layout, boxwood or dwarf holly along the border reinforces the clean lines rather than fighting them.
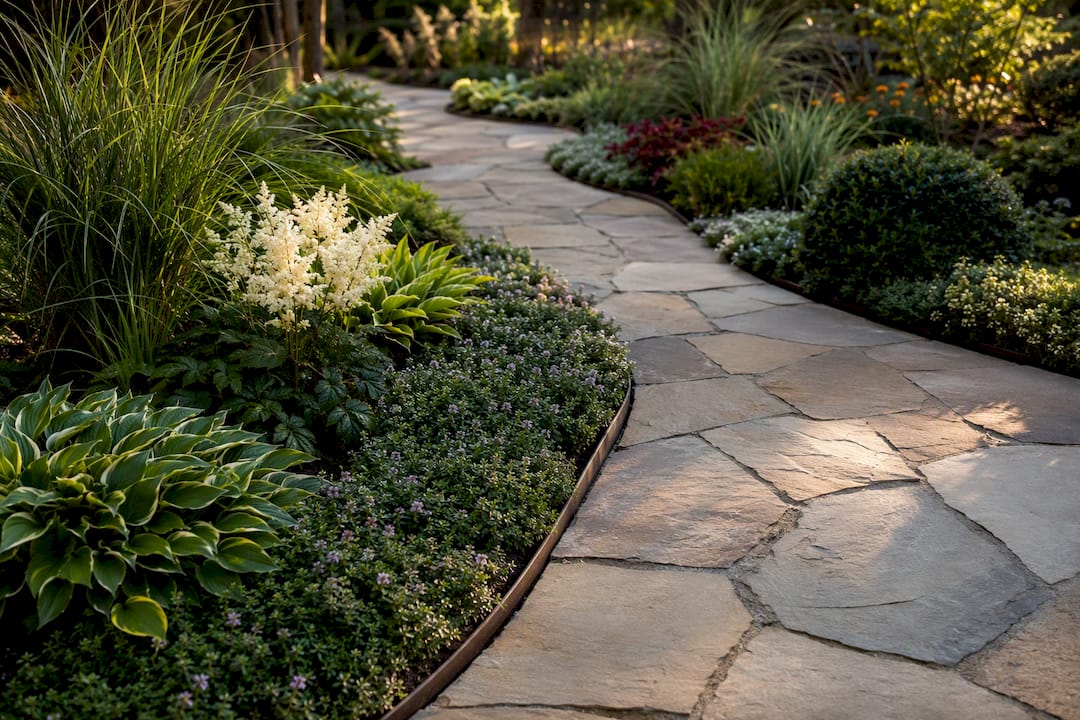
Edging materials should match the walkway’s formality. A dry-laid garden path pairs naturally with steel or aluminum edging that disappears into the soil line, while a mortared front entry looks better with a cut stone or brick border that echoes the path’s material. Avoid plastic edging on anything meant to look permanent. It tends to heave with frost and shows at the surface within a couple of seasons.
One detail homeowners overlook: leave a maintenance strip, roughly 4 to 6 inches, between the stone edge and dense plantings. It gives you room to trim without kneeling directly in the flower bed, and it keeps root systems from pushing joint material out of place over time.
Lighting Options That Make a Flagstone Path Work After Dark
A walkway that looks great at 2 p.m. and disappears at 8 p.m. isn’t finished. Lighting is both a safety feature and a design opportunity.
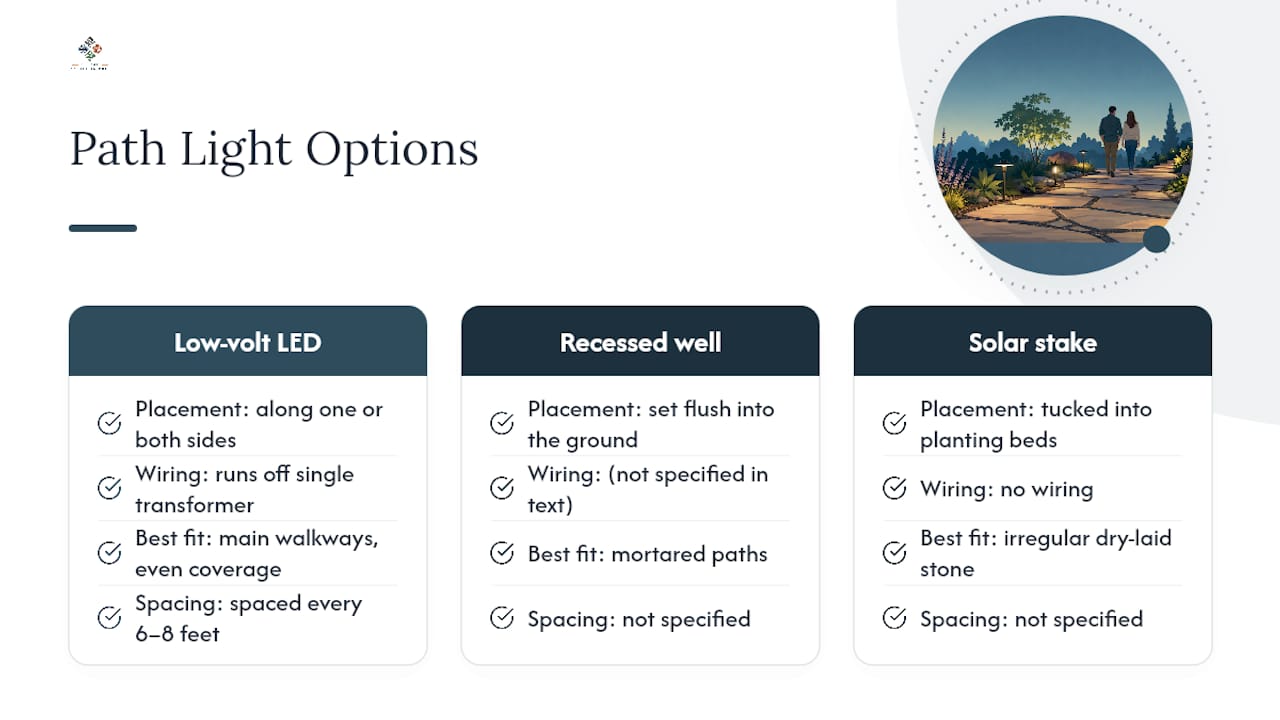
Low-voltage LED path lights, spaced every 6 to 8 feet along one or both sides, give the most even coverage for main walkways and are simple to run off a single transformer. Recessed well lights set flush into the ground work well along mortared paths where you don’t want fixtures interrupting a clean sightline. For irregular dry-laid stone, small solar-powered stake lights tucked into planting beds beside the path add a softer glow without the wiring.
Uplighting nearby trees or architectural features near the walkway creates depth and keeps the path from feeling like an isolated strip of light in a dark yard. Avoid overlighting. A walkway lined with too many fixtures at even brightness reads more like a runway than a garden feature. Warmer color temperatures, in the 2700K to 3000K range, tend to suit stone better than cooler white light, which can make natural material look flat and clinical.
Our custom woodworking and accent lighting work often pairs directly with flagstone installations, since lighting placement is easiest to plan before the stone goes down rather than after.
Making the Walkway Feel Like Part of the Landscape, Not an Add-On
A flagstone path should connect to the features around it, not sit like a strip dropped onto the lawn. Think about sightlines first: where does the path start, where does it end, and what does a person see along the way.
Curving the walkway slightly around an existing tree, garden bed, or boulder outcropping almost always looks more intentional than a straight shot between two points, even when a straight line would be shorter. If the path connects a patio to a side gate or a driveway to a front door, match the transition material and width at each end so the eye reads it as one continuous design rather than three unrelated segments.
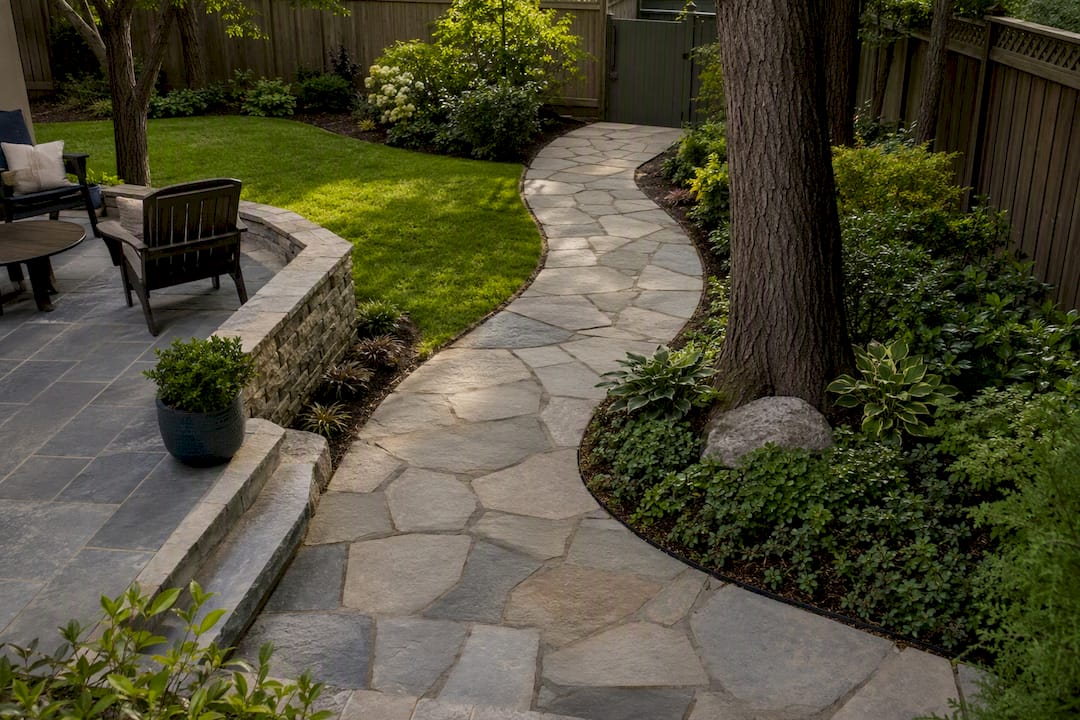
Grade changes matter too. A flagstone path that steps down a slope should use consistent riser heights, ideally no more than 6 to 7 inches between steps, so the rhythm feels natural underfoot. Tie the walkway into drainage features like dry creek beds or rain gardens where the site already collects runoff, since flagstone with open joints can double as part of a broader water management plan rather than fighting against it.
A Contractor’s Take on Aesthetics vs. Longevity
Good flagstone design starts with solving water and movement problems, not with picking a pretty stone. We’ve seen gorgeous stone fail in two seasons because nobody addressed drainage first. We work with each homeowner to match the look they want to a base and budget that will actually hold it in place.
Ty
Get a Flagstone Walkway Built Right the First Time
If you’d rather skip the plate compactor rental and weekend of trial-and-error leveling, Villageprecisionpros installs flagstone walkways and patios across Central Arkansas with the base depth, compaction, and drainage detailing this article walks through, done once and done right.

We handle everything from stone selection through final joint fill, and we build every base to hold up through Arkansas freeze-thaw cycles rather than the bare minimum. Our hardscape and stone masonry team has completed more than 2,000 projects, so we’ve already made (and fixed) most of the mistakes a first-time DIYer runs into.
- Schedule a landscaping consultation to walk your site and talk through layout options.
- Review our working process to see how a project moves from design to finished walkway.
Sources
For more detail on installation specs and cost comparisons, see Fine Homebuilding’s flagstone walkway guide, The Spruce’s flagstone considerations, and our stone pathway project archive for Central Arkansas examples.
- Flagstone Patios and Walkways: What to Know: The Spruce
- How to design and lay a flagstone walkway: Fine Homebuilding
- Flagstone vs Concrete Walkway: Which Is Worth the Cost? PourCanvas
- Flagstone Patio Installation: Complete Guide for Homeowners: D and G Flooring
FAQ
Is Flagstone Cheaper Than Concrete?
No. Stamped concrete typically comes in lower upfront, even though flagstone often ages better.
What Do You Put Between Flagstones on a Walkway?
Common joint fills include polymeric sand for locked, weed-resistant joints, stone dust for easy dry-set refreshing, and gravel or groundcover for a more textured, natural look.
Can I Lay Flagstone Directly on Dirt?
No. Flagstone needs a compacted crushed-stone base, typically 6 to 12 inches deep, plus a sand or stone-dust bedding layer, or it will sink and shift within a season or two.
Does Flagstone Make a Good Walkway?
Yes, flagstone makes a durable, attractive walkway surface as long as it sits on a properly compacted base, with dry-set styles suited to garden paths and mortared surfaces suited to accessible, high-traffic entries.