The fastest way to make a tree read as a warm, three-dimensional nighttime focal point is to use warm 2700K to 3000K LED uplights sized correctly to the tree. Low lumens placed close to the trunk create grazing texture. Wider beams set farther back wash the whole canopy in light. Three techniques do most of the work: grazing for bark texture, canopy washing for volume, and cross-lighting for evenness on larger specimens. Stick to low-voltage LED systems with dimmable drivers so you can adjust output as the tree grows or seasons change. For mature shade trees, tricky grading, or anything involving trenching near utilities, call a professional. The rest of this guide breaks down exactly how to choose fixtures, set beam angles, and place lights so your setup looks designed, not accidental.
Key Takeaways
Effective tree uplighting depends on matching beam angle and lumen output to tree size, placing fixtures at the correct offset distance, and using warm, dimmable LED light for a natural look.
| Point | Details |
|---|---|
| Match lumens to tree size | Use 50 to 150 lm for small ornamentals and 700 to 1,200 lm for large trees, often split across multiple fixtures. |
| Choose beam angle by technique | Narrow beams (15 to 25°) suit trunk grazing; medium to wide beams (30 to 60°+) suit canopy washing. |
| Place fixtures at correct distance | Set lights 1 to 3 feet from small and medium trunks, 3 to 8 feet for large canopies. |
| Use cross-lighting on large specimens | Two to three fixtures at 120-degree offsets remove dark interior pockets in wide canopies. |
| Call in a professional for complex sites | Village Precision Pros handles mature trees, drainage issues, and multi-zone lighting design across Central Arkansas. |
Table of Contents
- Tree Uplighting Ideas Start With the Right Fixture
- How Many Lumens and What Beam Angle Do You Need?
- Where to Place Uplights for the Best Effect
- Creative Uplighting Ideas You Can Copy Tonight
- How to Install Tree Uplighting Safely as a DIYer
- Keeping Your Uplighting Looking Sharp Year After Year
- How Village Precision Pros Designs and Installs Tree Uplighting
- Why Some Trees Uplight Better Than Others
- Smart Controls Make Tree Lighting Easier to Live With
- Reducing Light Pollution From Your Tree Lighting
- Sources
- FAQ
Tree Uplighting Ideas Start With the Right Fixture
Fixture choice determines almost everything else, from how concealed the hardware looks to how long it survives an Arkansas summer. Three fixture families cover nearly every residential tree lighting job:
- Spotlights produce a narrow, directional beam and work best on columnar trunks, palms, and specimens where you want to highlight form over volume.
- Floodlights spread light wider and lower in intensity per square foot, making them the right call for broad canopies, evergreens, or perimeter washing along a tree line.
- Well lights sit flush in the ground, which keeps the fixture itself invisible during the day. They’re the preferred choice for front-yard or high-traffic areas where a visible fixture would look cluttered.
- Tree-mount accents clamp to a branch rather than sitting at grade, useful for downlighting through a canopy, though they demand careful hardware selection so growth doesn’t strangle the mount.
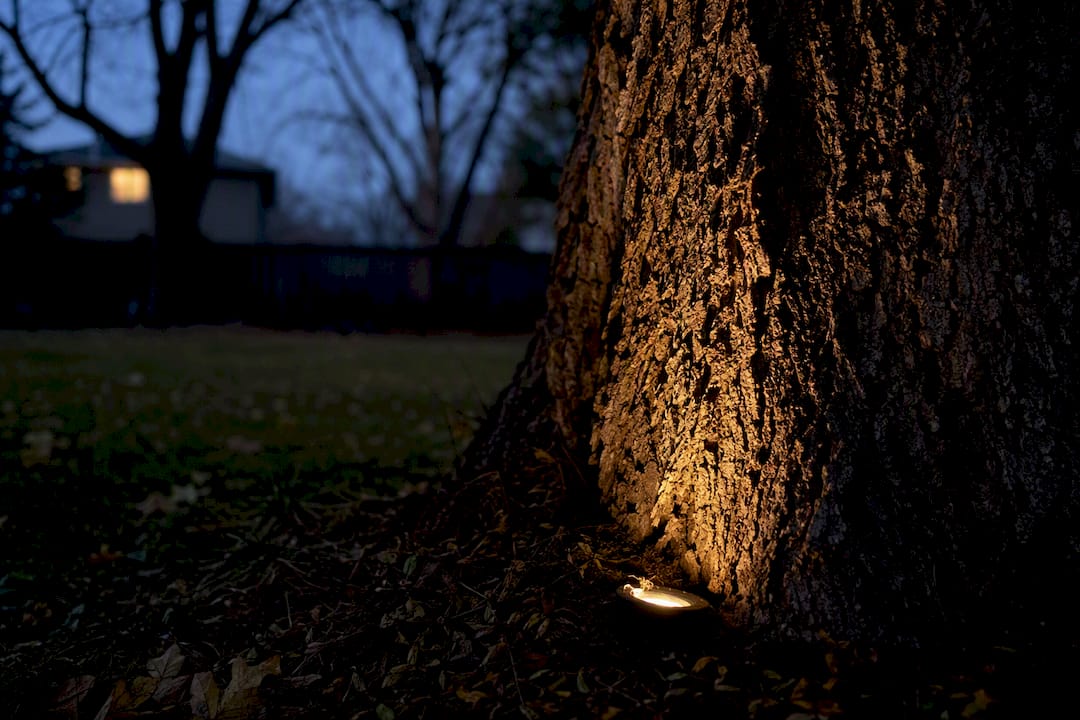
Match the fixture to the tree’s actual shape rather than defaulting to whatever’s cheapest at the hardware store. A narrow spot on a crepe myrtle’s multi-stem base reveals bark texture that a flood would wash flat. A recessed well light tucked near a mature oak in a front bed disappears by day and throws a clean wash by night. Wide floods make sense for large canopies or evergreens where the goal is silhouette rather than detail.
Color temperature matters as much as fixture type. Designers consistently favor warm color temperatures between 2700K and 3000K with high CRI, since anything cooler starts to look clinical against natural bark and leaf color. Aim for a CRI of 90 or higher, and 95 or higher if you can find it, so greens and browns render accurately instead of going flat or gray.
On the wiring side, low-voltage LED systems with dimmable drivers cut both energy use and installation risk compared to line-voltage setups. Look for weatherproof, gasketed connectors rated for direct burial, not just splash resistance. If you’re weighing fixture temperature against the rest of your landscape lighting plan, our breakdown of 2700K versus 3000K landscape lighting covers which fits which yard style.
How Many Lumens and What Beam Angle Do You Need?
Beam angle and lumen output are the two variables that separate a professional-looking install from a floodlit mess. Get either one wrong and the tree looks either underlit or blown out.
Beam angles fall into three practical categories. Narrow beams, roughly 15 to 25 degrees, concentrate light into a tight column that’s ideal for grazing trunk texture or lighting tall, slender specimens like palms. Medium beams, around 30 to 40 degrees, spread light enough to cover a modest canopy without losing punch. Wide beams at 60 degrees or more are built for washing broad canopies or lighting several trees from a single vantage point. Kichler’s landscape lighting guidance frames narrow beams as the tool for trunks and tall forms, with wider optics reserved for canopy coverage.
Lumen output should scale with the size of what you’re lighting, not with how bright you assume outdoor fixtures need to be. Here’s the practical range:
| Target size | Recommended lumen range | Typical beam angle |
|---|---|---|
| Small ornamental (crepe myrtle, dogwood) | 50 to 150 lm | Narrow (15 to 25°) |
| Small tree (young maple, redbud) | 250 lm | Narrow to medium |
| Medium tree (mature ornamental, small oak) | 400 to 700 lm | Medium (30 to 40°) |
| Large tree (mature oak, sycamore) | 700 to 1,200 lm | Wide (60°+), often multiple fixtures |
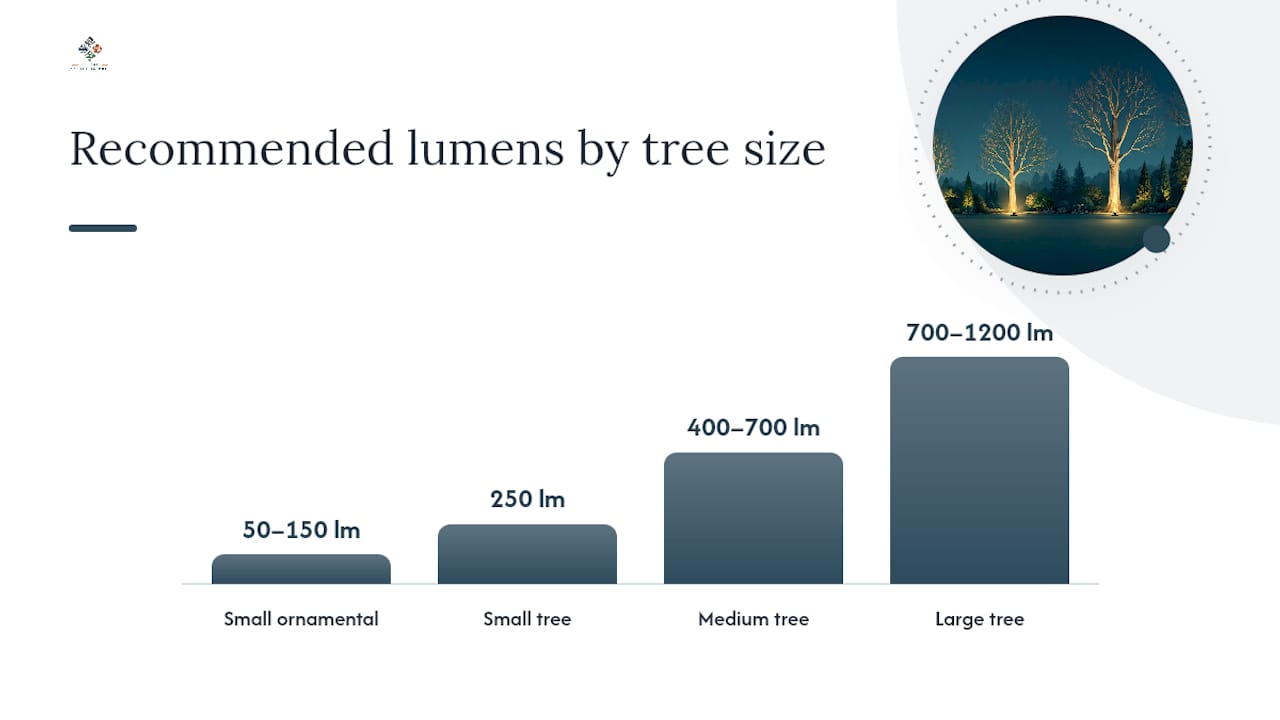
These ranges come from Portfolio Lighting’s landscape lighting lumen guide, and they hold up well in practice. Large trees usually need more than one fixture rather than a single overpowered light, since a lone 1,200 lumen fixture at close range creates hot spots and harsh shadows instead of even coverage.
The rule of thumb: match beam spread to the tree’s angular size from the fixture’s position, not to how bright the box promises. A narrow beam mounted too close to a wide canopy lights only a sliver of foliage. A wide flood mounted too far from a small ornamental washes out the very texture you’re trying to show off. When in doubt, start with less light and add more after testing at night, not before.
Where to Place Uplights for the Best Effect
Placement determines whether the beam actually reaches the canopy or dead-ends against the lower trunk. Get the distance wrong and even the right fixture with the right lumen output looks weak.
For small to medium trees, place the fixture 1 to 3 feet from the trunk. This close range works because the canopy sits low enough that a narrow-to-medium beam can reach it without much horizontal travel. For larger trees, pull back to 3 to 8 feet. The extra distance gives the beam room to spread and enter the canopy at a useful angle instead of just illuminating the trunk’s lower third.
Aim matters as much as distance. For canopy work, angle the fixture toward the first major branch split, typically around a 45 degree angle from the ground. That’s where the tree’s structure actually begins to spread, and lighting that junction makes the whole canopy above it read naturally lit rather than lit from a weird angle.
A few mounting and glare rules keep the install looking intentional:
- Use ground-mounted fixtures or recessed wells rather than strapping lights directly to the trunk, since rigid attachments restrict growth and can girdle the tree over time.
- Leave slack in buried wiring runs near the trunk so root growth and trunk expansion don’t snap a connection years later.
- Add louvers or shrouds on fixtures near sightlines, walkways, or property lines to control spill and glare.
- Check the view from your neighbor’s windows and the street before finalizing placement, not just your own porch.
Pro Tip: Run your fixtures on temporary stakes and test them for two or three nights before you trench anything permanent. Angles that looked right at 6 p.m. often look completely different at 10 p.m. once your eyes adjust to full dark.
Creative Uplighting Ideas You Can Copy Tonight
These setups work as starting recipes. Each one specifies fixture type, beam, lumen range, and placement, so you can replicate the look without guessing.
-
Grazing a textured trunk. Use a narrow spot (15 to 25 degrees) at 50 to 150 lumens, placed less than 1 foot from the trunk, aimed nearly vertical. This works best on trees with exfoliating or deeply furrowed bark, like crepe myrtle, sycamore, or river birch, where structural bark texture is the whole point of the effect.
-
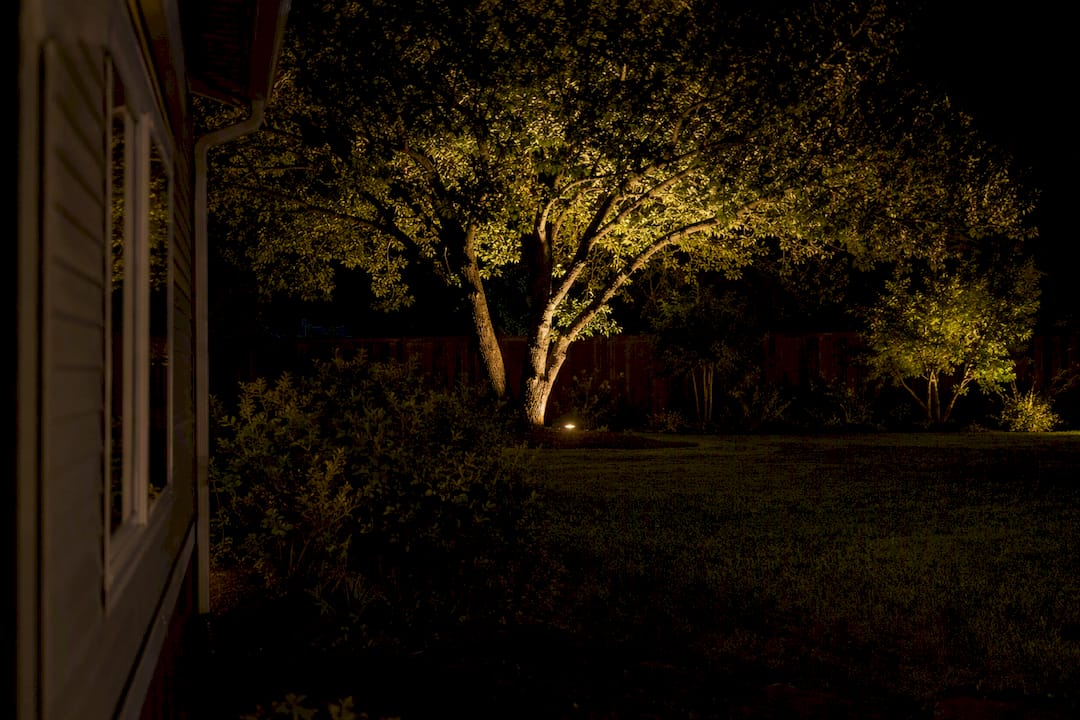
Washing a medium canopy. Use a medium to wide beam (30 to 60 degrees) at 400 to 700 lumens, set 3 to 5 feet back from the trunk, aimed at the first major branch split. This is the standard setup for a single ornamental or shade tree serving as a yard’s centerpiece.
-
Cross-lighting a large specimen. For mature oaks or sycamores, place two to three fixtures at roughly 120 degrees apart, or on opposite sides of the trunk, each running 400 to 700 lumens. Multi-fixture triangulation eliminates the dark interior pockets, sometimes called black holes, that a single fixture always leaves behind on a wide canopy.
-
Vertical uplighting for palms. Palms need a tight, narrow beam running nearly straight up the trunk at low lumens (50 to 250, depending on height), since the goal is emphasizing the trunk’s vertical line rather than lighting fronds.
-
Multi-trunk specimens. Crepe myrtles and river birches often split into three or more trunks near the base. Light each trunk individually with a small narrow spot rather than one fixture trying to cover the whole cluster. It reads as intentional design instead of a single misplaced light.
-
Group or row lighting. For a line of ornamental trees along a driveway or fence, keep fixture placement and lumen output consistent across the row. Inconsistent spacing or brightness is the fastest way to make a row lighting project look unplanned.
-
Integrating with path and step lighting. Tree uplights should sit slightly dimmer than adjacent path lights so the eye is drawn upward into the canopy rather than staying at ground level. For more ideas on blending these elements, see our guide to customizing your landscape with unique lighting.
How to Install Tree Uplighting Safely as a DIYer
A safe, effective DIY install follows a specific order. Skipping steps, especially the mockup phase, is where most home installs go wrong.
- Mock up and test at night first. Stake temporary fixtures and run them off an extension cord before committing to any trenching. Adjust angles and lumen output until the effect matches what you pictured.
- Plan trenching and cable routes. Route low-voltage cable along existing bed lines where possible, and keep runs shallow but protected, typically 6 inches deep for low-voltage wire.
- Size the transformer correctly. Add up the total wattage of every fixture on a run, then check voltage drop across the cable length. Long runs on undersized transformers dim fixtures at the far end unevenly.
- Make and seal connections. Use waterproof, gel-filled connectors rated for direct burial, not electrical tape or indoor wire nuts.
- Final aim and bury. Once you’ve confirmed the angles at night, bury the cable and lock in fixture placement.
Before any of that, run a quick safety check: confirm you’re working with low-voltage (typically 12V) rather than line-voltage wiring, plug transformers into GFCI-protected outlets, and call 811 or your local utility locator before digging anywhere near the tree’s root zone. Some municipalities require permits for permanent outdoor electrical work, so check local codes before you start.
Pro Tip: If you’re lighting a mature shade tree over 30 feet tall, dealing with drainage issues near the root zone, or your property has permit requirements for electrical work, that’s the point where hiring Village Precision Pros saves more time and risk than it costs.
Keeping Your Uplighting Looking Sharp Year After Year
Uplighting isn’t a set-it-and-forget-it project. Trees grow, lenses collect grime, and what looked balanced last spring can look overexposed once the canopy fills back in.
Plan on an annual re-aiming and cleaning pass. Growth shifts branch structure over a single season, and dust or pollen film on a lens can cut light output noticeably without you realizing it until you compare photos.
Dimmability earns its keep here. Full summer foliage absorbs and diffuses more light than bare winter branches, so a setup calibrated for leaf-on conditions often reads as too bright once leaves drop. Adjustable drivers let you dial output down for winter and back up for summer instead of living with a mismatch for months.
On hardware: choose fixtures with an IP65 rating or higher and corrosion-resistant housings, since ground-level fixtures near irrigation or rain runoff take more moisture exposure than typical outdoor lighting. When a fixture fails, check whether you can swap just the LED module rather than replacing the whole housing.
Finally, protect the tree itself. Ground-mounted fixtures and slack wiring prevent the fastener creep that happens when a strap or bracket stays cinched against a growing trunk for years. Route cable runs to avoid root damage during any future digging near the base.
How Village Precision Pros Designs and Installs Tree Uplighting
Since 2020, Village Precision Pros has completed more than 2,000 projects across Central Arkansas, and outdoor lighting is one of the categories where the difference between a DIY attempt and a designed install shows up fastest.
Our typical workflow starts with an on-site consultation to evaluate tree species, canopy height, and existing grading. From there, we mock up fixture placement and test it at night, the same way we’d recommend any homeowner do, before committing to trenching. Installation follows, then we schedule a seasonal follow-up to re-aim fixtures and adjust dimming as foliage changes.
Trees with drainage problems at the root zone or grading that slopes toward the foundation need more than a lighting plan. They need someone who understands how water moves through the yard before any single fixture goes in the ground.
Homeowners tend to call in a professional for three reasons: safety around existing electrical and irrigation lines, grading or drainage complications a lighting plan alone won’t fix, and long-term maintenance planning that a one-time DIY install doesn’t account for.
Why Some Trees Uplight Better Than Others
Not every tree responds to uplighting the same way, and foliage density is usually the reason. Dense evergreens like magnolias or hollies absorb light aggressively, which means you generally need more lumens or closer placement than the same-size deciduous tree to achieve a comparable wash.
Bark texture matters just as much as leaf density. Trees with exfoliating, furrowed, or deeply textured bark, crepe myrtle, sycamore, river birch, respond beautifully to narrow-beam grazing because the technique is designed to catch shadow and relief. Smooth-barked species like young maples don’t offer that same payoff from grazing, so a canopy wash usually looks better on them.
Canopy shape changes your fixture math too. A columnar tree, like many arborvitae or Italian cypress varieties, wants a narrow vertical beam that follows its form. A broad, spreading oak or sycamore wants either a wide flood or multiple medium beams working together to avoid leaving dark gaps in the interior foliage.
Seasonal foliage change deserves special attention if you’re working with deciduous species. A canopy wash calibrated for full summer leaf cover can look strangely bright and exposed once the tree drops its leaves in fall, since there’s far less foliage to diffuse and absorb the light. This is one more argument for dimmable fixtures rather than fixed-output ones. What works against a full canopy in July often needs dialing back by November.
Species-specific quirks are worth researching before you finalize a plan. Multi-trunk trees need individual attention per trunk rather than one fixture trying to cover the whole cluster, while single-trunk shade trees are more forgiving of a single well-placed uplight.
Smart Controls Make Tree Lighting Easier to Live With
Manual on/off switching gets old fast, especially once you have multiple tree uplights running alongside path lights and architectural accents. Smart controls and timers solve the practical problems that come with seasonal daylight shifts and daily habit.
An astronomic timer, which adjusts on and off times automatically based on sunrise and sunset for your location, keeps your lighting schedule accurate year round without you resetting anything each season. Pair that with a smart dimmer or app-controlled driver, and you can drop lumen output during quieter months or brighten things up for a specific event without touching a single wire.
Zoning is where smart controls really pay off on a multi-tree property. Instead of one switch controlling every fixture in the yard, separate zones let you run your street-facing trees at a lower, subtler output while keeping a backyard entertaining area brighter. That kind of control matters more once you’ve got several trees lit differently based on species and placement, which is common on properties with a mix of ornamentals and shade trees.
Most low-voltage LED transformers now come with app or remote compatibility built in, so retrofitting smart control onto an existing install is usually simpler than people expect. The main thing to check before buying is whether your specific transformer and fixture combination supports dimming without flicker, since not every LED driver plays nicely with every dimmer.
Reducing Light Pollution From Your Tree Lighting
Good tree uplighting and responsible outdoor lighting aren’t competing goals. The same discipline that makes a design look professional, restrained lumen output, controlled beam spread, and thoughtful aim, is exactly what keeps light from spilling where it doesn’t belong.
Uplighting is inherently more prone to light pollution than downlighting, because you’re aiming a beam upward into open sky rather than down toward the ground. Shielding and aim control matter more here than in almost any other outdoor lighting category. Glare shields, louvers, and precise aiming keep the beam contained to the canopy instead of scattering into the night sky or a neighbor’s bedroom window.
Warm color temperatures help beyond just aesthetics. Light in the 2700K to 3000K range scatters less in the atmosphere than cooler, bluer light, which means less contribution to overall sky glow. That’s one more reason the same warm-light recommendation that makes trees look natural also happens to be the more neighbor and environment friendly choice.
Timers and dimmers reduce total light output over the course of a night, cutting energy use and unnecessary illumination during the hours when nobody’s outside to see it anyway. Running full brightness from dusk until 2 a.m. rarely serves any real purpose. Scaling down after 10 or 11 p.m. is an easy adjustment that most smart controllers handle automatically.
A short note on design philosophy
Good tree uplighting stays subtle. It should look like the tree is quietly glowing from within, not lit up like a stage. Start dimmer than you think you need, then adjust upward if the effect calls for it.
Let Village Precision Pros Handle the Details
Getting tree uplighting right on your own is doable for a single ornamental tree in a weekend afternoon. It gets harder fast once you’re dealing with mature shade trees, multiple zones, drainage-prone root areas, or a property where several trees need to work together as one cohesive design. That’s where a professional design pass earns its cost back in the first season, both in how the yard looks and in how much rework you avoid later.

Village Precision Pros has installed outdoor lighting across more than 2,000 Central Arkansas projects since 2020, and we handle everything from initial layout and fixture selection to trenching, transformer sizing, and the seasonal re-aiming visits most DIY installs never get. If your property has grading challenges, established trees worth doing right, or you’d simply rather skip the trial-and-error phase, schedule a landscaping consultation and we’ll walk your yard with you before any wiring goes in the ground.
Sources
- Tree lighting | Kichler Lighting
- Landscape lighting lumen guide
- Tree Uplighting Techniques: Beam Spread, Glare, and Fixture Choice
FAQ
What are some good uplights for outdoor trees?
Low-voltage LED spotlights, floodlights, and well lights with dimmable drivers and 2700K to 3000K color temperature work well for most residential trees, with fixture type chosen based on trunk shape and canopy size.
Where is the best place to place uplights on a tree?
Place fixtures 1 to 3 feet from the trunk for small and medium trees, or 3 to 8 feet back for large trees, and aim toward the first major branch split at roughly a 45 degree angle.
What is the best uplighting technique?
There’s no single best technique. Grazing works best for textured bark, canopy washing suits broad medium trees, and cross-lighting with multiple fixtures at offset angles is the standard for large specimens that need even coverage.
How many lumens do I need to uplight a large tree?
Large mature trees typically need 700 to 1,200 lumens total, often split across two or three fixtures rather than concentrated in a single light, to avoid hot spots and uneven coverage.
Recommended
- Outdoor Lighting Ideas for Arkansas Landscapes
- Transform Your Landscape with Unique Outdoor Lighting Ideas
- Patio Enhancement: Key Tips for Style and Functionality
- 2700K vs 3000K Landscape Lighting: Which Fits Your Yard
Uplighting is one piece of a full landscape lighting layout, which we plan before the stone goes down.