
Most finished outdoor kitchens cost between $6,304 and $27,087, with a national average around $16,587, and per-square-foot rates typically landing between $33 and $130. If your budget is modest, plan on a basic grill island or prefab kit. Midrange budgets accommodate built-ins with quality countertops and appliances. Higher budgets allow for custom masonry builds suited to endure diverse climates.
We built these ranges from three sources: HomeAdvisor’s national cost data, installer guidance from Grills on hybrid labor strategies, and design guidance from Yale Appliance on appliance selection and ventilation. The bottom line: your outdoor kitchen cost depends far more on tier and appliance choices than on square footage alone, which is why two projects with nearly identical footprints can land $15,000 apart.
Key Takeaways
Outdoor kitchen cost depends more on build type and appliance choices than on square footage, and a hybrid approach of licensed pros for regulated work plus homeowner DIY for the rest typically delivers the best balance of savings and safety.
| Point | Details |
|---|---|
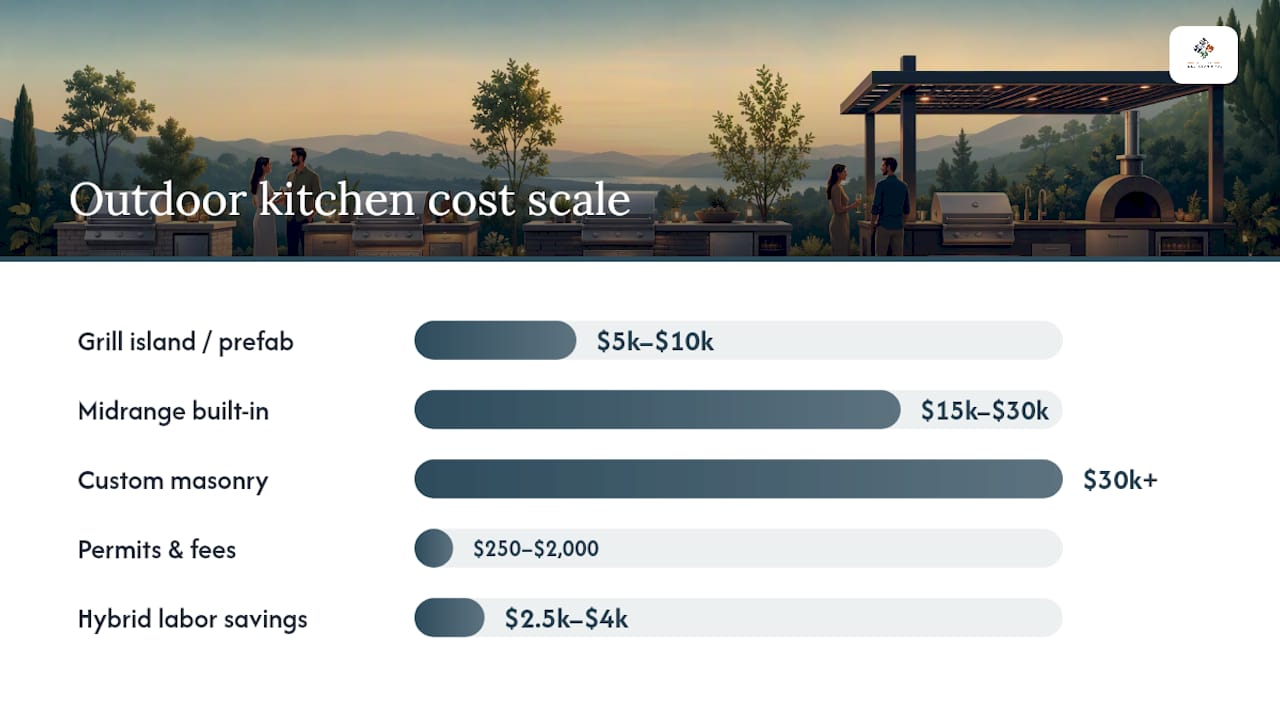
| Set your budget tier first | Match your budget to a build type: $5k–10k for a grill island or prefab kit, $15k–30k for a midrange built-in, $30k+ for custom masonry. |
| Budget for hidden costs | Set aside $250–$2,000 for permits and factor in trenching, drainage, and possible foundation work before finalizing your number. |
| Use the hybrid labor model | Hire licensed pros for gas, electrical, and structural work while DIYing assembly and finish tasks to save $2,500–$4,000. |
| Get three itemized bids | Build a spec sheet listing exact appliances and materials so every contractor bids on the same scope. |
| Work with a site-first local pro | Villageprecisionpros walks your site for drainage and foundation issues before estimating, based on over 1,750 completed Central Arkansas projects. |
Where to Verify These Cost Ranges
These figures come from a small set of sources worth bookmarking if you want to dig deeper or double-check a number against your own bids.
- HomeAdvisor’s outdoor kitchen cost guide provides the national cost range, average, and per-square-foot benchmarks used throughout this guide.
- Yale Appliance’s design blog covers appliance selection, ventilation requirements, and site-orientation planning in more technical detail.
- Grills.co’s DIY vs. pro breakdown lays out exactly which tasks are safe to DIY and which require a licensed trade.
- This Old House’s build guide explains labor savings percentages and code compliance considerations for DIY projects.
- HireLocal’s setup guide covers resale ROI ranges and overhead structure costs.
Local permit fees, code requirements, and HOA rules vary enough by municipality that you should always confirm current requirements with your local building department before finalizing a budget.
Table of Contents
- What Drives Outdoor Kitchen Cost by Build Type?
- What Does Each Component of an Outdoor Kitchen Cost?
- How Much Does an Outdoor Kitchen Cost Per Square Foot?
- What Hidden Costs Should You Budget for in an Outdoor Kitchen?
- How Can You Lower the Cost of an Outdoor Kitchen?
- How Long Does It Take to Build an Outdoor Kitchen?
- How Do You Choose a Contractor for an Outdoor Kitchen Build?
- What Do Sample Outdoor Kitchen Budgets Look Like?
- Does an Outdoor Kitchen Increase Home Value?
- How Does an Experienced Local Pro Estimate Outdoor Kitchen Cost?
- Sources
- FAQ
What Drives Outdoor Kitchen Cost by Build Type?
Your build type sets the ceiling and floor for your entire budget before you pick a single appliance. Four categories dominate the market, and each one carries a distinct price band, skill requirement, and timeline.
Basic grill station or prefab kit. These run roughly $2,000 to $8,000 and typically include a single built-in grill, a small counter section, and maybe a side burner. Most homeowners assemble these themselves over a weekend, since the modules bolt together and require minimal gas or electrical work beyond what a licensed technician handles in an afternoon. The tradeoff: limited counter space and a boxy look that rarely blends with existing hardscape.
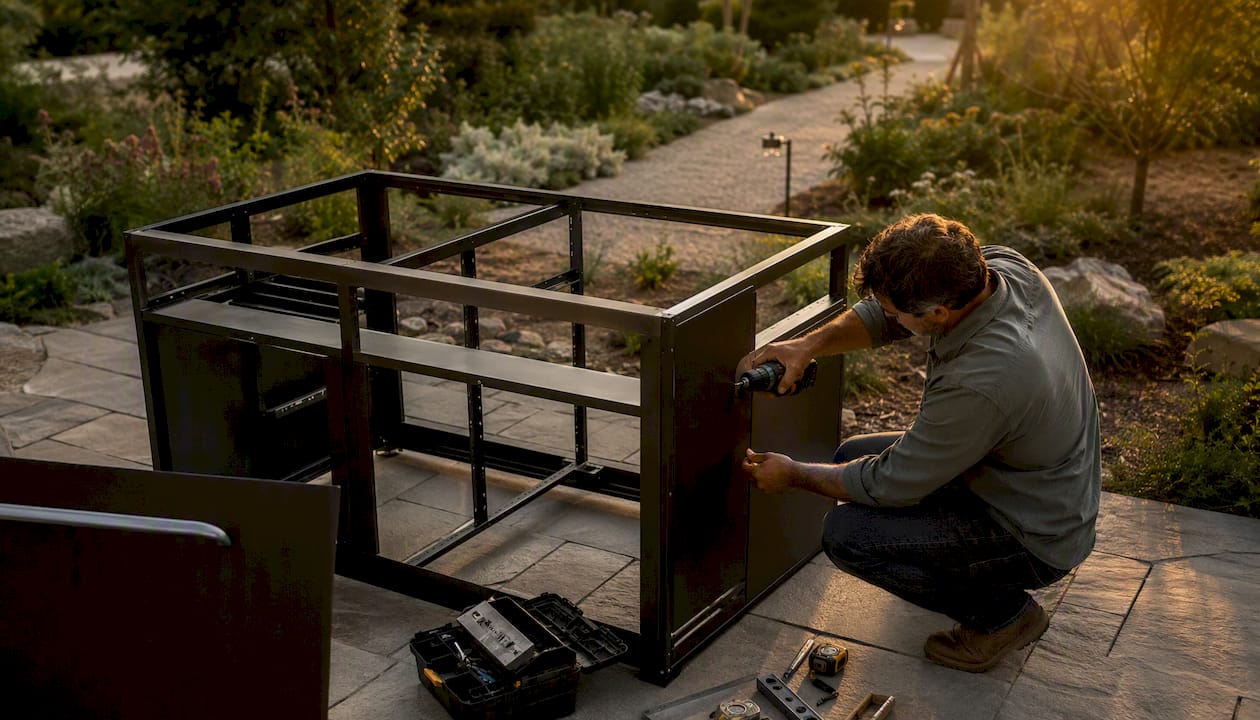
Modular islands. Priced from $6,000 to $18,000, these use factory-built frame sections that get set on a slab and finished with stone veneer or stucco. A hybrid crew, meaning a licensed plumber or electrician for utility connections and a homeowner or general laborer for assembly and finish work, can complete one in a few days once utilities are staged. The look is far more polished than a prefab kit, but you’re still working within the module manufacturer’s dimensions.
Integrated prefab systems. These run $12,000 to $25,000 and bundle a full appliance suite (grill, side burner, refrigerator, sink) into a coordinated cabinet system designed to be installed as a unit. Professional installation is standard here because the utility rough-ins need to align precisely with the cabinet cutouts.
Custom masonry and stone builds. Starting around $20,000 and climbing past $50,000 for elaborate designs, these are built stone-by-stone or block-by-block on-site to match your patio, your slope, and your specific appliance layout. This is where compressive strength and freeze-thaw resistance in your base materials actually matter, since a poorly compacted aggregate base under a custom stone kitchen will crack and shift within a few seasons.
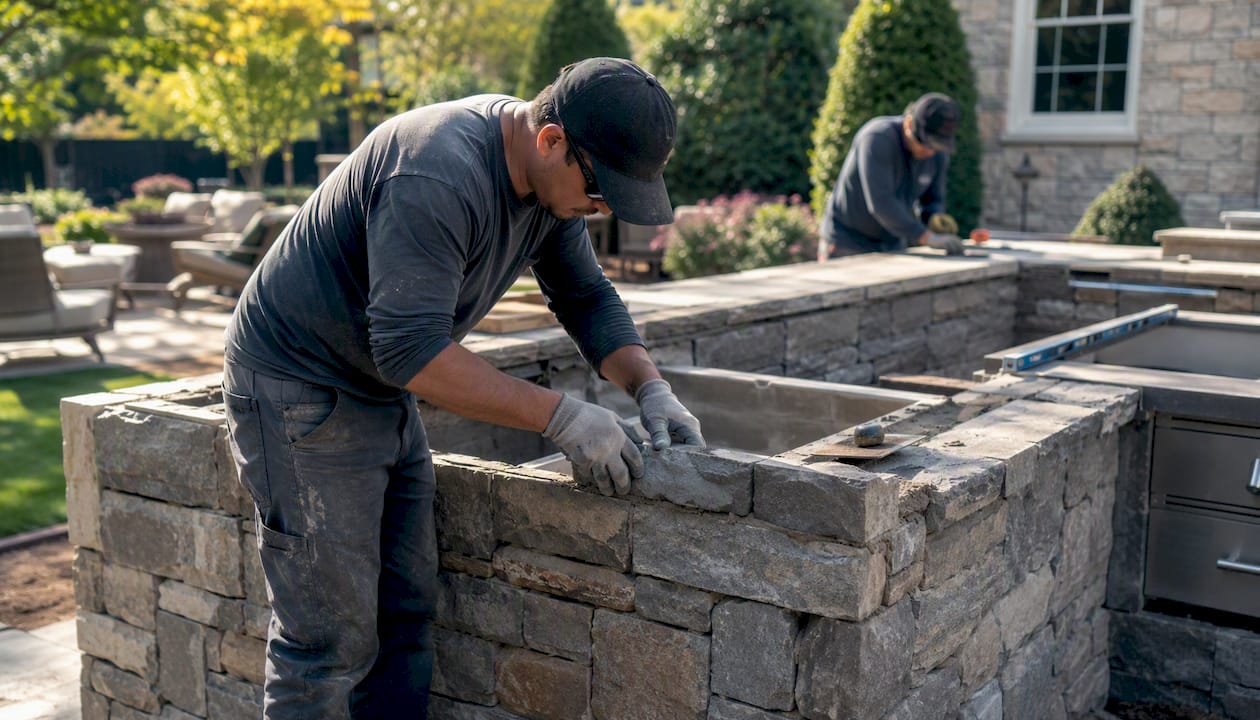
Prefab construction is generally faster and less expensive, while custom work earns its premium on irregular lots, sloped yards, or when you want the kitchen to look like it grew out of the existing patio design rather than sitting on top of it, according to Chonko Construction’s breakdown of how custom builders approach site-specific design.
What Does Each Component of an Outdoor Kitchen Cost?
Line items are where contractor bids start to diverge, and where homeowners get surprised if they only budgeted for a “total number.” Here’s how a typical midrange project breaks down by component.
Material choice moves these numbers more than anything else on the list. Concrete countertops cost a fraction of granite but need periodic sealing to resist staining. Stainless cabinetry costs more upfront than treated wood but won’t warp or rot after a wet Arkansas spring. If you’re weighing options, our guide to choosing the right hardscape materials walks through the durability tradeoffs in more depth.
Labor typically represents a significant portion of your total budget on a professionally built project. Licensed plumbers generally charge $45 to $150 per hour, electricians run $50 to $130 per hour, and masons charge $40 to $100 per hour depending on your region and the complexity of the stonework. A project with heavy custom masonry will skew toward the higher end of that labor share, since stonework is slow, detail-intensive work that can’t be rushed without compromising the interlocking joints that keep a stone structure stable through freeze-thaw cycles.
How Much Does an Outdoor Kitchen Cost Per Square Foot?
Per-square-foot pricing for outdoor kitchens generally falls between $33 and $130, and the spread within that range comes down to three factors: appliance density, whether the space is covered, and material grade. A bare-bones grill island with a concrete counter sits near the low end. A fully covered kitchen with a built-in refrigerator, stone veneer, and a stacked-stone bar sits near the top.
- 100 square feet or less: $3,300 to $13,000. Typically a single-run counter with a grill and maybe a side burner. Good fit for smaller patios or condensed backyards.
- 100 to 200 square feet: $6,600 to $26,000. Enough room for an L-shaped layout with a grill, sink, and small fridge, plus counter seating for two or three people.
- 200 to 400 square feet: $13,200 to $52,000. This size supports a full island layout with separated prep and cooking zones, bar seating, and often a covered structure overhead.
- 400+ square feet: $52,000 and up. These are essentially outdoor living rooms with a full kitchen, dining area, and frequently a fireplace or pergola tied into the design.
Layout shape matters almost as much as square footage. An L-shaped kitchen generally delivers more usable counter space per dollar than a straight linear run, because it wraps the cook and lets you separate prep space from the grill zone without adding floor area. A full island costs more per square foot than either, since it needs finished cladding on all sides instead of just the front.
Pro Tip: Before you commit to a footprint, measure your actual grill and appliance dimensions and add at least 24 inches of clearance behind the cook for movement. Homeowners consistently underestimate how tight a “generously sized” 8-foot counter feels once a grill, a sink, and a mini fridge are actually installed.
What Hidden Costs Should You Budget for in an Outdoor Kitchen?
Permits and site prep are where outdoor kitchen budgets quietly blow past their original estimate. Plan on $250 to $2,000 in combined permit fees once you account for building, plumbing, and electrical permits together, with individual permits often running $50 to $500 depending on your municipality. Some jurisdictions bundle these into one fee; others require separate applications and separate inspections for each trade.
Beyond permits, watch for these frequently overlooked line items:
- Gas line trenching from your existing supply, which can add $500 to $2,000 depending on distance and whether you’re crossing a patio or driveway.
- Electrical panel upgrades if your existing service can’t support new circuits, adding $500 to $2,500.
- Sewer or drain connections for a sink, which may require tying into existing plumbing at $500 to $1,500.
- Structural footings for anything load-bearing, especially under a full masonry island or a covered structure.
- Grading and drainage work to keep water from pooling under the kitchen slab, which becomes critical if your yard has any slope or clay-heavy soil.
- Tree removal or root work if your ideal footprint sits near existing landscaping.
- HOA approval fees or design review costs, which some communities require before you can pull a building permit at all.
Homeowners typically pull permits themselves for straightforward add-on projects, but contractors usually handle permitting on larger custom builds since they know exactly which inspections the local building department requires and in what order.
Pro Tip: Call your local building department and your HOA (if you have one) before you finalize a design, not after. Gas line placement, setback requirements, and overhead structure restrictions vary enough between municipalities that a design that’s perfectly legal three streets over might need a redesign in your neighborhood. If you’re adding a permanent roof or pergola, budget an extra $2,000 to $10,000 for the structure itself, and know that a covered kitchen usually triggers additional ventilation permitting since any cooking area under a roof needs a properly sized hood and exhaust system.
How Can You Lower the Cost of an Outdoor Kitchen?
The hybrid approach is where most homeowners find real savings without cutting corners on safety. The strategy: hire licensed pros for anything regulated (gas lines, electrical circuits, structural masonry, plumbing) and handle non-regulated tasks yourself. This split can save $2,500 to $4,000 on a typical midrange build while keeping your gas connections and electrical work code-compliant, which matters both for safety and for insurance purposes if something ever goes wrong.
Beyond the hybrid split, several tactics reliably reduce total spend:
- Choose durable mid-range appliances over premium name brands; the performance gap is usually smaller than the price gap.
- Use prefab modules for straightforward runs and reserve custom masonry for the parts of your layout that actually need it, like an irregular corner or a slope transition.
- Defer nonessential features (a pizza oven, a beverage cooler, decorative lighting packages) to a phase two build once the core kitchen is functional.
- Buy major appliances during seasonal sales, typically late summer and early fall when retailers clear grill inventory.
- Consolidate utility routing early so your plumber and electrician can run lines in a single trip instead of two separate site visits.
DIY assembly and finish work can save 20% to 40% of your labor budget, but that savings comes with real risk if you attempt gas or electrical work without a license. Hiring pros for those specific trades isn’t just about code compliance. It’s about avoiding the kind of expensive rework that happens when a DIY gas connection fails inspection and has to be torn out and redone by a licensed plumber anyway.
Appliance quality deserves its own caution here. Cheap, non-rated outdoor appliances frequently rust or fail within two or three seasons of exposure to humidity and temperature swings, according to Yale Appliance’s design guidance. A mid-range appliance built specifically for outdoor-rated stainless construction usually costs more upfront but avoids the replacement cycle that eats into any savings from buying cheap the first time.
How Long Does It Take to Build an Outdoor Kitchen?
A midrange built-in project generally runs six to twelve weeks from initial planning to first cook, though custom masonry builds can stretch past three months once you factor in stone fabrication and multi-trade scheduling. Here’s the typical sequence:
- Planning and design (one to three weeks). Finalize layout, appliance list, and material selections; get a signed contract and permit applications underway.
- Permit review (one to four weeks). Timelines vary heavily by municipality; some approve straightforward add-ons in days, while custom structural work can take a month.
- Ordering appliances and materials (two to eight weeks). Custom countertop fabrication, especially natural stone, is often the longest lead time in the entire project, sometimes running four to six weeks by itself. Hood and vent systems for covered kitchens can add similar lead time.
- Site prep and foundation (three to seven days). Excavation, grading, and slab pour, plus cure time before framing can begin.
- Rough-ins (three to five days). Gas, water, and electrical lines get run and inspected before anything gets covered up.
- Framing and finishes (one to three weeks). Structure goes up, cladding and countertops get installed, and appliances get set into place.
- Final inspection (one to two weeks). Local inspectors sign off on gas, electrical, and structural work.
- Commissioning and first cook (same day). Appliances get connected, tested, and you’re cooking.
Contractor demand spikes hard in spring and early summer across most regions, which stretches timelines and can push your project’s start date back if you’re calling in April looking for a June install. Booking your consultation in late winter, well before peak season, generally gets you a faster start and more flexible scheduling.
How Do You Choose a Contractor for an Outdoor Kitchen Build?
Vetting a contractor properly is the single biggest lever you have over whether your project finishes on budget or spirals past it. Start by confirming licensing and insurance directly, not by taking a contractor’s word for it. Ask for their license number and call your state’s licensing board to confirm it’s active. Ask for a certificate of insurance naming you as an additional insured, and verify workers’ compensation coverage if the crew includes subcontractors.
A trustworthy contractor will hand you a line-item estimate, not a single lump-sum number. That itemized breakdown lets you see exactly what you’re paying for framing versus appliances versus labor, and it’s the only way to compare two bids honestly. If a contractor resists breaking down their number, treat that as a warning sign rather than a formality they’re skipping to save time.
Ask specific questions before signing anything: What warranty applies to labor versus materials? What’s the realistic timeline, including permit review? Who pulls the permits, you or the contractor? Does the contractor subcontract gas and electrical work to licensed trades, or claim to handle it in-house? What’s the change-order policy if you decide to add a side burner mid-project? A contractor who answers these clearly and specifically, without hedging, is generally one who’s run this process enough times to know exactly where things typically go sideways.
Red flags worth walking away from: a contractor who wants full payment upfront, one who can’t produce a current license or insurance certificate, one who quotes a number without ever seeing your site, or one who pressures you to skip permits to “save time.” Get at least three bids for any project over $10,000, and build a simple spec sheet listing exact appliances, square footage, and materials so every contractor is bidding on the same scope. Without that spec sheet, you’re comparing apples to oranges, and the lowest bid is often lowest because it’s missing something the higher bids included.
What Do Sample Outdoor Kitchen Budgets Look Like?
Three scenarios below show how the numbers actually stack up, assuming a straightforward backyard with reasonable access for equipment and no major slope issues.
Budget kit (roughly 80 square feet, open-air, one grill and one side burner):
Midrange built-in (roughly 180 square feet, partially covered, four appliances):
Luxury custom (roughly 350 square feet, fully covered with pergola, full appliance suite):
The line items with the most flexibility are cabinetry finish, countertop material, and secondary appliances like a pizza oven or beverage cooler. The line items where cutting quality tends to backfire are the frame, the gas and electrical rough-ins, and the foundation. A cheaper foundation that cracks under freeze-thaw cycles costs far more to fix later than it saved upfront.
Does an Outdoor Kitchen Increase Home Value?
Outdoor kitchens can return a meaningful share of their cost at resale, though the range reported across the industry is wide: some sources cite recoup figures anywhere from 60% to 200% of the original build cost, depending heavily on local market conditions and build quality. That spread means you should treat any single ROI number with caution. A well-integrated custom stone kitchen in a market where outdoor living is a major buyer priority will land toward the higher end. A mismatched prefab kit bolted onto an otherwise unfinished yard will land toward the lower end if it moves the needle at all.
What actually drives the ROI figure higher is integration, not extravagance. A kitchen that reads as a natural extension of your existing patio and hardscape tends to appraise and show better than a standalone unit sitting in the middle of a lawn. Durable, low-maintenance materials matter too, since buyers touring a home can tell the difference between stone that will outlast them and a laminate surface that’s already showing wear.
When you’re ready to sell, present the kitchen around its functional strengths: covered cooking that extends usable months into shoulder seasons, a layout that actually works for entertaining rather than just looking good in photos, and materials that won’t need replacing in five years. Buyers respond to evidence of durability far more than they respond to a long appliance list.
How Does an Experienced Local Pro Estimate Outdoor Kitchen Cost?
We approach every outdoor kitchen estimate the same way: walk the site first, before a single number gets written down. On a recent Central Arkansas project, a homeowner came to us wanting a covered, 220-square-foot kitchen built onto an existing patio slab. The initial scope looked straightforward: extend the existing hardscape, add a stone island with a grill, sink, and mini fridge, and tie the roofline into the existing porch structure.
During site prep, our crew found the existing slab had settled unevenly on one corner, likely from years of poor drainage beneath it. That discovery changed the plan. Rather than build a stone structure on a foundation that would keep shifting, we recommended foundation leveling and a proper compacted aggregate base before any masonry work started. It added cost and about a week to the timeline, but it avoided the far more expensive problem of cracked stonework two years down the road.
The lesson here isn’t that estimates are unreliable. It’s that a good estimate always includes contingency for exactly this kind of discovery, and a good contractor tells you about it the moment it’s found rather than after the invoice arrives.
It’s the kind of outcome that comes from checking site conditions early rather than assuming a slab is sound just because it looks flat. You can see similar stone-built outdoor kitchen projects across Central Arkansas in our portfolio, including work in Hot Springs where similar drainage and slope conditions shaped the final design.
A Contractor’s Take on the One Step Homeowners Skip
The biggest mistake we see isn’t a bad appliance choice or an overspent budget. It’s homeowners finalizing a layout on paper and never walking it in real life. A countertop that measures fine on a design drawing can feel cramped the moment you’re standing at the grill with a plate in one hand and a drink in the other.
Pro Tip: Before you finalize any layout, tape the full footprint on your actual patio or yard using painter’s tape and walk through your normal cooking motions: grill to counter, counter to sink, sink to seating. If you find yourself squeezing past a taped corner or reaching too far for a utensil, fix it now. It costs nothing to move tape. It costs thousands to move stone.
How Village Precision Pros Helps You Plan an Outdoor Kitchen You Won’t Regret
An outdoor kitchen is only as good as the ground it sits on and the drainage underneath it, and that’s exactly where Villageprecisionpros specializes. Rather than treating your kitchen as an isolated appliance install, we design it as part of your full outdoor space: patio, hardscape, drainage, and structure working together from day one.

If you’re weighing a custom stone build against a prefab kit, our team walks your site, flags drainage or slope issues before they become mid-project surprises, and hands you a transparent line-item estimate rather than a single lump number. We coordinate licensed trades for gas, electrical, and plumbing rough-ins directly, and we handle permitting so you’re not chasing down inspections on your own. Our stone-built outdoor kitchen projects across Central Arkansas reflect over 1,750 completed projects built on that same site-first approach. If you’re ready to see what your specific yard and budget can support, schedule a landscaping consultation and we’ll walk your site with you before you spend a dollar on materials.
Sources
- HomeAdvisor — Build an outdoor kitchen cost guide
- Yale Appliance blog — How to design and build an outdoor kitchen
- Grills
- This Old House — How to build an outdoor kitchen
- HireLocal — Setting up an outdoor kitchen guide
FAQ
What is the average cost to build an outdoor kitchen?
The national average sits around $16,587, with most projects falling between $6,304 and $27,087 depending on build type, size, and appliance count.
Is it cheaper to build or buy an outdoor kitchen?
A prefab kit you assemble yourself is generally the cheapest route, while a hybrid approach, hiring pros for gas and electrical while DIYing assembly, can save $2,500 to $4,000 compared to a fully turnkey professional build.
How much would an outside kitchen cost per square foot?
Expect $33 to $130 per square foot, with the lower end covering basic open-air grill stations and the upper end covering covered, fully appliance-loaded custom builds.
Does an outdoor kitchen increase home value?
Reported resale recoup ranges vary widely, with some sources citing 60% to 200% of build cost depending on market conditions and how well the kitchen integrates with the existing patio and landscape.
How much should I set aside for permits?
Plan on $250 to $2,000 total for combined building, plumbing, and electrical permits, with individual permits often ranging from $50 to $500 depending on your municipality.