The best approach for most homeowners is a low-voltage smart system built around a hub or smart relay, not a string of standalone smart bulbs. A single-zone retrofit with a smart plug works fine for a small patio or a short path run. Once you’re managing multiple zones, long wire runs, or drainage and grading challenges, hiring a pro for a properly commissioned install saves you from callbacks and dim, uneven fixtures years down the road.
TL;DR:
- Using a hub or smart relay offers more reliable control and customization than standalone smart bulbs, especially for multiple zones or complex setups.
- Proper wiring size, transformer capacity, and weatherproofing are crucial for long-lasting, flicker-free performance; undersized wiring remains a common failure point.
- Smart landscape lighting saves energy primarily through precise scheduling, scene control, and dimming, not just LED efficiency, reducing runtime and fixture wear.
- Professional commissioning, including voltage testing and scene validation, is essential for long-term reliability and seamless night-time performance.
- Most systems are best built around 2700K warm white light with carefully aimed fixtures, and integration with existing smart ecosystems enhances convenience and control.
Table of Contents
- What Does Smart Landscape Lighting Actually Include?
- Which Smart Control Method Fits Your Setup?
- How Do You Size and Wire a Landscape Lighting System?
- What Color Temperature and Aiming Strategy Works Best?
- How Do Professionals Commission and Test a Lighting System?
- Low-Voltage or Line-Voltage: Which One Do You Need?
- Does Smart Landscape Lighting Actually Save Energy?
- How Does Smart Lighting Support Home Security?
- Which Smart Home Ecosystems Work With Landscape Lighting?
- How Do You Troubleshoot a Smart Landscape Lighting System?
- How Long Do Smart Landscape Lighting Components Actually Last?
- When Should You DIY vs. Call a Professional?
- How Village Precision Pros Builds Smart Landscape Lighting That Lasts
- Sources
- FAQ
What Does Smart Landscape Lighting Actually Include?
Smart landscape lighting isn’t one product. It’s a layered system of fixture types, each doing a specific job, tied together through an app or hub so you can control brightness, color, and timing from your phone.
Most yards benefit from combining several fixture categories rather than relying on just one:
- Path lights mark walkways and steps for safety, spaced at regular intervals along a route that suit the specific property layout.
- Uplights or spotlights aim upward into trees, columns, or facade textures to create depth and shadow play.
- Bollard lights offer broader, softer illumination for driveways, garden beds, or low retaining walls.
- Well or inground lights sit flush with the ground, ideal for uplighting trees without a visible fixture.
- String or ambient lights wash patios and outdoor living areas in warm, party-ready glow.
Layering means path lights handle wayfinding, uplights add architectural drama, and ambient string lighting makes the patio feel like an extension of the living room. A well-built outdoor lighting scene for entertaining might run path lights at 100%, uplights on trees at 60%, and string lights over the patio at full brightness, while a “late evening” scene dims everything to a quiet 20% for security without glare. An “away” or overnight scene can drop to minimal path lighting only, saving energy while still deterring anyone casing the property.
Which Smart Control Method Fits Your Setup?
Smart control for landscape lighting breaks into three tiers, and the right one depends on how much zoning and scene complexity you actually want.
- Smart plug on the transformer. This is the cheapest way to get app-based scheduling. Plug your existing low-voltage transformer into a smart plug, and you can turn the whole system on or off remotely or set a timer. The catch: everything turns on or off together. There’s no per-fixture dimming, no separate zones, no RGBW color scenes.
- Low-voltage smart controllers. These replace or attach to the transformer and give you per-zone control, often with dimming and RGBW color options. You can run path lights at one brightness while uplights sit at another, all from a single app.
- Hub-based integration. Pairing your lighting controller with a home automation hub unlocks astronomical scheduling (lights that shift automatically with sunrise and sunset times through the year), voice control, and scene libraries you can trigger with one tap.
The tradeoff moves in the same direction as the capability. Smart plugs are nearly maintenance-free. Wireless controllers depend on a stable mesh network and, in some cases, battery-powered sensors that need periodic swaps. Hardwired hub integrations are the most reliable long-term but require more planning during installation.
Pro Tip: If you’re retrofitting an existing low-voltage system, start with a smart plug on the transformer for a season. It tells you how often you actually want to change scenes before you invest in a full controller upgrade.
How Do You Size and Wire a Landscape Lighting System?
Getting the electrical side right is what separates a system that looks great for ten years from one that starts flickering after two.
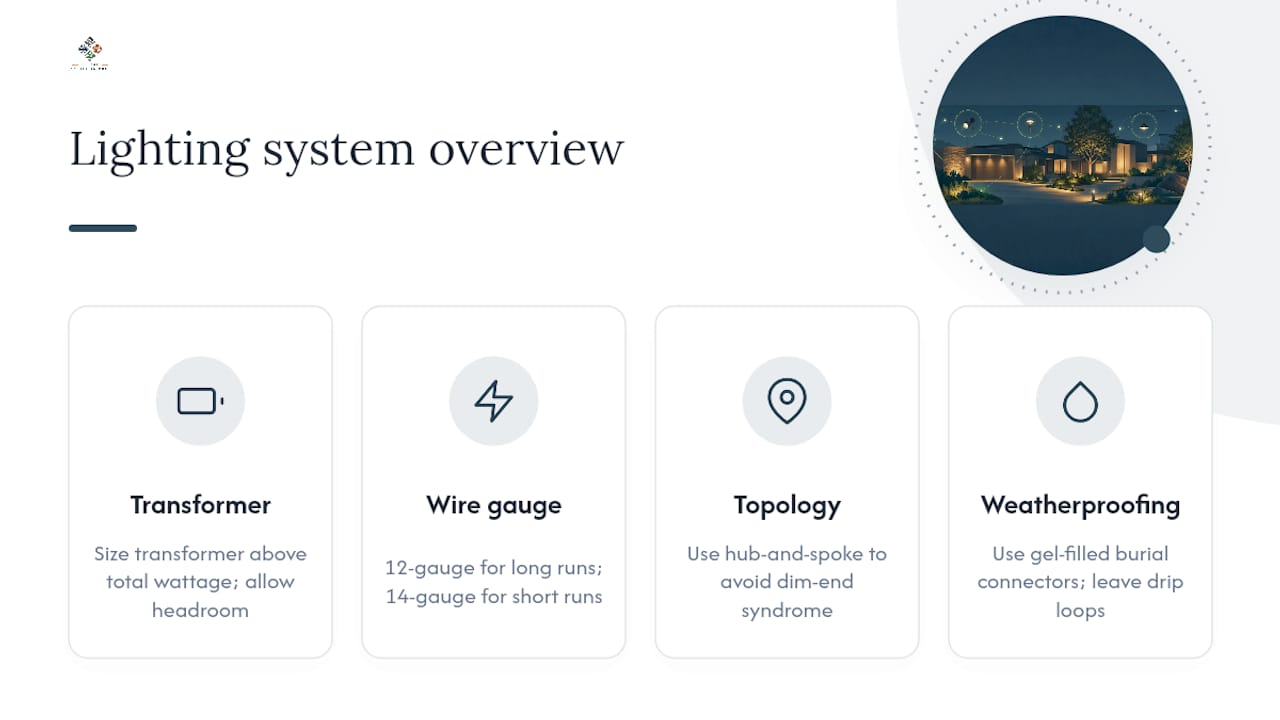
Transformer sizing comes first. Add up the total wattage of every fixture you plan to run, then size your transformer to exceed that total by a recommended safety margin. Installation guides commonly advise allowing some headroom to account for future fixture additions and voltage stability. If you’re running a moderate total wattage of fixtures, you want a transformer rated somewhat higher than that figure to ensure reliable performance and allow for future expansion, and multi-tap transformers give you flexibility to adjust output voltage as your system grows.
Wire gauge matters more than most homeowners expect. Thin cable over a long run causes voltage drop, which shows up as dimmer fixtures the farther they sit from the transformer. As a general cutoff, 12-gauge wire handles longer runs and higher loads, while 14-gauge is fine for shorter runs with fewer fixtures. When in doubt, size up.
Wiring topology affects uniformity across the whole yard. Daisy-chaining every fixture off one long cable run creates what installers call dim-end syndrome, where fixtures near the transformer glow brightly and the last ones in line barely register. Hub-and-spoke wiring, where cable runs out from a central point to multiple shorter branches, keeps voltage more consistent across every fixture.
Weatherproofing is where most systems actually fail. Connections at wire splices, not the fixtures themselves, are the most common failure point once moisture gets in. Use gel-filled or heat-shrink connectors rated for direct burial, bury cable at a consistent depth, leave a drip loop at every connection so water runs off instead of into the fitting, and place your GFCI outlet somewhere it stays dry and accessible for testing.
Skipping any one of these steps rarely causes an immediate problem. It shows up 18 months later as a dead zone in your yard that takes a full afternoon to diagnose.
What Color Temperature and Aiming Strategy Works Best?
2700K is the color temperature to build your whole system around. This warm white tone renders foliage, stone, and wood tones naturally, while cooler temperatures in the 4000K-plus range can look sterile and clinical against a night sky. If you’re torn between close options, our breakdown of 2700K versus 3000K landscape lighting walks through exactly where each one fits.
Beam angle and mounting distance do more work than most people realize:
- Narrow beam angles (around 15 to 25 degrees) create dramatic uplighting on tall trees, emphasizing bark texture and canopy shape.
- Wide beam angles (35 degrees or more) wash broader surfaces like walls or garden beds evenly.
- Mounting distance from the trunk or wall changes the shadow pattern. Closer fixtures create tighter, more dramatic light cones; fixtures set farther back spread softer, more even coverage.
Scene mapping means deciding in advance which fixtures belong together. Your “entertaining” scene might combine full-brightness path and patio lighting with moderate tree uplighting, while your “quiet evening” scene dims everything except a soft wash near seating.
Glare control matters just as much as brightness. Shield fixtures with hoods or louvers, aim them away from windows and neighboring property lines, and favor fixtures with cutoff optics that direct light down and out rather than spraying it sideways.
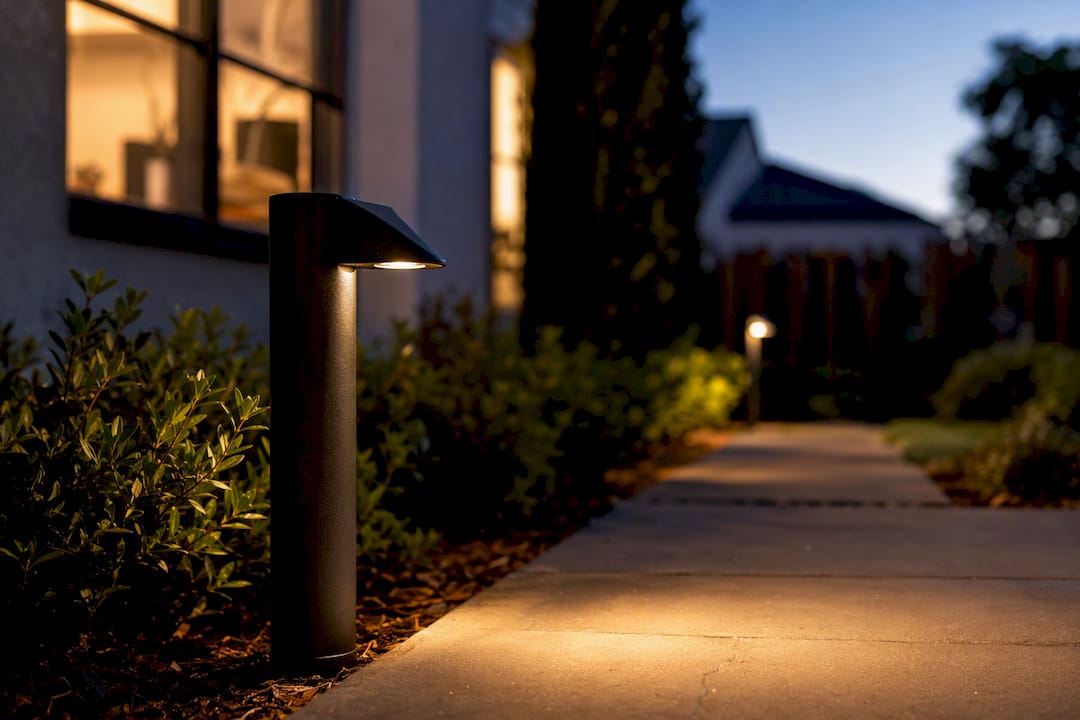
Pro Tip: Walk your own property after dark from the street, from a neighbor’s yard if possible, and from inside your house. Light that looks perfect from the fixture’s base can glare straight into a window from ten feet away.
How Do Professionals Commission and Test a Lighting System?
Commissioning is the step that separates a lighting system that performs for a decade from one that limps along with dim spots and confused scenes. Professionals treat it as an essential project phase, not an optional finishing touch, because skipping it undermines both scene performance and long-term reliability.
A proper commissioning checklist runs through several distinct steps:
- Loaded-voltage checks. Test the system with every fixture running simultaneously, not one at a time, since voltage behaves differently under full load.
- Night-time aiming from real viewpoints. Final aiming should happen after planting and paving are substantially complete, walking the property after dark rather than relying on a drawing.
- Control verification. Confirm every scene, timer, and astronomical schedule fires correctly across a full day and night cycle.
- Recorded acceptance evidence. Document fixture IDs, loaded voltages, and photos of each aimed fixture so future troubleshooting isn’t guesswork.
Ongoing maintenance follows a simple rhythm: inspect wire splices and gaskets each spring for moisture intrusion, check controller firmware and backup settings, and export or back up your scene files before any app or hub update. An annual maintenance plan that includes a seasonal lighting check catches these small failures before they become dark zones in your yard.
Low-Voltage or Line-Voltage: Which One Do You Need?
Low-voltage systems, typically running at 12 volts through a step-down transformer, are the right call for the vast majority of residential landscape lighting projects. They’re safer to install and maintain since the reduced voltage poses far less shock risk, the fixtures and cable cost less, and they pair naturally with smart controllers designed around low-voltage output.
Line-voltage (120-volt) landscape lighting exists for a narrower set of situations. Large properties need it for lighting spread across distances where voltage drop on low-voltage cable becomes impractical to manage. Certain fixture types, like larger area floods for a big backyard or lighting mounted on a barn or detached structure far from the house, sometimes call for line voltage simply because the run length or wattage demand exceeds what a 12-volt transformer setup handles efficiently.
The tradeoff is real: line-voltage wiring requires conduit in many jurisdictions, needs a licensed electrician for code-compliant installation, and doesn’t integrate with the wide range of consumer smart controllers built for the low-voltage market. If your project involves a standard yard, a patio, a walkway, and some tree uplighting, low-voltage is the more flexible and more automation-friendly choice. Save line voltage for genuinely large-scale or long-distance lighting needs, and bring in a licensed electrician when that’s the direction you’re headed.
Does Smart Landscape Lighting Actually Save Energy?
Smart control saves energy in landscape lighting through scheduling precision, not just LED efficiency. LED fixtures already use a fraction of the power older halogen landscape lights consumed, but the bigger savings come from lights that run only when they need to.
Astronomical scheduling, tied to your local sunrise and sunset times, adjusts automatically through the year so your lights never run longer than necessary. A manual timer set for winter darkness keeps burning through the longer daylight hours of summer unless someone remembers to reset it. A hub-driven system handles that shift on its own.
Dimming adds a second layer of savings. Running path lights at 60% for a quiet weeknight instead of full brightness cuts power draw noticeably, and LED fixtures dim without the flicker or color shift that plagued older lighting technology. Zone control means you’re not lighting the whole backyard when only the patio is in use.
The upfront cost of a smart controller or hub is higher than a basic mechanical timer, but the combination of precise scheduling, dimming, and zone isolation typically pays that difference back over the life of the system through lower runtime and reduced fixture wear. Fixtures that run at partial brightness most nights also tend to last longer before their diodes degrade.
How Does Smart Lighting Support Home Security?
Landscape lighting and home security overlap more than most homeowners realize, but smart systems work differently than the motion-triggered floodlights most people associate with security. Smart landscape lighting emphasizes scenes and consistent schedules rather than sudden bright flashes, and that steady presence is often more effective at deterring anyone considering your property.
A yard with path lights and modest uplighting running every evening looks occupied and cared for. Irregular darkness, or a house that’s obviously running a timer set for one season regardless of the actual sunset, signals the opposite. Astronomical scheduling keeps that consistency intact automatically.
Integration with a home security system adds another layer. Many hubs let you trigger landscape lighting scenes from security events, so a triggered door sensor or camera motion alert can bump your exterior lighting to full brightness instantly rather than waiting on a separate motion-sensor floodlight to catch up. Some homeowners also link an “away” scene to their security system’s arm/disarm status, dimming interior-facing ambient lights while keeping path and perimeter lighting active.
The security case for smart landscape lighting isn’t about replacing dedicated motion floodlights near entry points. It’s a complementary layer: your scene-driven ambient system handles the nightly baseline of visibility and presence, while dedicated security lighting still handles the sudden, bright response to actual motion.
Which Smart Home Ecosystems Work With Landscape Lighting?
Most smart landscape lighting products on the market today are built to integrate with the three dominant ecosystems: Amazon Alexa, Google Home, and Apple HomeKit. Which one matters to you depends on what you’re already running indoors, since landscape lighting rarely stands alone.
Philips Hue’s outdoor product line is a clear example of how this integration works in practice. Their weather-rated outdoor fixtures are documented to support app control and scene functions while working within a broader smart-home ecosystem, letting you group outdoor path lights and uplights into the same scenes and voice commands you already use for indoor lighting.
Before buying any smart landscape fixture or controller, check three things: which ecosystems it natively supports, whether it needs a proprietary hub or bridge device to function, and whether firmware updates happen automatically or require manual intervention. A controller that only works through its own standalone app, with no Alexa, Google Home, or HomeKit bridge, limits you to a separate app just for your yard instead of one unified control point for your whole house.
If you’re starting from scratch and haven’t committed to an ecosystem yet, pick the one tied to whatever voice assistant or smart display you already use daily. Landscape lighting should fit into your existing routine, not create a second app you forget to open.
How Do You Troubleshoot a Smart Landscape Lighting System?
Most smart landscape lighting problems trace back to one of three sources: connectivity, power, or the physical connection at the fixture.
Connectivity issues show up as delayed responses, scenes that partially trigger, or fixtures that drop off the app entirely. Wireless mesh range is the usual culprit. If fixtures at the far end of your yard sit outside your router’s range, add a mesh extender or move to a wired controller for that zone rather than fighting the signal.
Power and voltage problems look like dim fixtures, flickering, or lights that work fine near the transformer but fade toward the end of a run. This almost always traces back to undersized wire gauge or a daisy-chained run that’s too long, both of which point back to the wiring topology decisions made at install.
Physical connection failures are the most common cause of a fixture going dark entirely. Moisture intrusion at a wire splice corrodes the connection over time, even with decent connectors, especially in the constant wet-dry cycling that ground-level fixtures endure. If one fixture drops out while its neighbors keep working, check that connection first before assuming the fixture itself failed.
A quick diagnostic order saves time: check the app for a connectivity error first, then test voltage at the fixture with a multimeter if you have one, then physically inspect the nearest splice. Skipping straight to “replace the fixture” is the most common wasted step, since fixtures fail far less often than the connections feeding them.
How Long Do Smart Landscape Lighting Components Actually Last?
LED fixtures themselves are the most durable part of any smart landscape system, often running for a decade or more before the diodes degrade noticeably. The components that fail first are almost always the connections, the electronics, and anything with a battery.
A seasonal maintenance routine keeps the system running at full performance:
- Inspect wire splices and gaskets each spring for signs of moisture intrusion or corrosion.
- Check any battery-powered wireless sensors or bridges and replace batteries proactively rather than waiting for a failure.
- Export or back up scene files and controller settings before any firmware update, in case the update resets custom configurations.
- Clean fixture lenses of dirt, algae, or mineral buildup from sprinklers, which dims output more than people expect.
- Confirm GFCI outlets and transformers still trip and reset properly, since a failed GFCI can silently cut power to an entire zone.
Smart controllers and hubs typically have a shorter functional lifespan than the fixtures they run, often five to eight years before a manufacturer stops supporting the app or hardware. Budgeting for a controller refresh at that interval, while keeping the same low-voltage wiring and fixtures in place, is usually far cheaper than a full system rebuild.
When Should You DIY vs. Call a Professional?
A single-zone retrofit, a smart plug on your transformer, or a short path light run along a small walkway are reasonable DIY projects for most homeowners. Starter kits that bundle fixtures, transformer, and connectors make that entry point genuinely practical.
Call a professional once you’re dealing with multiple zones, long cable runs across drainage or grading challenges, or a property where uneven ground complicates burial depth and cable routing. Ask any contractor how they handle loaded-voltage testing, night-time aiming, and what documentation they hand over at completion. If they can’t describe a commissioning process, that’s a red flag worth taking seriously.
— Ty
How Village Precision Pros Builds Smart Landscape Lighting That Lasts
A commissioned system with loaded-voltage testing, night-time aiming, and documented handover instead of a controller box zip-tied to a fence post is the alternative to a rushed DIY patch job for outdoor lighting in Central Arkansas. Lighting design alongside the hardscape it lives on includes planning wiring runs before pavers go down to avoid squeezing them in afterward.

Our Woodworking & Lighting service covers fixture layout, transformer sizing, and smart control integration, and it pairs naturally with a new patio or deck project or a full hardscape build where lighting and stonework get designed together from the start. An initial visit typically involves walking the property, mapping zones and scenes to how the yard is used, with a written plan developed before any trenching starts.
For homeowners who want the system checked and adjusted with the seasons, our annual maintenance plans include the kind of seasonal lighting inspection that catches a failing splice before it becomes a dark zone. Reach out for an estimate and we’ll walk your property together to map out where every fixture belongs.
Sources
- Engineerskill
- Outdoor LED Landscape Lighting Commissioning Checklist | Synno
- Landscape Lighting Benefits: Why Every Homeowner Should Light Up Their Yard | VOLT® Lighting
FAQ
What Is the Best Smart Lighting System for a First-Time Buyer?
For most first-time buyers, a low-voltage system with a smart plug or a basic low-voltage controller is the best starting point. It gets you app scheduling and remote control without the cost or complexity of a full hub integration, and you can add zones or a hub later as your needs grow.
How Do I Install Smart Outdoor Lights Myself?
Start with a low-voltage kit that bundles fixtures, transformer, and connectors, size the transformer with roughly 20% headroom above your total wattage, and add a smart plug or low-voltage controller for app control. Test the system fully loaded and at night before finalizing fixture placement, since aiming looks very different after dark than it does on paper.
Does Village Precision Pros Install Smart Landscape Lighting?
Yes, Village Precision Pros designs and installs smart landscape lighting as part of its Woodworking & Lighting service, often integrated with patio, deck, and hardscape projects. Pricing varies based on zone count and site conditions; current estimates can be found on the company’s website.
What Color Temperature Should I Choose for Landscape Lighting?
2700K is the recommended color temperature for most landscape lighting because it renders foliage, stone, and wood tones naturally without the harsh look cooler temperatures produce at night. Our 2700K versus 3000K comparison breaks down which fits specific yard styles.
Why Did My Smart Landscape Lights Stop Responding to the App?
Unresponsive fixtures usually trace back to a wireless mesh range issue, a power interruption at the transformer, or a corroded wire splice feeding that zone. Check the app for a connectivity error first, then inspect the nearest splice for moisture intrusion before assuming the fixture itself has failed.