

A dry creek bed will solve your drainage problem when you have concentrated surface runoff, a visible downhill slope, and a stable outlet on your own property. If water pools in a flat yard, seeps through your foundation, or has nowhere to go except a neighbor’s lot or the street, a creek bed alone won’t fix it — you need subsurface drainage or a grading correction first.
When a dry creek bed is the right fix:
- Roof or downspout runoff cutting rills across a lawn or planting bed
- A slope that concentrates flow and causes erosion at one point
- A defined flow path from a high point to a low point you can terminate safely on your property
When it won’t be enough:
- Standing water in a flat yard with no natural outlet
- Subsurface groundwater or a high water table pushing up through soil
- Flow that originates off your property and arrives at volume
- No legal outlet available on your side of the property line
Before you dig anything, run a hose test or watch the yard during a real storm. If water reaches your foundation or crosses onto a neighbor’s property, treat the situation as higher-risk and call a drainage contractor before proceeding.
Key Takeaways
A dry creek bed solves concentrated surface runoff reliably when it has adequate slope, correct stone sizing, and a legal outlet on your property — without those three elements, the system will underperform or fail.
| Point | Details |
|---|---|
| Surface runoff only | Dry creek beds move water above grade; subsurface groundwater requires a French drain or dry well. |
| Slope and sizing matter | Aim for 0.5%–5% longitudinal slope; size channel width and depth to the contributing area (under 0.25 acres: 2–3 ft wide, 6–12 in deep). |
| Permits are site-specific | Municipal connections and significant grading almost always require a permit; get written confirmation from your building department. |
| Termination is non-negotiable | End in a rain garden, dry well, or stable vegetated area on your property — never discharge to the street or a neighbor’s yard. |
| Villageprecisionpros | Offers professional dry creek bed design, installation, and permit assistance for Central Arkansas homeowners. |
A contractor’s perspective on what actually goes wrong
The most common mistake we see on DIY dry creek beds is a flat grade with no real outlet. The homeowner digs a trench, fills it with rock, and the water sits there. It looks like a drainage feature, but it functions like a decorative pond. The second most common problem is undersized rock — pea gravel or small decorative stone that migrates with the first real storm and clogs the fabric underneath within a season.
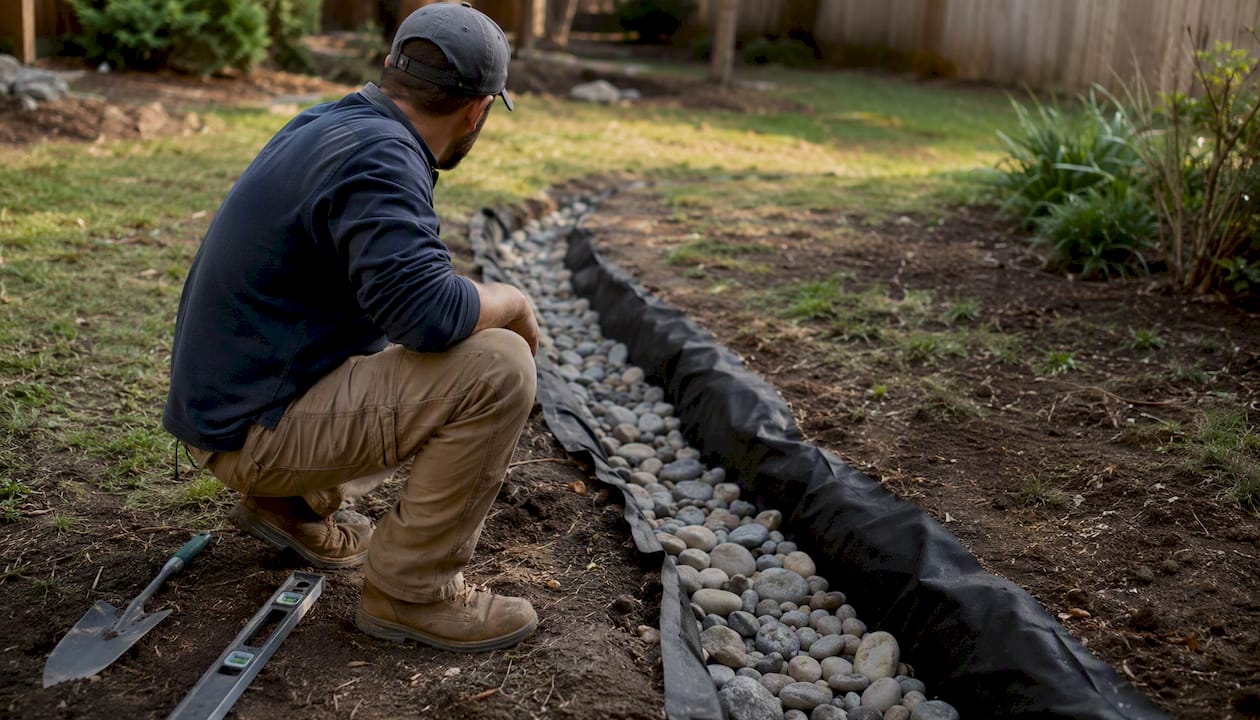
When our crews assess a site, the first three things we check are the catchment area (how much water is actually entering the system), the available slope from inlet to outlet, and whether a legal outlet exists on the property. If any of those three are missing or marginal, we address them before we talk about rock sizes or planting.
The value homeowners get from a professional install isn’t just the labor. It’s the site read — knowing that the channel is sized correctly for the actual contributing area, that the fabric is commercial-grade and properly lapped, that the outlet won’t cause erosion or a neighbor dispute, and that the system will still be working five years from now without a full rebuild. Over 1,750 projects in Central Arkansas have taught us that the details that seem minor during construction are exactly the ones that determine whether a drainage feature holds up or fails.
Table of Contents
- What is dry creek bed drainage and when should you use it?
- Do you need a permit for a dry creek bed?
- Materials and tools you need for a dry creek bed
- How to build a dry creek bed step by step
- Where should your dry creek bed end?
- Dry creek bed vs. French drain: which one fits your problem?
- Design tips and plant choices that keep the creek looking natural
- How to maintain a dry creek bed and fix common problems
- What does a dry creek bed cost and how long does it take?
- When should you hire a landscaper or drainage contractor?
- Villageprecisionpros handles the drainage work you shouldn’t DIY
- Sources
- FAQ
What is dry creek bed drainage and when should you use it?
A dry creek bed is a shallow, fabric-lined channel filled with mixed stone that carries surface runoff during rain events and sits dry the rest of the time. The rock-lined trench channels surface water, slows flow velocity, and reduces erosion — all while functioning as a landscape feature that looks like it grew out of the ground naturally.
The channel serves four practical functions: conveyance (moving water from point A to point B), energy dissipation (slowing fast-moving flow so it doesn’t scour), temporary storage (holding a pulse of runoff while it infiltrates or drains), and filtration (letting fine particles settle before water reaches the outlet).
Where it performs best:
- Channeling concentrated runoff from downspouts, driveways, or roof valleys away from the house
- Fixing rill and gully erosion on slopes where water has already carved a path
- Protecting planting beds from washout during heavy rain
- Improving curb appeal while solving a real functional problem
The feature does not address subsurface groundwater. If your soil is saturated below grade, a French drain or dry well is the right tool. A dry creek bed handles what you can see moving across the surface.
Pro Tip: Follow the water’s existing path. Dry creek beds function best when they trace existing surface flow lines. Forcing a channel across natural contours causes poor performance and stagnation — the water will find its original path anyway.
Do you need a permit for a dry creek bed?
The short answer: sometimes, and the stakes are high enough that you should always ask before you dig. Permits are commonly required when a drainage system connects to the municipal storm sewer or when excavation and regrading exceed local thresholds. Small, self-contained drains entirely on private property are often exempt — but “often” is not “always,” and the rules vary by municipality, county, and state.
At the federal level, the U.S. Army Corps of Engineers’ Section 404 exemptions for drainage ditches distinguish between maintenance of existing ditches and new construction, and the recapture provision requires a case-by-case analysis. Most residential dry creek beds won’t trigger federal review, but work near a wetland, floodplain, or protected waterway can change that quickly.
Planning checklist before you break ground:
- Map the full flow path from inlet to outlet and measure the contributing drainage area.
- Estimate total soil disturbance in square feet or cubic yards.
- Call 811 to locate buried utilities before any excavation.
- Check your local stormwater management ordinance and zoning setback rules.
- Verify outlet legality — you cannot legally discharge to the public street or a neighbor’s property in most jurisdictions.
- Contact your local building department and ask the two questions below.
- If connecting to any public infrastructure, apply for the permit and get written approval before starting.
Pro Tip: Ask your building department two specific questions: “Will this system connect to municipal infrastructure?” and “How much grading or soil disturbance triggers a permit on a residential lot?” Get the answers in writing. That documentation speeds future inspections and protects you at resale.
For projects where runoff reaches the foundation or involves large catchment areas, engineered drainage plans and permits are typically required. Pair your permit research with a yard-level grading assessment — our guide on fixing drainage with yard leveling covers the grading side of that equation.
Materials and tools you need for a dry creek bed
Getting the material list right before you order saves you a second delivery and a wasted weekend. For clay-heavy soils common in Central Arkansas, a compacted base layer under the fabric is worth the extra step — clay drains slowly, and without a stable base, the channel can shift after the first heavy rain.
Essential materials:
- Non-woven geotextile landscape fabric: Commercial-grade, not the thin woven type sold for weed suppression. Non-woven fabric allows water to pass through while keeping soil and rock separated.
- Bedding gravel or compactable base: A 2–3 inch layer of crusher run or compacted aggregate under the fabric stabilizes the channel floor.
- River rock and cobbles: Mixed sizes from 2–6 inches for the main bed surface; 6–12 inch stones for armor at bends and high-energy sections.
- Anchor boulders: Larger stones (12 inches and up) placed at bends, grade breaks, and the inlet to dissipate energy and hold the channel shape.
- Landscape staples: 6-inch or longer staples to secure fabric overlaps, especially on slopes.
Optional but often worth it:
- Perforated pipe or underdrain buried beneath the rock layer when you need added conveyance capacity beyond what infiltration provides
- A catch basin or inlet grate at the entry point where concentrated flow enters from a downspout or paved surface
- Riprap apron at the outlet to protect against scour where water exits the channel
Tools:
- Round-point and flat-point shovels, mattock for clay soils
- Wheelbarrow and hand truck for rock transport
- Plate compactor or hand tamper for base preparation
- String line and line level to establish and check grade
- Safety glasses, gloves, and steel-toed boots
Sizing guidance: For a contributing area under 0.25 acres, a channel 2–3 feet wide and 6–12 inches deep handles typical residential runoff. A catchment of 0.25–0.5 acres calls for a channel 3–5 feet wide and 12–18 inches deep. Keep the center of the channel lower than the edges so water stays in the bed rather than spilling onto the banks. Avoid pea gravel as the primary bed material in any section with real flow — it migrates easily and clogs fabric faster than angular or rounded cobble.
How to build a dry creek bed step by step
A correctly sloped, well-terminated bed with fabric and graded rock will move surface water safely and hold its shape through years of storms. Contractor experience confirms that a visible outlet and energy-dissipating stones are non-negotiable for long-term performance — a creek bed that traps water mid-yard is a mosquito habitat, not a drainage solution.
- Observe and test. Watch the yard during a real storm or run a sustained hose test for 10–15 minutes. Mark where water enters, where it travels, and where it needs to exit. Photograph the flow path.
- Mark the channel. Use marking paint or stakes and string to lay out the channel, following the natural flow line. Gentle curves look more natural and slow velocity better than straight runs.
- Call 811. Before any digging, call 811 to have underground utilities marked. This is required by law in every U.S. state.
- Excavate to grade. Dig the channel so the center is deeper than the edges, creating a slight V or U profile. Aim for a longitudinal slope between 0.5% and 5% — roughly 1/2 inch to 6 inches of drop per 10 linear feet. On slopes steeper than about 4–5%, plan for check dams or stepped boulders to prevent downstream scour.
- Compact the base. Tamp the excavated floor firmly. In clay soils, add a 2–3 inch layer of compactable aggregate and tamp again before laying fabric.
- Lay non-woven geotextile fabric. Drape fabric into the channel with at least 12 inches of overlap at seams and 6–8 inches of overhang on each bank. Secure with landscape staples every 18–24 inches, especially on slopes. The Lowe’s how-to guide recommends commercial-grade landscape fabric and checking local codes before discharge planning.
- Place anchor boulders first. Set the largest stones at bends, grade breaks, and the inlet. These anchor the fabric and define the channel’s skeleton.
- Fill with mixed river rock. Work from large to small, filling the channel with 2–6 inch river rock and tucking smaller stones into gaps. The varied sizes interlock and resist displacement better than uniform stone.
- Install outlet protection. At the termination point, place a riprap apron, direct flow into a rain garden, or connect to a dry well. Never leave the outlet unprotected — bare soil at the exit point will erode within one or two storms.
- Test and adjust. Run a controlled flow through the finished channel with a hose before calling the job done. Watch for spots where water overtops the bank or pools. Adjust rock placement and recheck grade at any problem areas.
Pro Tip: After the first two or three significant storms, walk the channel and clear any sediment that has accumulated at the inlet and at any flat sections. Early sediment removal prevents the fabric from clogging and keeps the channel at full capacity.
Where should your dry creek bed end?
Always terminate on your own property into a stable receiving area. Discharging untreated runoff to the public street or a neighbor’s yard is prohibited in most U.S. jurisdictions and can create liability if it causes downstream damage.
Rain garden
Best choice when your soil has reasonable infiltration capacity and you want the water to soak in rather than run off. A rain garden is a shallow, planted depression that receives the creek’s discharge, holds it temporarily, and lets it infiltrate over 24–48 hours. It adds filtration, supports pollinators, and qualifies as a low-impact development feature in many stormwater programs. Ideal for smaller contributing areas and yards with loamy or sandy-loam soil.
Dry well
A perforated chamber or gravel-filled pit buried below grade that receives concentrated discharge and disperses it into surrounding soil. Good when space is limited and infiltration is desired but a rain garden isn’t practical. Check local stormwater and groundwater rules before installing — some jurisdictions restrict dry wells near septic systems or in high-water-table areas.
Daylight point or vegetated swale
The simplest option: the channel daylights at a stable, vegetated area where the pulse of water can spread and soak in without causing erosion. Works well when you have a large lawn or natural area downslope. Requires a riprap apron or dense groundcover at the exit point to prevent scour. If the daylight point is near a property line, confirm that the discharge stays on your side.
Quick comparison:
- Rain garden: best infiltration, most ecological benefit, requires decent soil drainage and a planted depression
- Dry well: concentrated discharge in tight spaces, needs local code check, less visible
- Daylight/swale: simplest install, needs adequate receiving area and erosion protection at exit
Connecting the outlet to a municipal storm sewer almost always triggers a permit. Avoid it unless you have written approval from your local authority.
Dry creek bed vs. French drain: which one fits your problem?
Use a dry creek bed for surface runoff you can see moving across the ground. Use a French drain when you need to intercept subsurface water, relieve hydrostatic pressure near a foundation, or drain a flat area where surface conveyance isn’t possible.
The distinction matters because the two systems solve different problems. A dry creek bed is a surface conveyance channel — it catches and moves water that is already flowing above grade. A French drain is a subsurface pipe-and-gravel system that intercepts groundwater or perched water moving through the soil profile. Choosing the wrong one means the problem persists regardless of how well you build it.
| Feature | Dry creek bed | French drain |
|---|---|---|
| Water type addressed | Surface runoff | Subsurface / groundwater |
| Visibility | Visible landscape feature | Buried, invisible |
| Slope requirement | Needs 0.5%–5% grade | Needs minimal slope |
| Infiltration | Moderate (depends on rock and soil) | High (perforated pipe to gravel) |
| Foundation drainage | Not suited for foundation seepage | Well-suited |
| Maintenance | Clear sediment and rock annually | Flush pipe, check for root intrusion |
| Aesthetic value | High — doubles as landscape feature | None above grade |
| Typical complexity | DIY-friendly for small projects | More complex; often requires pro |
Quick decision rules:
- Standing water in a flat yard after rain → French drain or dry well
- Concentrated flow cutting across a slope → dry creek bed
- Foundation seepage or wet basement → subsurface solution, often with a French drain and possibly a sump
- Both surface and subsurface issues → combine systems
For a broader look at how these options fit together, our landscape water drainage solutions guide walks through the full decision tree.
Design tips and plant choices that keep the creek looking natural
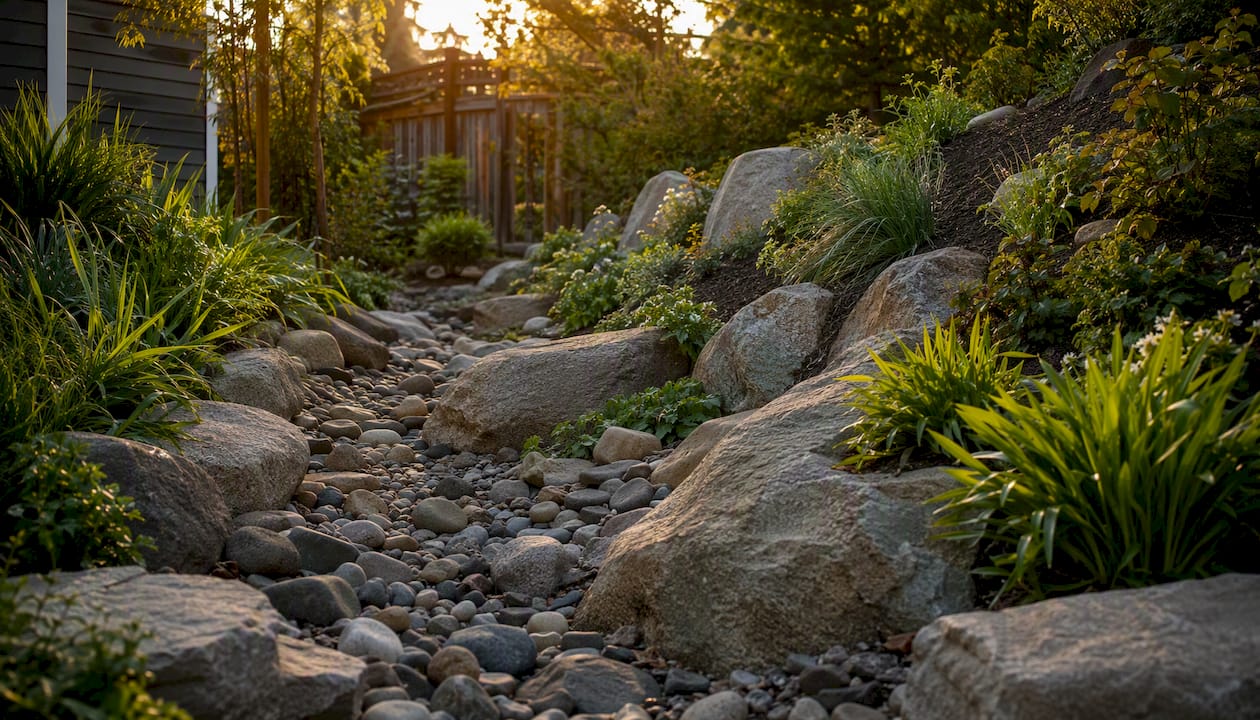
A well-designed dry creek bed looks like it belongs — as if water carved that path over decades. The design choices that create that effect also happen to be the ones that perform best hydraulically.
Core design rules:
- Follow the natural flow line, not a straight line drawn on a plan
- Use gentle curves; place anchor boulders on the outside of each bend where energy is highest
- Keep the center of the channel lower than the edges at every cross-section
- Vary rock sizes visibly — a uniform field of same-size stone reads as artificial immediately
- Group two or three larger boulders together rather than spacing them evenly
Planting by function:
- Erosion control on banks: native grasses and sedges like switchgrass (Panicum virgatum), river oats (Chasmanthium latifolium), or soft rush (Juncus effusus) anchor soil with fibrous root systems without undermining the channel structure
- Edge softening: ornamental grasses such as muhly grass (Muhlenbergia capillaris) and native shrubs like buttonbush (Cephalanthus occidentalis) add seasonal interest and filter fine particles from runoff
- Moisture pockets behind boulders: moisture-tolerant perennials like blue flag iris (Iris virginica) or cardinal flower (Lobelia cardinalis) thrive in the slightly wetter microclimate behind anchor stones
- Low-maintenance groundcover: creeping Jenny (Lysimachia nummularia) or native violets fill gaps between rocks and suppress weeds without deep roots that could displace fabric
Choose species suited to your USDA hardiness zone and your soil’s infiltration capacity. Central Arkansas falls primarily in zones 7b–8a, which supports a wide range of moisture-tolerant natives. Avoid planting large trees within 6–8 feet of the channel banks — deep tap roots can lift fabric and displace rock over time. For more planting ideas that pair well with creek beds, our low-maintenance landscaping ideas for Arkansas yards covers species selection by zone.
Pro Tip: Plant in pockets directly behind anchor boulders, not in the channel floor. The boulder breaks flow velocity and protects the root zone from being washed out during heavy rain. Plants placed in the channel itself rarely survive the first significant storm.
How to maintain a dry creek bed and fix common problems
A properly built creek bed needs minimal attention, but “minimal” is not “none.” Sediment accumulates at inlets and flat sections, rocks migrate during high-flow events, and fabric can shift if staples fail. A seasonal inspection takes less than an hour and prevents the kind of gradual failure that requires a full rebuild.
Seasonal maintenance checklist:
- Fall: Clear leaf litter and organic debris from the channel before winter rains begin. Decomposing leaves accelerate sediment buildup and can mat over the fabric.
- After major storms: Walk the full length of the channel. Remove accumulated silt at the inlet and any flat sections. Reset displaced rocks and check that the outlet is clear and unobstructed.
- Spring: Inspect landscape staples along the banks and re-staple any sections where fabric has lifted. Top up rock in areas where it has thinned. Prune any vegetation that is growing into the channel floor.
- Annually: Test flow with a sustained hose run. If water ponds anywhere along the channel, the grade has shifted and needs correction.
Troubleshooting common failures:
- Ponding mid-channel: the gradient has flattened, either from settling or initial construction error. Deepen the affected section or add a check dam upstream to redirect flow.
- Rocks washing out at the inlet: the entry point is receiving more energy than the current stone size can handle. Add larger armor boulders or install a concrete or riprap inlet apron.
- Sediment buildup choking the channel: rake or vacuum accumulated fines and replace the top layer of bedding rock if the fabric is visibly clogged. In heavy-clay soils, this may be an annual task.
- Repeated bank erosion or blowouts: the channel is undersized for the contributing area, the slope is too steep without energy dissipation, or the outlet is backing up. Add check dams on sections steeper than 4–5%, widen the channel, or call a drainage contractor to reassess the design. Maintenance guidance from drainage specialists also recommends anchor stones and seasonal inspections as the first line of defense against channel failure.
What does a dry creek bed cost and how long does it take?
Cost and timeline depend heavily on channel length, rock size, site access, and whether the project requires permits or engineered plans. Here are realistic ranges to help you decide whether to DIY or hire a crew.
DIY (materials only):
- Small project (20–40 linear feet, simple outlet): roughly $200–$600 in materials depending on rock type, fabric quality, and whether you need a catch basin or perforated pipe
- Mid-size project (40–80 linear feet, rain garden outlet): $600–$1,500 in materials; add rental costs for a plate compactor and possibly a mini-excavator if the soil is hard clay
- Timeline: 1–3 days for a small project with two people; add a day for a rain garden termination
Professional installation:
- Small residential project: $1,500–$4,000 installed, depending on rock sourcing, haul distance, and outlet complexity
- Mid-size project with engineered outlet or permit: $4,000–$10,000 or more; large boulders, long material hauls, and permit/plan review add significant cost
- Timeline: 2–5 days for a contractor crew on a standard residential project; add 2–6 weeks for permit review if required
Factors that raise cost and time:
- Large decorative boulders (often $150–$400 each, plus delivery and placement equipment)
- Long haul distance from material supplier to site
- Steep slopes requiring check dams or engineered grade breaks
- Permit and plan review time, which varies widely by municipality
- Limited site access that prevents equipment from reaching the work area
When should you hire a landscaper or drainage contractor?
Hire a professional when the job touches your foundation, crosses near a property line, involves a large contributing area, conflicts with buried utilities, or requires permits and engineered plans. These aren’t situations where a well-intentioned DIY attempt just looks rough — they’re situations where a mistake can cause structural damage, legal liability, or a failed inspection.
Hire a pro when:
- Water is reaching or threatening your foundation.
- The contributing drainage area exceeds roughly 0.5 acres.
- The outlet requires connection to municipal infrastructure.
- The site has steep slopes (greater than 5%) without natural grade breaks.
- Permits or a formal drainage plan are required by your municipality.
- Buried utilities are present and the excavation depth exceeds 12 inches.
- You’ve had a previous drainage install fail or need to diagnose why an existing system isn’t working.
What to ask a contractor before hiring:
- Are you licensed and insured for drainage and grading work in Arkansas?
- Can you provide references and before/after photos from similar projects?
- What is the estimated excavation volume and how will spoil be removed?
- How will the outlet be protected and terminated?
- Does this project require a permit, and will you handle the application or does the homeowner?
- What warranty do you offer on material placement and grading?
- Do you offer a follow-up inspection after the first storm season?
Our yard drainage contractors in Arkansas page connects you with local professionals who handle the full scope — from site assessment through permit assistance and installation.
Villageprecisionpros handles the drainage work you shouldn’t DIY
When the drainage problem is straightforward, this guide gives you everything you need to build it yourself. When it involves your foundation, a large catchment area, steep slopes, or a permit, the risk of getting it wrong outweighs the cost of hiring a crew that does this work every week.
Villageprecisionpros designs and installs dry creek beds, rain garden terminations, and complete surface drainage systems for Central Arkansas homeowners. Every project starts with a site assessment — we map the flow path, measure the contributing area, confirm outlet legality, and handle permit coordination when it’s needed. You bring the photos, rough dimensions, and a high-water photo if you have one. We bring the grading plan, the material sourcing, and the crew.

Ready to stop watching water go where it shouldn’t? Schedule a landscaping consultation and we’ll walk the site with you, or explore our full drainage and irrigation services to see what a professional install includes.
Sources
- Do I Need a Permit? — Drainage permits overview
- USACE Regulatory Guidance Letter on drainage ditches and exemptions (RGL 07-02)
- Build a Dry Creek Bed — The Spruce
- How to build a dry creek bed — Lowe’s
- How a Dry Creek Bed Works—and Why It Solves Water Problems Better Than You Think – TLC Incorporated
- How Do Dry Creek Beds Improve Drainage In Arkansas Landscapes? – Cultivating Flora
FAQ
Do dry creek beds actually help with drainage?
Yes, when correctly graded and terminated. A dry creek bed reliably moves concentrated surface runoff when it has a downhill slope of at least 0.5% and a stable outlet on the property — it won’t address subsurface groundwater or standing water in flat areas.
What should you put under a dry creek bed?
Lay commercial-grade non-woven geotextile landscape fabric directly over a compacted base, with a 2–3 inch layer of bedding gravel beneath the fabric in clay soils. Add perforated pipe under the rock layer only when you need extra conveyance capacity beyond what infiltration provides.
Do you need a permit to build a dry creek bed?
It depends on your municipality. Small, self-contained drains entirely on private property are often exempt, but permits are required when the system connects to municipal storm sewer or when excavation exceeds local grading thresholds. Always ask your building department and get the answer in writing.
How do you build a dry creek bed for drainage?
Call 811 before digging.
What is the difference between a dry creek bed and a French drain?
A dry creek bed is a surface channel that moves visible runoff above grade; a French drain is a buried perforated pipe system that intercepts subsurface water. Use a dry creek bed for slope-based surface erosion and concentrated runoff; use a French drain for flat-yard standing water, foundation seepage, or groundwater control.

